Potatoes are an integral part of the diet of most people in our country. It is not for nothing that people call this vegetable “second bread”. Gardeners who grow potatoes usually do this in large quantities, with a reserve until the next harvest. Therefore, the issue of storing potatoes is always relevant.
A garage can be adapted for these needs, but in order for the vegetable to retain its freshness and excellent taste longer, the room must be properly prepared. We'll tell you how to store potatoes in a cold and warm garage in this article.
Preparing potatoes for storage
In order for potatoes to retain their fresh and appetizing appearance until spring, it is important to properly prepare them for wintering:
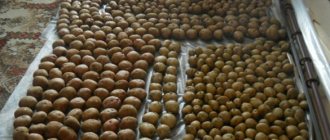
- Dry the tubers outdoors or in a well-ventilated area if it rains on the day of harvest. In this case, you should avoid exposing the vegetable to direct sunlight.
- Sort through the crop, remove all “substandard” - damaged specimens.
- Sort potatoes by size and purpose (seed material, potatoes for food).
Ideal tubers set aside for storage should be clean and dry, with intact, tight skins. If there are shoots, they need to be removed. If there is damage: cuts, wormholes, rot or mold, green areas, then such specimens are disposed of.
Even if at first glance the wound on the tuber is very small, over time it can cause infection of all the potatoes stored nearby.
Reference. The keeping quality of the root crop also depends on the variety. Early and mid-season varieties are stored for no more than 3-6 months. For long-term storage of potatoes in the garage in winter, it is better to choose late varieties.
Rules for storing potatoes in a box
To prevent the crop from spoiling, you must follow some rules when planting and storing tubers:
- Before placing vegetables in a box, they are carefully inspected and any that are rotten or too soft are removed. If there are flies in them, remove both the potatoes affected by insects and those that came into contact with them.
- It is not recommended to wash the tubers - they will begin to deteriorate earlier. You should carefully clean them of dirt, after drying them slightly.
- During the entire storage period, you need to sort through the vegetables, promptly removing those that have begun to rot.
A special box is practically the only way to store a large volume of potatoes in a city apartment. You don’t have to buy it; you can make it yourself using available materials.
Storage in a garage without a cellar and with a cellar
The main problem with crop storage is rot. Spoiled vegetables are not only unsuitable for consumption, but are also dangerous because they infect all stored products with infection, reducing the gardener’s efforts to zero.
The main causes of potato rotting:
Humid air is a favorable environment for the development of pathogenic fungus and mold. To avoid this, you should maintain air humidity no higher than 75-80% and sprinkle the bottom of the storage container or the floor of the room with drainage material - for example, crushed stone or pebbles.
If the temperature is too low, the crop will freeze, the starch will be converted to sugar, and the vegetable will acquire a characteristic sweet taste. If the temperature is higher than the recommended +2°C...+4°C, the potatoes will sprout and take root, which will significantly worsen their taste and keeping quality.
Important! Light is contraindicated for potato fruits, because under its influence, solanine is formed in tubers - a substance harmful to the human body.
What is the difference
Garages with a cellar are more preferable because... Fully recessed storage facilities are optimal for storing crops. This is due to the constant temperature in the cellar, practically independent of weather fluctuations and changing seasons.
In addition, direct sunlight does not enter the cellar, therefore, poisonous solanine is not produced in the tubers. On the other hand, in the absence of a ventilation system in the cellar, air humidity is often increased.
Not every garage is equipped with a basement, but if space allows, storing potatoes in a garage without a cellar is also possible. But you should think in advance about the possibility of regulating the temperature in the room in order to prevent the tubers from freezing in the garage in winter.
Types of potatoes for storage
High humidity, cold and heat are the main reasons why root crops can rot.
Experts say that almost all varieties of potatoes can be stored, but the timing will be different for everyone:
- Early and mid-season varieties (Housewife, Aurora, Pirol) cannot be stored for too long; their shelf life is from three to six months;
- Late as well as mid-late varieties (Slavyanka, Kolobok, Atlant, Chaika, Zdabytak, Scarlet) can last until spring.
Attention: Before sending potatoes to the garage cellar for storage, you need to prepare all the tubers for storage.
To do this you need:
- First, do not forget to dry the potatoes in the fresh air, and then place them in the sun for several hours. Ultraviolet rays will destroy all pathogens and promote long-term storage;
- The entire harvest must be sorted most carefully. In this case, damaged tubers should be removed and sorted by size. Medium-sized root vegetables can be stored.
A variety of species provides an increased percentage of crop storage.
The following are considered optimal conditions:
- Maintaining the temperature in the room where the tubers will be stored is from plus two to plus four. In this case, the potatoes will not take root and freeze;
- Air humidity should not be more than seventy to eighty-five percent. Increased humidity will lead to the growth of fungi (see Fungus has appeared in the garage. How to get rid of fungus), as well as the formation of mold. To do this, the bottom of the cellar must be covered with crushed stone or pebbles;
- Lack of light (in the light, solanine begins to be produced in potato tubers, after which they can no longer be eaten).
Attention: If these parameters are not followed, it will cause spoilage and sprouting. If the room temperature is more than seven degrees, the potatoes will begin to germinate. When it drops to zero, the starch in the tubers will turn into sugar. At sub-zero levels, freezing and unsuitability occur.
How to prepare a garage for storage
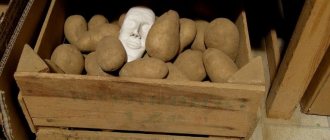
Before sending potatoes for storage, you need to treat the room. In addition to the usual cleaning of litter and dirt, it involves the use of lime whitewash:
- 150 g table salt;
- 2 kg of slaked lime;
- 1 kg of copper sulfate;
- 10 liters of water.
A pre-prepared mixture is used to whiten the walls of the cellar or the area inside the garage reserved for harvest storage.
Reference. Whitewashing will prevent the possible spread of mold.
The second important point is the ventilation system. It needs to be cleaned and the operation of the exhaust system checked. Before directly planting potatoes, the room must be thoroughly ventilated.
Arranging a basement in a garage
Not everyone knows how to properly store potatoes in the basement or garage. In order for it to be suitable for storing vegetables, it must be properly equipped:
- If the soil moisture is low, the walls can be built of brick, but for high humidity, concrete walls with waterproofing are more suitable.
- Ideally, the floor should consist of three layers: crushed stone, bitumen and concrete mixture. This will provide the necessary drainage and air capacity.
- For disinfection purposes, the walls are covered with lime.
- To prevent condensation from settling on the ceiling, the upper plane should be tilted towards the hood.
- Because Bright light has a detrimental effect on the keeping quality of potatoes; it is better to give preference to low-voltage lighting.
When equipping a cellar in a garage, you need to know where the groundwater passes - to avoid moisture seepage, the bottom of the storage facility is located no closer than 2 m from them.
Arranging a garage without a basement
If the garage does not have a basement, this is not a reason to be upset. By properly organizing the space for storing crops, you can use almost any free space for these purposes:
- The garage should provide the possibility of thermoregulation, because... severe frosts or, on the contrary, elevated air temperatures can ruin the harvest. For this purpose, thermometers and heaters are installed.
- The tubers are covered with breathable material (straw, burlap, etc.). On the one hand, this will protect vegetables from light, on the other hand, it will serve as additional heat and moisture insulation.
- If possible, potato trays should be raised above floor level. As a last resort, make a thick base of straw, newspaper, earth and heat-insulating material.
Like the cellar, the garage must be cleaned, ventilated and dried before use, and then treated with a disinfectant.
How to design a vegetable pit in the garage with your own hands
To build a vegetable pit correctly, you will have to understand the main stages of construction.
We build a hole
The cellar begins to be created by digging a pit in which a basement will be built for storing vegetables and preserves. After this, the floor is arranged. To make the floor covering reliable, it is made of several layers. First, the bottom is covered with a small layer of crushed stone, which is compacted with a vibrating plate. Then the compacted crushed stone is covered with construction sand and filled with concrete.
When the flooring has hardened, the walls are finished. A solid brick that is resistant to high humidity is suitable for this. The walls are laid out in such a way that the seams of each subsequent row of bricks do not coincide with the previous one.
After creating the walls, a reliable ceiling is created that can withstand any load. When making a ceiling, boards are laid at the top of the pit, on which reinforcement is laid and concrete is poured. Having finished with the ceiling, you can make a staircase, which is installed near the entrance inside.
Drainage
Before using the vegetable pit, dry the room so that the walls, ceiling and floor are completely dry. There are several methods that help dry out the cellar:
- Place a metal bucket in the center of the basement, fill it with firewood and build a fire. When using this method, you will have to maintain the fire for an hour and a half.
- Place a metal pipe outside and place a burning candle underneath it, which will provide natural draft.
Waterproofing
Sometimes vegetable pits are made in areas with high groundwater levels, which increase humidity. In this case, you need to install waterproofing inside the basement, which will help keep the humidity level within normal limits.
Experienced builders advise taking care of waterproofing at the stage of creating walls and floors. To protect against high humidity, special waterproofing compounds , which close all cavities in the concrete.
Choice of insulation
To maintain the optimal temperature inside the cellar, additional thermal insulation will be needed. The selected thermal insulation material must have the following properties:
- environmental friendliness;
- chemical safety;
- reliability;
- protection from moisture.
To insulate storage for vegetables, use polystyrene foam or polystyrene foam.
Ventilation opening design
Any cellar must have ventilation, since it is responsible for the circulation of oxygen inside. When organizing a ventilation system, they install supply and exhaust pipes. The supply air is located near the floor, and the exhaust is led out through the roof.
How and in what to store
The container for storing potatoes plays no less significant role than the room. It is better if these are solid wooden boxes, allowing air to circulate freely between the rows of tubers.
In unheated garages and on balconies, thermal boxes with a layer of thermal insulation are an excellent option for storing vegetables.
Finally, you can store potatoes the old-fashioned way - in piles, as well as in bags and nets.
Preparing a container for storage in the garage
All storage equipment (pallets, boxes, bags and nets) are pre-dried and disinfected.
There are several ways to do this:
- treatment with a solution of potassium permanganate (potassium permanganate);
- “roasting” in the sun;
- treatment with a mixture of lime and copper sulfate (100 g per 10 l).
If straw is used as a covering material or substrate for potatoes, it must also be disinfected. For example, douse it with steam or boiling water and then dry it.
Storage features depending on the type of balcony
The presence or absence of glazing and heating, the climate of the region - all this affects the temperature on the balcony. And you need to select the type of box taking these factors into account.
Provided that the temperature on the balcony stays around 0–6 °C all winter, occasionally rising or falling slightly, it is permissible to use a simple chest without additional insulation. Before expected frosts, it is enough to throw a rag over it to protect the supplies from freezing.
We suggest you familiarize yourself with How to install a kitchen sink in a countertop and secure it with your own hands
If the balcony is glazed, but not heated, and there are regular frosts in the region, you will need a container with insulation without heating. In places with a harsh climate, you will have to make an insulated chest with heating.
Alternative storage methods
In addition to the garage, you can use a garden plot, balcony or loggia in a city apartment to store potatoes.
Our grandparents used special pits to preserve the harvest. You can arrange it now on your personal plot. For this:
- dig a hole at least 1.5 m deep;
- the bottom and walls are lined with wooden boards, straw is laid on top;
- cover the tubers with a layer of about 1 m (50 cm should remain to the edge);
- The potatoes are covered with straw, boards, and then covered with earth.
If it is inconvenient to go to the dacha for the next portion of potatoes, you can store them right on your balcony. A thermal box, either purchased or homemade, is ideal for this purpose. If the box is made independently, it is insulated with polystyrene foam, cardboard, rags or sawdust, and unnecessary warm clothes are placed on top of the vegetables. They must be clean and made from natural materials so that the tubers can breathe.
On an insulated loggia, it is enough to install suitable-sized boxes made of wood or plastic and periodically sort through the potatoes for rotten specimens to remove sprouts.
At what sub-zero temperature can potatoes be stored? Plastic boxes
We assemble compact and lightweight collapsible plastic boxes using grooves into which we insert the side walls onto special rails. In the spring we will dismantle this structure.
Boxes made of dense polyethylene are very popular for storing potatoes on the balcony
Often potatoes on balconies are stored in chests made of carefully fitted boards, lined inside with extruded foam more than 2 cm thick: 1 cm of foam per 10 cm of concrete wall.
We insulate the bottom and lid in the same way as the walls - according to the principle of a thermos. Potatoes can be stored in bulk and checked once a week for their integrity and mixed at the same time.
Please note: a wooden cellar on the balcony will be constantly exposed to temperature changes. To protect the box from rotting, use a special impregnation.
For those who want to know how to store potatoes on the balcony in winter - useful
As you can see, putting together a mini-pantry from boards is not at all difficult, just like buying a ready-made cellar in a store, but under one condition - if it is possible to install a vegetable storage on a glazed balcony. A large wooden box can also be useful in the summer - for folding winter clothes and shoes, which take up a lot of space in closets.
The cellar is a very good place to store root vegetables, as it is cool and dark. But you need to monitor the temperature: if it gets a little cold in the cellar, the potatoes need to be covered with straw or warm clothing, for example, a quilted jacket.
How to grow potatoes from seeds is described here in the article.
You need to think about ventilating the cellar and having good ventilation in this place. Otherwise, the potatoes will begin to rot. Before placing potatoes in the cellar, you need to dry the cellar and clear it of debris. And the walls need to be treated against fungus and parasites. It is advisable to whitewash the boxes with lime. You can also buy special preparations in stores that will absorb water from the environment.
How to properly equip a cellar in a country house? Usually the main problem in our climate is to protect the cellar from freezing. Therefore, listen to our advice.
- You can make a cellar above the cellar - this is a booth that will protect the cellar from the environment in very severe frosts.
- The cellar should be closed so as not to allow air to pass through - it can be insulated on top with polystyrene foam.
- The ceilings in the cellar can also be insulated with some kind of thermal insulation material.
- In different corners of the cellar you can hang light bulbs that are painted in a dark color - they can be turned on in very severe frosts for additional heating of the cellar.
Naturally, simply scattering potatoes on the floor of the balcony or putting them in a corner in a fabric bag is a bad idea. In order for this vegetable to be stored for as long as possible and retain its rich taste and beneficial properties, you will have to take care of the equipment of the boxes to place it.
You can do this in several ways:
- Make a box out of wood (boards, clapboards, slats, etc.). In this case, the presence of gaps between the boards will act as ventilation, but this is only suitable for carefully insulated and waterproofed balconies;
- Make a box out of wood without gaps and insulate it.
Any foam insulation and a layer of cardboard on top of it, glued from the inside of the box, will create conditions quite comfortable for root vegetables; Thermal box made by a professional - Process and insulate ready-made wooden or plastic vegetable boxes, which are easy to find in markets or large chain stores - they are often thrown away, so they will definitely give you a couple of boxes;
- Buy plastic boxes or a chest of drawers for storing things and toys, and then lay soft warm fabric or insulation inside it;
- Use an old refrigerator, chest of drawers, drawer table or chair with storage space under the seat for storage;
Box from an old refrigerator - Create boxes with an automatic heating and temperature control system. This option is only possible if you have the necessary skills and funds, since the costs of such equipment can significantly exceed the cost of the potatoes themselves over several seasons;
- Purchase special backpack-type bags designed for storing vegetables on the balcony and hang them on the insulated walls of the room.
Tips and tricks
Experienced summer residents share useful information on online forums - we’ll share with you some nuances:
- Elevated temperatures are no less harmful when storing potatoes than frosts. Heat coupled with dry air causes dried out and flabby vegetables.
- Storing different vegetables in one tray is not the best idea. But the proximity of beets and potatoes will bring a positive result, because... the beets will absorb excess moisture, improving the keeping quality of potato tubers.
Can potatoes be stored in the refrigerator?
The rules for storing peeled potatoes are different: the potato peel has protective properties and when separated from the fruit, the shelf life of the potato is significantly reduced. Can potatoes be stored in the refrigerator? Yes, peeled root vegetables must be stored in the refrigerator or other cold place at temperatures up to 2-4 degrees. The storage container must be airtight and tightly closed, and the peeled potatoes must be dried. In such conditions, the fruits will be stored for a couple of hours, after which oxidative processes will begin and the potatoes will darken.
How to store peeled potatoes?
In order to extend the life of peeled potatoes, it is recommended to store the vegetable completely immersed in cold fresh water in a closed container. Thanks to immersion in liquid, dark spots will begin to appear within a day. How to store peeled potatoes, since they are already a semi-finished food product and are not suitable for long-term storage? After 3-4 hours of soaking in water, the potatoes will begin to lose water-soluble vitamins, which will affect not only the usefulness of the product, but also the taste.
The best way is to store peeled potatoes in airtight boxes or plastic bags in the freezer. This option will provide longer storage.
Attention! During long-term storage, the taste may change
Advantages and disadvantages of a garage
- suitable temperature;
- lack of direct sunlight;
- humidity (if the air is dry, as is often the case at home, the tubers will lose moisture and, accordingly, their taste).
If storage standards are not observed, the advantages can easily turn into disadvantages:
- as the temperature rises, the tubers will begin to germinate;
- when it falls below normal, they will freeze and become sweet;
- If there is too much moisture, the potatoes will rot.
Choosing a storage place
There are several proven options for storing potatoes on a balcony during the winter months, but not all of them allow you to preserve vegetables during frosts. These are the following methods:
- use a box with sawdust;
- cover the bags of potatoes with an old blanket;
- put in plastic containers;
- make an insulated box from wood;
- use a heating cabinet or a ready-made thermal container;
- use an old refrigerator;
- make a container with ventilation;
- make a chamber with heating.
When choosing a storage location, you should consider 2 rules:
- the potato box should not interfere with the free movement of residents on the balcony;
- It is better to place it away from the cold external wall.
To minimize potato losses over the winter, it is recommended to use the advice of experienced gardeners:
- vegetables for winter storage are collected only in dry weather; for better preservation they should be pre-dried, preferably in the open air;
- Before storing, potatoes should be sorted and sorted by quality, separating damaged and diseased tubers from healthy ones, and store them separately;
- before the start of the season, boxes and storage containers should be disinfected with a mixture of soap, soda and hot water, after drying - treated with copper sulfate (proportions - 100 g per 1 bucket of water) and lime;
- To reduce the likelihood of rotting, it is recommended to sprinkle the tubers with chopped garlic or layer them with rowan leaves.
Storage in a garage without a cellar and with a cellar: what is the difference?
Fully recessed storage facilities are optimal for storing crops. After all, the temperature in the garage cellar is more constant throughout the year.
- No costs for the construction of additional structures.
- There is no direct sunlight, which means that the tubers will not produce solanine, a toxic substance chemically equal to steroids.
There are also disadvantages:
- Before placing potatoes in the cellar, they must be carefully sorted and dried.
- If your cellar is not equipped with a temperature sensor, then it will be impossible to adjust the temperature.
Where and how can you store potatoes at home?
Everyone chooses where and how to store potatoes based on their capabilities.
In the cellar
Cellar storage is, of course, the best way. The conditions created in such a room are optimal for potatoes. There is no natural light or elevated temperatures in the cellar.
Before stacking, the potatoes are checked to ensure that all conditions are met. If necessary, the room is insulated and treated against rodents, after which the container is transferred to the storage location.
Important! It is not recommended to store potatoes in bags - they begin to rot and sprout.
If all conditions in the cellar are met, the tubers will remain in good condition for up to ten months.
In the basement
Potatoes are stored in the basement:
- bulk method;
- in boxes;
- on shelves.
When using the bulk method, the height of the embankment should not exceed a meter. Do not pour potatoes onto the bare floor. Often, bins are built in basements - large wooden boxes. They must provide gaps between the crossbars for ventilation.
Many summer residents practice storing potatoes on racks. The tubers are laid out on the shelf in one layer. This makes it easier to keep track of them and discard spoiled ones.
On the balcony
To store potatoes on the balcony use:
- wooden boxes;
- thermal container;
- old refrigerator.
Important! The storage area must be insulated to reduce the risk of tubers freezing at low temperatures. To do this, the walls, bottom and lid of the box are insulated with sawdust, wood shavings or polystyrene foam.
When sub-zero temperatures occur, wrap the container using old clothes or a blanket, old fur coats or canvas bags.
Important! Sunlight should not penetrate inside the container. It provokes the release of solanine.
To regulate humidity, place in the box:
- onion peel;
- beets;
- elderberry sprig;
- bag of mint.
Under such conditions, the container will maintain a temperature of up to +7°C.
In the corridor
Storing potatoes in the hallway is not the best solution, but sometimes it is the only possible one. In such conditions it is difficult to achieve the desired temperature and humidity. As a rule, the corridor is used as temporary storage. The container should be ventilated; a bottle or jar of water should be placed nearby to raise humidity. Sometimes the box is placed in a vestibule or entrance. In this case, the container will be equipped with a lock against uninvited guests.
When storing potatoes in the corridor, sudden temperature changes occur due to drafts, which negatively affects the condition of the vegetables.
Alternative methods
If you don’t have a garage or the ability to place potatoes in it, take note of other options for long-term storage of vegetables.
On the balcony
To do this, you can build a storage box yourself. It is insulated with polystyrene foam and foil for better thermal insulation. The bottom of the container is raised from the floor, thereby creating an air cushion and avoiding hypothermia.
If the loggia is not insulated, for more efficient harvest storage it is better to use a chamber with additional heating. It is easy to assemble from two boxes, one of which is smaller than the other and fits inside it. The air cushion between them is sealed with polystyrene foam or construction foam, and the pallet with polystyrene foam, sawdust, rags, and cardboard. Such a box is heated using electric light bulbs - the light in the container is turned on for 4-5 hours a day.
In the apartment
Here storage should be organized in the coolest places - near the balcony door or windows. The tubers are placed in bags made of coarse fabric that allows air to pass through well. Straw or beets are placed on top so that they absorb excess moisture and the potatoes do not rot.
If there are no cool places, then a closet or hallway will do. The tuber cannot be stored in a warm place for a long time, so it is placed in a plastic container with holes for ventilation. Place a damp cloth inside so that the vegetable does not dry out and become limp. Only small volumes of potatoes can be stored this way.
With high yields, storage in a pit is an option. An area with loose soil is selected, the bottom is covered with straw, tubers are poured on top, covered with straw, boards and earth. There should be about half a meter left to the edge of the pit, which is necessary to add soil when the temperature drops.
It’s easy to organize storage of potatoes in the garage in winter, and if you follow all the rules, then within 8-10 months the vegetables will be in perfect condition. A properly organized cellar in your garage will maintain a favorable temperature all year round, not only for potatoes, but also for preservation.
If you find an error, please select a piece of text and press Ctrl+Enter.
Nowadays, few people are engaged in preparations for the winter, especially in large cities. At least in my circle of office workers. Indeed, the economic benefits are not so obvious. The wholesale price of potatoes in season on the wholesale market is 10-12 rubles/kg. Retail price in a store near the house is 20 rubles/kg. Over the course of the year, the price rises to approximately 40-50 rubles/kg. It would seem that an increase in price from 10 to 50 rubles/kg gives a profit five times! However, firstly, the price increases gradually throughout the year and as a result, the savings are three to four times. Secondly, in absolute terms, the savings are also not impressive. For example, if we buy 300 kilograms of potatoes for 10 rubles, and not 40 in the supermarket, then we will spend 3,000 rubles, and not 12,000. The savings come out to 9,000 rubles - not bad! You can buy an MTPL policy and a full tank of gasoline, for example. But this savings is evenly spread in a thin layer throughout the year and is almost impossible to collect. Thirdly, my generation does not have cellars. Simply because they don't need them. And the new houses do not have cellars, as was the case in Soviet five-story buildings. And even those who have them in their house or garage are stopped by laziness from going into a dirty basement somewhere, getting dirty, breathing dust, etc. In addition, potatoes have a significant drawback - they need to be peeled. )) In this regard, it is much inferior to the same pasta and cereals. For that reason, no pasta can dream of the wide range of uses for potatoes - mashed potatoes, frying in a frying pan, soups, casseroles, potato pancakes, potato zrazy, homemade chips and generally what your imagination can handle. In general, the majority of our fellow citizens prefer not to prepare food, but to buy food in supermarkets. I understand them perfectly, I’m like that myself.
However, I decided to try to stock up on potatoes for the winter. For now as an experiment. Although in some places the idea may seem dubious, there are several reasons for this: Firstly, the economy is going through hard times, prices are rising and the money saved will not become redundant, even if evenly spread out. Secondly, at least a feeling of some kind of food security is created. Loss of a job, unexpected expenses, force majeure - in any case, a bag of potatoes and a couple of jars of pickles will allow a family of four to eat more or less normally.
How to make a box for storing potatoes on the balcony in winter
During the heating season, the air in living quarters is very dry and warm, so you can’t keep potatoes in your apartment - they will begin to sprout or dry out.
As a rule, it is stored on the balcony. It is not always possible to keep it in standard vegetable boxes, only if the optimal temperature for tubers (0–6 ° C) and humidity (40–85%) are always maintained there. At what temperature do vegetables begin to spoil?
- Already at – 1–2 °C they freeze.
- A short-term increase to 10 °C will not harm, but prolonged warming can provoke germination or drying of tubers.
In addition, vegetables should not be exposed to light - neither artificial nor solar. If this condition is not met, the tubers will begin to accumulate solanine, which makes the potatoes unfit for consumption. The presence of this substance is indicated by green spots on the peel.
Storage boxes come in several types. They can vary in type: insulated, non-insulated, heated.
By type of loading they are divided into:
- vertical, when the lid is located on top;
- horizontal, in which the doors are located on the facade or side.
Sizes and shapes can be any. They depend on the area of the balcony, the availability of free space and the volume of crops that need to be preserved. So, on small and cramped balconies, tall narrow boxes are made. On standard ones, they most often make a chest the entire width of the room. Its side surfaces will rest against the walls, and the lid can be used as a shelf or a place to sit in the warm season.
The box is a frame made of timber with a cross-section of 4*4 cm or more, covered with boards, clapboard, chipboard, OSB. Sheet material is taken at least 5 mm.
In addition to wood you will need:
- self-tapping screws;
- screwdriver;
- wood drill;
- mounting angles;
- jigsaw;
- roulette;
- level;
- furniture hinges;
- marker for marking.
Work begins with determining the optimal size of the box. Calculate the parameters of the future product. If necessary, draw a diagram. From the timber, 4 parts are cut into sizes of height (to avoid confusion during installation, they can be marked - a), width (b) and length (c).
The frame is assembled from them:
- Place 2 blocks c and b on the floor so that they form a rectangle.
- They are connected using fastening angles and self-tapping screws. You can do without the corners, but with them the structure will be stronger.
- The bars a are placed vertically on the corners of the resulting frame. Check their evenness using a level and level them if necessary. Screw it onto the corners with self-tapping screws.
- Connect the ends of the racks with the remaining bars b and c.
The frame is ready.
If sheet material is used for cladding, proceed to cutting out the parts. On a sheet of plywood or chipboard, using a ruler, mark 2 rectangles with dimensions a*b, 2 – b*c, another 2 – a*c. Cut them out with a jigsaw.
Part b*c is applied to the bottom of the frame and screwed with self-tapping screws. Rectangles a*c are fixed to the side walls. The front and back sides are sheathed with parts a*b. The remaining element b*c is the cover. It is screwed using hinges to the back of the frame. Using a drill, ventilation holes are made at the bottom of the box.
If desired, the box can be painted or varnished. So that it also serves as a seating area, the lid is covered with furniture fabric, leather or leatherette. In this case, the material for the lid is thicker so that it does not break under the weight. Cut out a piece of furniture fabric, the sides of which are 15–20 cm larger than the wooden base.
Another option is covering the frame with clapboard or boards. Start from the bottom, placing the strips at a distance of several mm from each other. Fresh air will flow through these cracks to the vegetables, and there will be no need to drill additional holes. Then the side walls are sheathed.
We suggest you familiarize yourself with Do-it-yourself decalcification of a coffee machine
For the lid, a frame is made from slats that matches the size of the bottom, strips are attached to it, and then fixed to the frame with hinges.
If the design of the box is high and narrow, then removing potatoes from the bottom will be inconvenient. To solve this problem, partially collapsible boxes are made.
For this:
- The facade is sheathed with clapboard from the bottom to approximately the middle, attaching the strips with self-tapping screws to the frame.
- Measure the height of the unsheathed area, add 5 cm. Cut 2 parts of the required length from a metal corner.
- They are applied to the frame so that one side of the corner is in contact with the side of the box. The second side will be located at a short distance from the frame beam of the unupholstered side. The lower part of the corner should extend approximately 50 mm onto the lining. Fix the corner with self-tapping screws. The second part is secured in the same way on the other side.
- As a result, you get 2 guides into which it is easy to insert the lining to completely cover the facade of the box. When necessary, the slats will be removed to effortlessly remove the remaining potatoes from the box.
It is undesirable for the potatoes to be located close to the concrete floor - they can cause cold temperatures in cold weather. On a balcony that is not insulated or glazed, it is recommended to install the box on legs or place a sheet of foam plastic or an old rag on the bottom. The legs can be easily made from the remnants of timber by cutting it into 10-centimeter pieces and attaching them to the bottom with self-tapping screws.
Chest with insulation
The simplest and most cost-effective solution is to make a structure from 2 boxes (drawers) of different sizes. They should be placed one inside the other so that the distance between the walls is 5 cm or more.
A layer of sawdust is poured onto the bottom of the first box or polystyrene foam is placed. Place a smaller box in it. The space between the walls is filled with sawdust. This backfill will protect the tubers from short-term frosts. For places where negative temperatures last for a long time, such a solution will not work.
A more reliable design is made on the basis of a frame box, but it is sheathed not only from the outside, but also from the inside. The cells formed between 2 layers of sheathing are filled with heat-insulating material.
How to insulate a box:
- polystyrene foam;
- penoplex;
- sawdust;
- foil isolon.
Warming procedure:
- The frame of the box is assembled and sheathed on the outside.
- They put insulation on the bottom, cover it with inner lining on top, and fix it with self-tapping screws. Elements of the internal cladding are cut from the same material as for the external cladding, but their dimensions must be reduced by the thickness of the timber. For example, for a box made of 5*5 cm timber, 80 cm long and 1 m wide, you will need a part measuring 90*70 cm.
- The side, front and rear walls are insulated in the same way.
- Isolon is attached to the inner surface of the lid using a stapler.
Heated
The simplest heating system can be made from an incandescent lamp. The heat it generates is enough to maintain a positive temperature in a medium-sized box. If the stall is large, or the weather conditions in the region are harsh, 2 lamps will be required.
Before installation, they need to be painted black to dim the light. The lampshade is fixed to the lid of the insulated box, a hole is made in it and the power cable is brought out. To reduce the risk of fire, it is advisable to nail a sheet of metal onto the lid around the lamp, and place the lamp itself in a piece of metal pipe.
We invite you to familiarize yourself with the smell of formaldehyde from furniture
Heating should not be on all the time. It is turned on when the temperature on the balcony drops below zero. To make it easier to control the temperature in the chest, you can install a thermometer inside it.
Sealed box
An airtight box is used on balconies where the temperature is just below 0 °C. However, in order to protect potatoes from spoilage, they must be periodically opened for ventilation.
A sealed chest is made in the same way as a regular non-insulated one, but all internal surfaces are lined with isolon. The joints are taped with foil tape.
To ensure that the lid fits tightly to the box, a rubber seal is glued to its inner side around the perimeter (at the point of contact with the frame).
How to make a container with your own hands?
The first step is to calculate the size of the future box, based on the number of potatoes and the place where they will be located subsequently. You can make a container from a variety of materials: plywood, timber, chipboard, plastic, and even from an old refrigerator or furniture.
Without heating
Materials:
block 5*5 cm for the frame;- plywood, fiberboard, OSB or chipboard for cladding;
- thermal insulation material: polystyrene foam, penoplex.
- Assemble the frame from timber, then sheathe it on the inside and outside with sheet material.
- Lay thermal insulation between the inner and outer layers.
- Then you need to make a lid of a suitable size, either removable or folding.
- Penoplex is better as thermal insulation because it absorbs excess moisture, but such insulation is more expensive. You can choose any sheet material.
From the video you will learn how to make a potato storage box:
Heated
If the loggia is insulated, then the potatoes will not need additional heating, but on a cold loggia a heated box is needed . For heating, use a hairdryer, incandescent lamp or film heated floor. Power should not exceed 60 W.
When heating with lamps, a tin pipe is placed in the center of the box, inside which the heating elements are placed, and for a hair dryer, a plastic tube with holes is taken. The optimal temperature is maintained using a thermostat; it will automatically turn the heating on and off.
Materials:
- 5*5 cm block for the frame.
- Plywood, fiberboard, OSB, or chipboard for cladding. The thickness of the material is at least 5 cm.
- Thermal insulation material: foam plastic, penoplex.
- Plastic tubes 4-5 cm in diameter.
- Hair dryer.
- Electric contact relay.
- First, they assemble a frame from bars and fasten them with corners.
- Then the resulting structure is sheathed with sheet material using self-tapping screws and holes are made for plastic tubes with warm air.
- The insulation is attached to the walls of the container with glue on the entire surface from the inside.
- Holes are made in the air tubes and inserted into the previously made slots.
- Lastly, attach the hairdryer and insulate all electrical components.
Important! All electrical equipment must be protected as much as possible to prevent a short circuit!
Watch a video on how to make a heated thermobox for storing potatoes on a balcony in winter:
On our website you can also find information about storing peeled potatoes, raw or cooked, for the winter:
- How long can you store raw food in water in the refrigerator?
- Can raw, boiled or fried food be stored in the refrigerator?
- Useful tips: how to properly preserve vegetables?