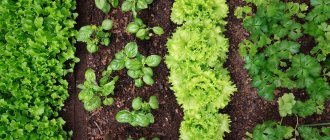
The benefits of aromatic herbs used in cooking have been known since ancient times. In the summer, they grow in large quantities in garden plots and are sold in supermarkets. How to preserve greens for the winter so that their beneficial properties and original taste are not lost? It can be frozen or dried in an electric dryer. There are more than 200 types of spices that people use for cooking and healing. The most popular herbs are: dill, parsley and cilantro, spinach and basil, fennel and celery, lemon balm and parsnip.
Preparing greens for drying
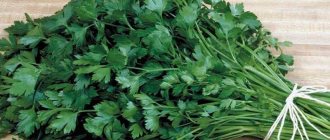
The easiest way to prepare for the winter is drying. The resulting seasoning is easy to store; it contains vitamins and beneficial microelements. Not every plant can be dried. Lettuce, garlic and chervil should be canned, frozen or left unprocessed. It is also recommended not to dry parsley, because it changes the smell to a very specific one. The grass is pickled or frozen in small portions.
Only fresh greens without signs of damage are selected for drying.
Before starting the drying process, the material must be prepared. Simple manipulations will help avoid rotting and mold in the workpieces.
- The grass should be washed and dried on a paper towel.
- Remove yellowed, rotten, woody leaves, as well as hard stems.
- Then cut into pieces 5 centimeters long. When dried they will shrink significantly.
- If the process occurs under natural conditions, then the stems cannot be touched. They are folded into a bundle and tied with a rope.
Purchased raw materials must be pre-processed. Soak in salted water for 15 minutes, at the rate of a large spoonful of salt per liter. Then the grass is thoroughly dried on a paper towel.
Spices must first be cut into small pieces
Method 3. Dry freezing greens
You can freeze absolutely any greens in food containers, cling film or foil in the freezer compartment of the refrigerator.
To do this, the greens must first be thoroughly sorted, washed, dried well and chopped (you can, by the way, leave them whole). Such greens are either placed in a container, or wrapped in film or foil and placed in plastic bags. And then they put/put it in the freezer. It is worth knowing that it is better to store such greens little by little with minimal air entering the bag.
Methods for drying greens
Before the development of the technical process, there was only one way of drying - in the open air. Modern technologies make it possible to speed up the process. An electric dryer, oven, or convection oven reduces the drying time to several hours. The preparation of greens for all units is the same.
In an electric dryer
The best device for wholesale winter preparations is the WOLTERA 1000 Lux electric dryer. The unit significantly reduces drying time. The process does not require effort on the part of the hostess.
- The greens are cut into pieces of 2 centimeters and laid out on the tray in a single layer.
- The unit is set to “grass” mode, or the temperature is 40-45 degrees.
- If 2 trays are used at once, they must be swapped periodically.
Drying time ranges from two to six hours. This depends on the power of the unit. You can check the time in the instructions supplied with the electric dryer.
You can prepare several types of greens at once in an electric dryer.
On open air
The natural drying method has two options. The first horizontal one will require parchment, and the second vertical one will require string or twine. Greens should not be left in direct sunlight; they are dried in the shade in a well-ventilated place. Cold, rainy weather is unfavorable for drying. The shorter the process, the more useful components are retained in the product.
Method 1. Air dry the greens
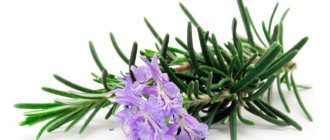
Using this natural air drying, you can harvest herbs such as rosemary, sage, thyme, as well as basil, dill and parsley.
To do this, you need not only herbs, parchment for laying them out and twine for tying them, but most importantly, warm and dry weather.
To air dry the greens, you must first sort them out and tie them into bundles with twine. The finished bundles should either be hung under a canopy or placed on a sieve, covered with gauze. Bundles laid out on a plane should be turned over regularly to prevent them from rotting. Depending on the weather and the condition of the greenery, the process takes from 6 hours to several days.
It is worth knowing that greens that are dried correctly will retain their original color and will not crumble in your hands. The faster the entire drying process takes place, the better the aroma and taste of the finished product.
How to properly dry greens in the oven
To properly dry the summer greens that the garden gives us, so that they retain their properties and aroma and are stored for a long time, you should follow these steps:
- prepare a cutting board, sieve and knife;
- steam the baking sheet and clean the oven;
- buy baking paper;
- collect the greens you want to dry into bunches.
In the oven at home for the winter you can dry dill, parsley, basil, dandelion leaves, beets and carrots, young nettles, and onion feathers.
How to properly dry greens for the winter in the oven, step-by-step instructions:
- Grow or buy ready-made greens.
- Place the greens one by one in a sieve and rinse them thoroughly.
- After washing, place the food on oilcloth, on a plate, on wooden boards for cutting vegetables, etc. The greens need to dry out.
- When all the water has drained, turn on your oven to heat to 30 degrees without placing the baking sheet in it, and in the meantime, start chopping the greens.
- Chop the greens to your taste (for later adding to various dishes, you should chop the food as finely as possible). If the leaves, dill and other greens taken are young, you can chop them together with the stem for drying, otherwise it is better not to take the stem for drying in the oven.
- Take a clean baking sheet and spread parchment paper on it.
- Spread the chopped greens in an even layer of one and a half to two centimeters, no more. Do not mix products while drying.
- Cover food to dry in the oven with a layer of parchment paper.
- Place the baking sheet on the middle level in an oven preheated to 30 degrees and close the oven door without closing it tightly.
- During the process of drying the greens, periodically, every 5-7 minutes, check the products and the oven itself. There should be no condensation on the oven walls. The greens must be stirred, preferably with a wooden object. If the oven is tightly closed during drying, the greens will simply lose their color and aroma, and they will fry. If you dry herbs in the oven for the winter, when drying, leave the oven door ajar by about three to four centimeters for electric stoves and 12-15 centimeters for gas stoves. The oven temperature for drying greens should be between 40 and 50 degrees. If condensation forms in the oven while drying the greens, this indicates that the temperature exceeds 50 degrees and must be reduced.
- After 100-120 minutes of drying (the greens should wilt during this time), increase the oven temperature to 60-70 degrees.
- Continue drying the greens for about two more hours, stirring every 10 minutes or so. At the same time, monitor the condition of the products so that they do not dry out.
- After four and a half hours (in total), the greens should be ready; all that remains is to cool them and place them from the baking sheet into jars prepared in advance, or mix all the products and place them in one storage container. It is important to cover the jars with lids so that the greens do not lose their aromatic properties and any insects do not crawl into them.
- You can store dried herbs in a kitchen cabinet or any other place at room temperature. It is best if the storage space is dark.
Features of harvesting greens for the winter
The basic rule is to use only high-quality plants. There is no point in purchasing and drying bunches of dill or parsley from the supermarket. Greens will not have a rich aroma and are poor in vitamins and chemical elements. In addition, it lies on the shelves for a long time and does not have the very first freshness.
Basic Rules:
- quality greens. We collect on our own plot or buy at the market from farmers, grandmothers, and acquaintances;
- first freshness. A limp bunch of basil or dill from the refrigerator is no good;
- preparation immediately. You need to dry it after cutting or purchasing. Do not leave for a long time at room temperature or in the refrigerator;
- dry completely. There are no dried greens, unlike fruits and berries. The product is dried to the point of brittleness.
How do you dry your herbs?
OvenElectric dryer
Greens can be dried in an electric dryer, microwave, air, or oven. It is important to maintain the temperature no higher than 40 degrees. Most types are stored for up to two years.
What types can be stored for a long time?
It is difficult to name greens that cannot be dried. Only lettuce leaves do not tolerate dehydration well. And not all types. There are varieties with low moisture content. They are suitable for this type of workpiece. Another question is its relevance.
What greens can be dried for the winter:
- parsley;
- dill;
- basil;
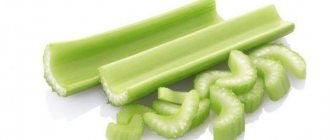
- celery leaves;
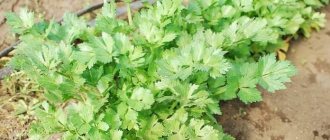
- cilantro.
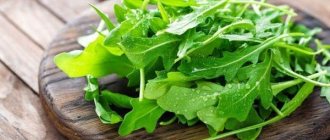
You can dry onion and garlic feathers, lemon balm, mint, various medicinal herbs, even carrot and beet tops. Sorrel and leafy vegetables like arugula tolerate the procedure well. Before choosing, you need to focus solely on your taste preferences.
Basic methods of drying herbs and root vegetables
Before drying, wash the greens thoroughly, remove yellowed leaves and damaged parts of the stems. Make bunches, tie them with threads and hang them in a well-ventilated area. It is very important that the greens are not exposed to direct sunlight, otherwise they will acquire a yellowish tint and begin to crumble.
If desired, you can finely chop the prepared greens and place on a sieve or cheesecloth. The layer should be no more than 1.5 centimeters. Stir the greens occasionally with your hands until they begin to crumble. On average, this takes about 5-7 days.
Greens can also be dried in an oven that has a thermostat. Chop parsley, dill, marjoram or other herbs, place on a baking sheet, place in the oven and set the temperature to no more than 50 degrees. Do not forget to stir periodically, controlling the degree of drying. Once the greens begin to crumble, you can turn off the heat.
Roots and vegetables must be washed, peeled and chopped before drying. You can cut them into slices, cubes or however you like. Lay a white sheet on a baking sheet, place prepared root vegetables or vegetables on it, and place in the oven. Dry at 60 degrees for 3-5 hours.
Store dried herbs or root vegetables in tightly sealed jars to prevent the flavor from dissipating. Cellophane bags are not suitable for storage, but plastic containers will come in handy.
Method 7. Pickling greens
This method also keeps greens fresh well, but it retains less vitamins. Before pickling, the greens must be washed, chopped (coarsely) and dried. You can marinate washed, chopped (large), dried greens. It is placed in glass jars and filled with hot marinade. To prepare the marinade, mix and bring to a boil 25 g of salt, 45 g of sugar, and 1 tbsp. 9% vinegar. Then the jars are sterilized and sealed. Half-liter jars need to be sterilized in boiling water for 15 minutes, liter jars for 25 minutes. These greens are stored for about six months in the cellar or refrigerator.
Only properly prepared and stored greens will be an excellent vitamin boost in winter, when our body lacks heat, sun and nutrients.
What greens are suitable for drying?
Almost any greens that do not have thick veins, such as lettuce, spinach and mustard greens, are suitable for drying.
Suitable for drying are dill, parsley, celery, cilantro, arugula, thyme, basil, tarragon and other herbs. Various types of mint and ordinary onions, and even leeks are dried. By the way, dried leek stems are a special delicacy; they are added to stews, both meat and vegetable.
Thrifty housewives also prepare herbs for future use for marinade; this is the usual set consisting of currant leaves, horseradish and dill umbrellas. This preparation will help out if you want to make lightly salted cucumbers at an inopportune time, for example, or pickle vegetables in winter.
Raspberry and currant leaves are dried to make aromatic tea in winter. Connoisseurs of medicinal herbs also collect them at a certain period of time and dry them for the winter.
Drying: important nuances
So, we have figured out some of the features of drying in the oven and electric dryer, let’s decide what exactly can be dried, how long it takes, and where to store the prepared drying supplies later.
What to dry?
Berries, fruits, citruses, grapes, kiwi, bananas, cranberries, tomatoes, eggplants, mushrooms, carrots, roots, nuts, herbs and medicinal herbs. You can make candied fruits, marshmallows, and dried tomatoes. By the way, you can even dry bread crackers in an electric dryer.
In order for the final product to be of good quality, you need to choose fresh and ripe fruits and elastic berries. If there are areas of damage on them, they need to be cleaned. To ensure that darkening foods retain their color during the drying process, they can be sprinkled with lemon juice or soaked in acidified water and then dried.
How to dry?
Regardless of where you dry vegetables or fruits, they need to be prepared. Wash, dry thoroughly or pat dry with paper towels. Before drying, vegetables must be washed, peels, seeds, damaged areas and all excess removed. Then cut into strips, cubes, plates, i.e. in a way that is optimal for each individual product.
The cutting method also depends on how and where you plan to use the dried products. It should be taken into account that the drying time also depends on the cutting method: finely chopped vegetables and fruits will dry much faster than whole ones or cut in half. Fruits with hard skins, such as figs or grapes, and hard fruits are recommended to be blanched first. If the grate is too large for the cut you have chosen, you can line it with gauze, as shown in the photo.
Drying carrots is very easy. Even if you simply wash and grate it, place it on a baking sheet and leave it in a warm, dry place, it will dry on its own, and in a dryer or oven this process will go even faster, a few hours is enough. You can dry carrots cut into strips, this will take a little longer, about 5 hours.
Pumpkin can be dried in grated form, and then added to porridges, made into candied fruits, or dried in slices or cubes in an electric dryer or oven. Drying time depends on the type of cut.
You can see how to dry mushrooms in an electric dryer in this article, and in the oven in this article. It must be remembered that mushrooms absorb moisture, so it is better to clean them rather than soak them in water.
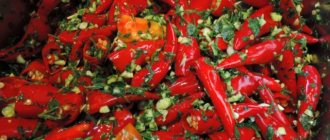
Bell peppers can be dried in strips or cubes, hot peppers can be dried in whole pods.
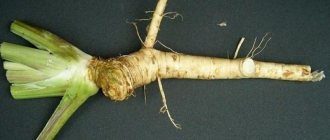
It is better to blanch peeled parsley root, celery root and parsnips for 1-2 minutes in boiling water before drying. The pieces should be no more than 5 mm thick.
Tomatoes tolerate drying well; how to dry them and where to use them can be found here. But how to make sun-dried tomatoes in oil is described in detail here and here.
Dried eggplants are similar in taste to mushrooms, so they can replace them in some dishes.
Raspberries, blackberries and strawberries can be dried only for tea or as a decoration for baking. Otherwise, due to the large number of seeds, it is not very tasty in dry form. You can see how to do this here. Detailed instructions for drying raspberries can be found in this material.
Strawberries after drying, in my opinion, are more aromatic than fresh. It can be added to any desserts and cereals. You can see how to dry strawberries here.
You can also grind strawberries and raspberries into powder and decorate any sweet dishes.
The pears must first be cut into slices; drying them will take approximately 10-15 hours. Wild pears can be dried whole if they are not wormy. They are very aromatic and ideal for dried fruit compotes.
The best varieties for drying apples are Antonovka, Titovka, and Anise. They can be dried unpeeled or peeled and cored. It is best to cut apples into thin plates or slices on a slicer, then the thickness of all slices will be the same. They will dry in about 6-8 hours.
To prepare candied fruits, chopped fruits (for example, pears) are boiled in steep syrup (700-800 g of sugar per glass of water) and then completely dried. In a similar way, you can make candied fruits from citrus peels. Berries and soft fruits are simply kept in syrup. This process can take from 3-4 hours to several days. Then you need to allow excess moisture to drain and dry in a dryer or oven with the door open at a temperature of 60-90 degrees. Then the resulting candied fruits are rolled in powdered sugar.
Separately, it is worth mentioning about drying greens. The faster it dries, the better its color, aroma and taste are preserved. The greens can be ground into powder by hand and added to any dish a few minutes before the end of cooking. Before drying, greens must be thoroughly washed and dried. The easiest way to do this is in a greens centrifuge. Then remove all the branches and cut into pieces 15 cm long so that they do not fall through the grate.
If you dry greens in an electric dryer, then you definitely need to change the tiers. The temperature should not exceed 35-40 degrees. In the oven, the drying process should begin at 30-40 degrees, and after an hour and a half, raise it to 60. You can dry dill, parsley, basil, marjoram, oregano, thyme and many other herbs. Many housewives also dry onions and garlic.
How long to dry?
Drying time directly depends on factors such as the amount of moisture in the product, the thickness of the slices and the air humidity in the room.
Drying times are approximate. In some electric dryers, it may differ significantly for the same product. The same goes for ovens. Sometimes such tables are given in the instructions for the device.
How to store?
Well-dried vegetables, berries and fruits should be crisp and elastic, free of moisture, otherwise mold may develop. Allow the dried product to cool completely before packing it. Pears and apples can be stored in a dry, dark place in linen bags; the rest can be dried in airtight jars or containers with a tight lid. It is recommended to store the dryer at a temperature of 0-10 degrees C, but in modern realities it is difficult to organize such conditions in an apartment other than loading everything into the refrigerator.
It is better to store different greens in separate jars to preserve their flavor. It can be compacted tightly so that it takes up less space. Take dry herbs only with a clean, dry spoon or dry hands so that no moisture gets into the jar.
I store the dryer in the pantry of the insulated balcony. In summer it is not very hot there, and in winter it is not critically cold. Naturally, you need to periodically inspect the drying area for moth larvae or bugs. If any appear, you need to get rid of the damaged dryer so that the rest of the dryer does not become infected. Or heat it in the oven at 80 degrees for about half an hour. Some books write that you need to place a container with salt next to the drying supplies so that it absorbs all the moisture. The salt won't give mold a chance.
Dried vegetables can be used in stir-fries, soups, borscht, stews, and porridges. Thanks to this method, you can enjoy candied fruits all year round, while being sure that they are not stuffed with any chemicals. And out-of-season herbs and vegetables will be very useful and will help diversify the menu. The possibilities of this harvesting method are limited only by your imagination and desire. So get down to business!