If you have to dry a craft for the first time, it will be useful to learn some subtleties. First of all, you need to understand the difference between drying and baking. It is a mistaken belief that an oven – electric or gas – is only suitable for baking. You can also dry the dough in it. It is important to know how and for how long.
There are several ways to dry salt dough:
- in the sun;
- at room temperature;
- on battery;
- in the oven;
- in the microwave;
- in a combined way.
Each of them has its own advantages and disadvantages.
| Type of drying | pros | Minuses |
| In the sun | Does not require energy consumption | The craft takes a long time to dry |
| At room temperature | Economical | It takes a long time to dry. Indentations will remain on the product in contact with any surface. |
| On battery | Convenient to use in winter when the batteries are warm | The area does not allow drying volumetric figures |
| In the oven | The fastest way | Difficult to calculate temperature |
| In the microwave | Microwave cannot be used! | |
| Combined method | Suitable for drying large crafts | Labour intensive |
How to properly knead salt dough
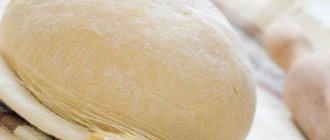
Dough is a material that is easy to prepare. Place 1/2 cup salt and 1 cup flour in a bowl and slowly add water. You need enough water to make the dough dry and elastic. If the dough becomes sticky, you need to add more flour. The dough is kneaded and used immediately, because... after a few hours it begins to dry out and crust over.
The softness and elasticity of the material depends on how to knead the dough correctly. It is better to use fine salt and flour without any impurities. If the salt is coarse, then experienced professionals recommend first dissolving it in warm water. Some people add another spoonful of PVA glue to a glass of flour so that the dough figures hold their shape better. The dough must be kneaded thoroughly so that no lumps form. Before sculpting, it is better to knead each piece with your fingers until the dough turns into soft plasticine.
At the first stage of work, you can color the material. To do this, while mixing the dough components, pour a little gouache or natural food coloring into the bowl. This way the dough will be colored even before drying and will receive a beautiful color with different shades after drying. And if you add aromatic oils to the material, the product will get a pleasant smell.
Experienced craftsmen use a special technique for preparing dough. To do this, mix fine salt and wheat flour in a 1:2 ratio in a saucepan. Add a tablespoon of vegetable oil and cream to the mixture. You can immediately add food coloring or simple paints for painting. Then pour in water in the same volume as the flour.
The mixture is placed on low heat and stirred constantly until the consistency becomes thick. Then the dough is kneaded on the table. This material is more elastic and holds its shape well. This method is suitable for professional salt dough products.
Mixture with PVA glue
As you already understand from the title of this section, we will talk about a recipe for salted modeling dough with the addition of PVA glue. Have to take:
- two glasses of white flour;
- half as much salt, it is advisable to take only fine “Extra” salt;
- lukewarm water - half a cup;
- 50 ml of white thick PVA glue.
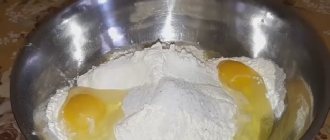
First, as usual, mix the dry ingredients - flour and salt. Then warm water is poured in and the composition is thoroughly mixed. Some people use a blender to achieve smoothness faster, but it doesn't really matter. You can mix the mixture perfectly with your hands. When the dough has the desired consistency, add PVA glue to the bowl and knead again.
After obtaining a beautiful, homogeneous dough, you need to roll an even and smooth ball, wrap it in cling film and put it in the refrigerator for a while.
How to dry dough crafts
Drying is an important step in making dough figures. The workpiece may deteriorate, crack, burst or warp due to improper drying. Drying dough products can be done in different ways.
The natural way is in the air
In summer, dough pieces can be air dried. It is better to choose sunny places. There, a millimeter of the product will be dried in a few hours. You can dry a small figurine in a day. However, items that are too thin may bend slightly. Therefore, it is better to place thick products in the sun. For drying, you need to choose flat surfaces so that the figures do not spoil their appearance or become deformed.
On the heating radiator
Dough crafts cannot dry in the air in winter, so the heat of the sun will replace the heating radiator in the cold season. The main thing is that its surface is smooth. The products are also laid out on the radiator. They dry faster than in the sun if the radiator is hot. If the radiator has a complex shape, then the dough figures can simply be hung next to each other by a thread. This is more convenient to do, for example, when drying on a radiator.
In an electric oven
The electric oven is heated to a temperature of 50°C to 150°C. At the highest temperature, a millimeter of the product will dry in 30 minutes. However, it is better to dry large items at 150°C. For small pieces, the oven should be preheated to 100°C. At this temperature, the small product will be ready within an hour.
The figures are simply laid out on a baking sheet, but you need to sprinkle it with a little flour before doing so. Place the salted dough for crafts in a cold oven. On a dark-colored baking sheet, the workpieces dry faster. In addition, it is not recommended to dry dough that is colored with gouache in ovens. Paint may change color when exposed to high temperatures.
In a gas oven
Traditionally, the dough is dried in the oven, which takes about 3 hours on low heat to prevent the dough from burning. When using this method, the following steps are provided:
1. Preheat the oven. Preheat the oven to 140°C. 2. Bookmarking figures. The finished products are placed on a baking sheet and placed in the oven for about 3 hours. This is how long it takes 0.5 cm of salt dough to dry in the oven. 3. Completion of drying. When the pieces are dry, turn off the oven. The figures need to be left in the oven to cool, because... Sudden temperature changes can damage products.
Combined method
The combined method is suitable for large workpieces. Drying a dough craft that is too thick is difficult because... Only 1-2 mm can be ready per day. Therefore, it is better to dry voluminous figures naturally, because... drying will take several days. You can dry the workpiece in the oven or on a radiator, when most of the figure is already dried. But if the figurine remains a little damp inside, then this is acceptable. Over time the dough will harden.
In the microwave
Dough dishes can be baked in the microwave. However, salt dough cannot be dried or baked in the microwave. The figures themselves will swell and become deformed. A large amount of salt is dangerous because it can catch fire.
How long will it take to dry the craft?
Let's take a closer look at how long it will take a dough product to dry in one way or another.
- In the sun or in the room. The most economical method, as it does not require gas or electricity consumption. But with this method, every millimeter of the craft will take 24 hours to dry. This will happen much faster in the sun. This option is not suitable for large figures.
- In an electric oven. Time is calculated using the formula - 1 hour for every half centimeter of product thickness at a temperature of 75 degrees. Place the figurine in a cold oven. The temperature is increased every hour by 25 degrees.
- In a gas oven. Here, dough products dry twice as fast. Dry over low heat with the door slightly open. The first hour it is opened halfway, the second hour - a quarter, the third - the door is closed.
- Combined method. For two days, the craft is kept in the air, then sent to the oven for an hour, heated to 50 degrees, gradually increasing the temperature to a maximum of 150. This method is good for large products.
- On the battery (radiator). First cover the radiator with foil or cloth. It is better to place a board or plywood so that the ribbed surface of the battery does not deform the molding. Keep until completely dry.
- It is not recommended to dry salt dough in the microwave, since drying requires a very long time, which is not provided for in the software.
- Drying on the grill. An effective method, since everything will dry evenly. Electricity consumption is relatively small.
Drying will be more effective if done in several stages. Dry in the oven for an hour on one side, 24 hours at room temperature, the next day dry on the other side in the oven for an hour and a half.
How to determine product readiness
It is important to determine the readiness of the workpiece in time during drying. You can calculate how long it takes a millimeter or centimeter of a product to dry under different conditions, but much in this case depends on weather conditions if drying is done in air, or on temperature if the workpiece is dried in an oven or on a radiator. You can keep the items for the same amount of time, but on different days or in different devices, they will dry slower or faster.
If the figurine is thin, then its readiness is immediately visible: it becomes hard. Larger products are checked for readiness in other ways. Medium-thick workpieces are checked by knocking. It is enough to tap the surface of the figure with your fingertips or a small hard object. If the sound is clear, then the product has dried well.
It is better to check thick figures with a thin match or needle, just as housewives check baked goods. A match is used to pierce the product in a place that can then be disguised. If there is dough left on the match or it easily fits into the workpiece, then the figure is not ready yet. If the product is difficult to pierce even with a needle, then it has dried out.
Cracks often indicate that the figurine has not dried completely. They appear after starting work with the workpiece, during its painting or varnishing. Such cracks appear if the product is still damp inside, so it needs to be dried.
Favorite recipe for children
This salted play dough at home is created with additional ingredients that allow products made from it to glow in the dark. Let's look at the composition of such a test:
- 2 tablespoons vegetable oil;
- two glasses of flour (wheat);
- the same amount of warm water;
- 100 grams of fine salt;
- 4 teaspoons cream of tartar;
- 2 capsules or tablets of vitamin E.
First, a dry mixture of flour, salt, and cream of tartar is mixed. A tablet crushed into a fine powder is also added there. After thorough mixing, add water and vegetable oil. But this is not the whole cooking process. The resulting homogeneous mass must be put on fire and simmered over low heat until the mixture begins to stick; the consistency should resemble ordinary plasticine.
Rules for browning products
You can beautifully brown a dough craft in a natural way, and not by tinting it with paints. To do this, at the end of drying in the oven, increase the temperature. If the baking sheet is on the lower or middle level, the thin parts of the product will brown. However, it is important not to overexpose the product so that it does not burn. Therefore, you need to monitor the process and leave the oven door open for this.
Large products are browned on the top tier. This will give the convex parts of the workpiece a beautiful brown tint. If you combine 2 types of browning, you can get an unusual product, but this can often be done by experienced craftsmen.
Water temperature and its effect on the dough
It is necessary to take into account the effect of water temperature on dough particles. The best swelling of flour and dissolution of crystalline raw materials occurs at elevated temperatures. The higher the dough temperature, the faster the process of dehydration of sugars occurs, and the frequency of interaction between protein, starch and water molecules increases.
The plasticity of salt dough can be achieved at a raw material temperature of 18 to 25 ° C. Elastic-plastic dough is obtained as a result of complete swelling of flour proteins at a water temperature of 38-40°C. To create a homogeneous mass, the mixing process is important. The better the quality of flour and the higher the gluten content, the longer the kneading.
When mixing flour, water and salt into a homogeneous mass, the process of dissolution of crystalline raw materials and swelling of flour colloids is accelerated. Stirring accelerates the process of gluten formation in the dough, so kneading the dough for a long time until a plastic and elastic mass is obtained.
How to bake salt dough
It is better to bake small items. Don't rush and turn the oven on high. The drying speed will decrease, but the product may crack or swell. If the product is voluminous, then it is better to use combined drying and alternate methods of drying the product: first put it in the sun, then bake it in the oven, the next day - vice versa. Also, the workpiece must be constantly turned over if it is double-sided.
You need to know not only at what temperature to bake salt dough. They start baking the figures on the top level, and then bring them a little closer to the heat source, lowering them to the middle level. It is better to leave the door slightly open so that the figures do not burn.
If the workpieces begin to crack or swell, then you need to immediately reduce the temperature. After baking the figures, it is better to cool them in place. If the products need to be removed, then this must be done with a spatula, because... hot figures are fragile.
Proper storage
No matter how accurately the required amount of ingredients is calculated, after class there is always a piece left that is a pity to throw away. And I don’t want to make a new batch every time.
To save time and effort, you can leave the modeling material for next time.
It is best to store salt dough in the refrigerator, first wrapped in a plastic bag or cling film. You can also put it in a food container and be sure to close the lid tightly.
When removing any part for modeling from a container or bag, you need to leave the product in the open air as little as possible, since contact with oxygen speeds up the process, and the mass deteriorates instantly. Weathered dough is the hardest to save; it becomes crusty and dries out.
The finished material, due to its specific composition, even with proper storage, loses its natural color, begins to dampen and darken. It is not recommended to knead the material to create figures for more than 2-3 days; dark spots and inclusions will appear on it.
Multi-colored dough must be stored in separate closed containers.
Frozen storage
Storing play dough in the freezer is only possible as a last resort. Under the influence of negative temperatures, the product loses its elasticity, which will be quite difficult to restore.