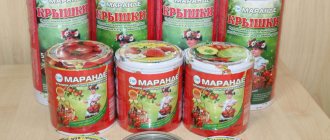
Sterilization of lids and jars before preservation How to roll up a jar with a screw-on lid How to roll up a jar with a seaming machine (key)
Manual seaming machine Snail key Semi-automatic
Features of seaming different products
As a child, when I watched my aunt and my mother making preparations for the winter, I didn’t understand why all these extra steps when I could go and buy the same thing in the store. A few days ago I caught myself thinking that I would be interested in trying to preserve a jar or two. I was inspired by this idea from the Instagram stories of my friends the same age, who also began to roll up jars of tomatoes, cucumbers and other vegetables.
Now, apparently, our time has come.
We have prepared some tips that will come in handy if you also want to master this simple task. Winter is just around the corner. Save the link for the future and leave comments if you have already made blanks more than once and know some interesting tricks.
HOW TO PROPERLY STERILIZE JARS TO CLOSE JAM
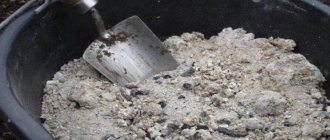
Before placing the jam in jars and using the seaming machine, all jars must be carefully prepared. First, they need to be thoroughly cleaned with soda, not only from the inside, but also from the outside. Sterilization is the process of treating jam jars at elevated temperatures to kill all bacteria. You can sterilize jars either using steam or by placing them in an oven heated to 100 - 120 degrees. It will also be necessary to sterilize the iron lids with which you will close the jars. Although it is easier with lids - they need no more than boiling for 5-10 minutes in a saucepan covered with a lid.
Is sterilization required?
Screw-on twist-off lids are successfully used for preserving vegetable salads, pickled vegetables, and jam. Proper sterilization will help ensure a long shelf life for products.
Only intact lids without chips or dents are suitable for sterilization. If the inside is varnished, special attention should be paid to the integrity of the coating. Before sterilizing twist offs (especially new ones), they are washed using liquid dish soap and rinsed thoroughly with running water.
- Boiling is a popular and simplest method. Bring water to a boil in a small saucepan, lower the lids and boil for at least fifteen minutes.
After boiling, they must be taken out and this must be done correctly. Do not put your hands in the water under any circumstances. Firstly, there is a high probability of getting burns, and secondly, the sterilization procedure becomes useless.
Correctly remove the lids with tongs (clean, sterilized). While hot, the lids are immediately placed on the filled jars and, covered with a clean towel, screwed on by hand.
- Steam sterilization. Boil water in a saucepan. While the water is boiling, place a colander on the container, into which we place the twist-off with the inside down. To enhance the steam effect, the colander can be covered. After fifteen minutes, remove the pan from the heat and use the twist off for its intended purpose.
- Sterilization in the oven. This is a fairly convenient method, as it allows you to sterilize the lids (they are laid out with the inside up) and jars at the same time. The oven is heated to 50 C, after ten minutes the temperature is increased to 100 C. Sterilization time is fifteen minutes.
You need to preheat the oven gradually, as a sudden temperature change may cause the sealing jar to burst. And one more very important rule: never sterilize jars with screw caps in the microwave.
Sterilization of lids and jars before preservation
Two key rules for properly sealing jars for the winter are sterility and tightness. Therefore, it is not enough to simply rinse lids and jars with hot water. They need to be boiled or fried in the oven. This is the only way to get rid of pathogenic bacteria.
Most often, the lids are sterilized over steam - 10 minutes in a slow cooker or, if you don’t have one, on a rack over boiling water so that the steam kills germs. Some housewives additionally fry the lids in the oven or microwave (about 15 minutes).
Important! Only screw-on metal lids can be sterilized in the oven. Don't put lids with rubber bands in there because they may melt. It is better to boil them in hot water or keep them over steam.
Source: Unsplash (@natalie_rhea)
While the jars and lids are being sterilized, you need to prepare the vegetables that you plan to preserve. As soon as you take the jar out of the oven or remove it from the steam and fill it, then immediately start twisting it. While the lids are still hot. This will make it easier for you to seal the jar, because the metal lids expand slightly during the sterilization process. Afterwards, when the metal cools, the lid is tightly fixed, ensuring high sealing.
Important! Be careful when sterilizing lids. Remove them from the oven or boiling water using tongs, a slotted spoon or a special lid magnet. During canning, use a dry cloth, dish towel or oven mitts to avoid burning your hands.
Before sterilization, jars be checked for integrity - see if there are any cracks or chips. Afterwards, the container must be rinsed thoroughly. It is better to use mustard powder or soda for this. Chemical detergents will not work.
The principle of sterilizing jars is almost the same as preparing lids. They can also be steamed for about 10 minutes, placed neck down on top of a tight mesh over boiling water. If you have a special sterilizer - a device that looks like a flat lid with one or more holes into which jars are inserted - then the process will be more convenient. The sterilizer has edges that match the neck of the jar to support it. There is no need to be afraid that the jars will fall or will not fit into the water bath in the pan.
Important! Sterilization can be completed when large drops of water appear on the inner walls of the jars.
The jars, like the lids, can also be roasted in the oven . It is better to do this for about 20 minutes at a temperature of 100-110 degrees. Sterilization time depends on the volume of the jar. If the containers are small, then 10-15 minutes will be enough. After the time has passed, the jars need to be kept in the oven for some time until they cool slightly. When you take it out, use a dry towel. If it is wet, the jars may burst due to temperature changes.
How to twist correctly and is a machine necessary for this?
Before using screw caps for their intended purpose, it is important to learn some subtleties and secrets:
- Before conservation begins, twist-off jars are sterilized. If containers for seaming are prepared together with lids, the sterilization temperature should not exceed 60 C. If jars are sterilized separately, the canning lids are first dipped in boiling water for two minutes.
- The prepared jar is filled with tasty contents and covered with a lid. In this case, the grooves on the rim should coincide with the twist lines on the can. The heated cap is scrolled along the thread line by hand. It covers the neck of the jar quite tightly, gradually cooling, ensuring maximum tightness.
When twisting, do not use too much force. Ignoring this condition can lead to overtightening of the thread and failure of the seam seal. Caps with broken threads are not suitable for use.
Also, twist-offs with traces of rust should not be used for canning. Products with damage, dents and scratches are only suitable if the cans are not hermetically sealed (for example, for storing bulk products).
Is it necessary to turn such a preservation over?
To ensure the quality of the seaming, you can perform a simple test:
- screw the filled jar;
- The jar is turned upside down.
If after such manipulations no drops of liquid appear on the rim, the preservation is sealed well and its contents will be stored for a long time. By turning over jars with screw lids, you can once again verify the tightness of home preservation.
How to open a jar
The screw cap is easy to open. To do this, turn the lid counterclockwise with a little effort. For those who do not have enough strength, a special opening machine will come to the rescue.
If the opening process does not work, a match will help open the jar. The flame is slightly heated under the rim. When heated, the metal expands and the screw opens easily.
If your hands slip on the jar when opening, use household gloves or cover the jar with a plastic bag.
If the top of the jar is stuck, the following steps will help open it:
- Gently, so as not to break the glass, knock on the jar (top and side);
- place the jar on its side and lightly roll it over the table;
- soak the canned food in warm water for fifteen minutes.
If the screw cap is too tight, hot water will help open the jar. Preservation is placed under running water or wrapped in a wet hot towel. In this case, preservation must be at room temperature, otherwise the glass of the jar will burst. You can also carefully pry off the metal rim with a knife. The point is inserted between the neck and the lid and the metal rim is slightly pushed back. Depressurization will occur and the can will open easily.
Can I use a screw cap instead of a regular one?
Screw caps are many times better than regular ones, if only because they can be reused. In addition, screw caps ensure high-quality canning of all types of pickled vegetables, mushrooms or jam. Such lids can be used for any jars, so many housewives have recently given preference to screw products rather than ordinary metal lids with rubber bands.
You can ensure a long shelf life of preservation by adhering to some rules:
- when preserving foods with a high level of acidity, it is better to choose a twist-off with a thick layer of varnish;
- never overtighten the lid more than the thread allows (it will be damaged);
- twist the twist-off strictly along the thread line;
- Close the jars immediately after filling. It is important not to overfill the container (the contents should not reach 1 cm to the edges);
- Store jars in a dry, well-ventilated place. It is important to limit preservation from sudden temperature changes;
- Canned food with very low sugar content (or no sugar at all) is stored in a cool place (for example, a refrigerator);
- after the canned food with twist lids is closed, it needs to be turned over (check for sealing tightness);
- The product cannot be used for food if the lid is swollen, there is no cotton when opening for the first time, or the twist-off is covered with rust on the inside.
Storage conditions for canned food
The ideal place for storing preserved food is a basement or cellar, where in the dark and cool your preparations can stand until next spring without losing their characteristics (Figure 6). Apartment owners can store canned food in a pantry or refrigerator. If there is very little space, any corner of your home that is remote from the stove and heating radiators will do, for example, an uninsulated loggia or shelves in the room.
Figure 6. Preservation storage methods
However, wherever your homemade products are stored, you must follow certain storage rules. Be sure to check the jars for leaks before storing them to prevent the jars in the pantry from exploding. Preservation should be placed away from direct sunlight to protect it from damage.
If during storage you notice cloudiness of the brine or the appearance of foam, bubbles, or mold, such preservation should not be used. This can be dangerous for your life, so it is better to throw away such a preparation without regret.
From the video you will learn about the basic methods of sterilizing jars for home canning.
Reuse
You can twist your favorite jam or any other product using a used twist lid.
The criteria for replacing the cover are:
- stains of rust or mold have appeared on the surface;
- the polymer inner layer was damaged;
- The side part with the thread is bent.
As long as the lid retains its original appearance, it is available for use. As practice has shown, it can be used for up to four years. Before reuse, the lid must undergo a sterilization procedure.
What is a lid magnet?
When canning at home, a problem arises - how to remove the lids from boiling water? A fork or slotted spoon, tongs - all these devices are quite inconvenient. It is much simpler, faster and, importantly, safer to use a special device for such purposes - a magnet for lids. This is a stick with a magnet attached to the end. The end with the magnet is dipped into boiling water, the twist off sticks to the stick, after which it can be placed on the neck of the jar without difficulty or injury. Understanding how to seal screw top jars will make the complex process of canning quick and easy.
Video
Lids for preservation
Screw-on lids are a paradise for the housewife who has despaired of handling the seamer when canning with simple lids with an insertable rubber band.
Seaming machines often break down and then do not close at all or cannot press the lid and attach it to the glass of the jar very tightly. If the jar is not closed tightly, the products will deteriorate. And this is so offensive! So much work in a hot, stuffy kitchen, so many products, and suddenly it turns out that the jars are swollen (that is, the lids on them) or have completely fallen off.
Therefore, in order not to be unnecessarily upset, you need to either buy a reliable seaming machine for lids, or switch to twist-off screw caps.
Jars with a screw neck, closed with twist-off lids are the most common containers in which we buy mushrooms, jam, compotes, canned tomatoes, lecho, gherkins, ketchups in glass jars, mussels, some types of cheese, sun-dried tomatoes in oil, juices and baby food. Twist-off technology is used both for capping medicines and for beer caps.
Twist-off caps come in different sizes
How the screw cap works
The hot lid, heated over steam or in hot water at a temperature of no more than 60 C, is screwed on and fits tightly to the glass of the jar.
The polymer coating on the inside of the lid, which acts as a gasket (sealant), softens in heat and allows you to close the jar with the lid as tightly as possible, without gaps. As it cools, the top of the lid is pulled inward (a slight click is heard) and a dry vacuum effect is created inside the jar.
Do not tighten more than the thread allows, do not overtighten. Otherwise, you will break the lid.
You need to install the cover, getting into the thread, and screw it on these rails. Otherwise, cracks will form and mold may appear in canned food.
Close canned food with a lid immediately after filling the jars.
Do not overfill jars. The jars should be filled with contents as much as possible, but not reach 1 cm from the edge of the jar.
Most canned foods can be stored with screw-on lids in a warm (but not hot), dry, and well-ventilated area. Do not expose canned food to sudden temperature fluctuations to avoid condensation.
However, if you can preserve jam with a small amount of sugar or compotes without sugar, or make other preparations that require more careful storage, they should be stored at lower temperatures (in the refrigerator or in the basement).
Before storing jars, jars with hot contents must be cooled to room temperature and checked for leaks (turn the jar upside down and see if the rim of the lid is wet).
The shelf life of canned food in screw-necked jars closed with screw lids is 6 months or more.
Twistable, screw-on lids - reusable. If you handle them carefully and do not clean off the varnish and the polymer inner layer of the lid with a hard sponge, the lid will last 4-5 years.
If the cover is rusty, it is not suitable for further use.
When the can is first opened, a loud pop is heard - this means that the canned food has not fermented or swelled.
If you notice that the lid on the jar is swollen, the canned food is spoiled, it is poison, you cannot eat it.
Screw caps can be opened by applying force and turning it in the opposite direction, or you can use a special opener for twist-off caps (they are sold in all hardware stores with a large assortment of products).
To close the screw cap, you need to twist it clockwise. To open, you need to unscrew the cap counterclockwise.
If the lid does not want to unscrew or you do not have enough strength, you should first try to cover the lid with a cloth or towel (so that your hands do not slip) and turn the lid.
If the technique is unsuccessful and the jar is still tightly closed, you need to take a burning match and slightly heat the lid from below with a flame (under the rim, around the jar). Just 1 match is enough, it’s quick, you won’t even burn your fingers. The lid will expand when heated and open (well, not by itself, of course, turn the heated lid).
Different types of lids: plastic (including nylon, translucent), plastic drain lid (with holes) and twist-off lids
How to seam a can with a seamer (key)
Manual seaming machine
This method is familiar to all of us; it is what many of us observed in childhood, when our mother or grandmother prepared canned food and screwed the lids onto the jars with a strange object - a seaming machine. It is also called a key. Sometimes, by the way, the wrench is also used when rolling up screw caps when there is not enough manual strength. But most often it is needed for seaming lids with an elastic band.
How to properly roll a jar with a manual machine: - First you need to install a sterilized lid on the jar, press it with a seaming machine and start rolling it in a clockwise circular motion. — After several revolutions, turn the key handle several times. This is necessary to reduce the diameter of the roller. Then move carefully clockwise again. — The main thing in this process is to screw the jar tightly, but not damage it.
Snail key
Visually, it is similar to a manual typewriter, but differs from it in its operating principle. The snail key rotates not along the central axis, but in a spiral.
Mechanism of operation: — The lid must be pressed tightly onto the jar with one hand, and the other hand must begin to be rolled up, guiding the device in a spiral. — For a tighter twist, it is better to rotate the handle clockwise, reducing the diameter along which the mechanism moves. — When the dipstick moves the shortest distance to the center, you need to unscrew the handle counterclockwise and remove the snail key.
Semi-automatic
It is a regular seaming machine with horizontal and vertical handles designed for holding and screwing the lids. The latch has a thread along which the mechanism rotates, pressing the metal against the glass. To tighten it, just install the device and turn it until it stops.
Is it possible to replace simple preservation lids with screw-on lids?
Yes, you can preserve all types of salads, compotes, cucumbers, tomatoes or mushrooms in marinade under screw caps. That is, use them to screw all the workpieces that were previously rolled up with simple tin lids.
Twist-off lids come with different internal coatings (more or less resistant to chemical influences). And if you have a very acidic product in the jar (sour fruit compote, sour juice or marinade), then you better take the lids with a generous layer of varnish to protect the lid from interacting with acids.
Plain iron, plastic and twist caps
In addition, jams can also be covered with plastic nylon lids by placing a circle of white paper soaked in vodka or alcohol under the lid (on top of the jam). The paper soaked in alcohol will collect mold on itself (if it suddenly appears) and you can throw away the damaged paper by placing a new piece of paper on the jam.
Nylon covers are the same plastic ones, only colorless
Jam cooked in a 1:1 ratio or if there is even more sugar in it (1:1.5 or 1:2) will be well preserved under a nylon (plastic) lid and at room temperature (but not in the heat, of course).
An example of using plastic lids is Cherry jam with pits.
An example of using twist-off lids: Nectarine compote - recipe.
Share with your friends!
For any housewife, with the onset of the warm season, the troubles only increase. First, you need to plant something on the plot in time, and then still find the strength to harvest the crop. After which many are faced with the problem - how to preserve it so that in winter they can treat their household? The main way to preserve berries and vegetables is canning.
This method has undergone many changes over the years of its existence. Everyone remembers the old seaming machines. Many people still use them today. The disadvantage of this device is that it must be used with great care. With a little more effort than required, you will end up with a jar with a damaged neck, which you will not be able to use in the future. But as a result of numerous tests, housewives today know how to properly roll up cans with a machine.
But everything is changing, and the old cans have been replaced by new ones, the lids of which are screwed on. That is why more and more housewives are asking this question: “How to roll up jars with screw-on lids?”
Screw caps are called twist-off caps and have been used for canning in Western countries for a long time. The essence of their operating principle is as follows. On the inside of the lid there is a special polymer coating that acts as a gasket. When exposed to high temperature, it expands and tightly seals the jar. As the temperature decreases and as it cools, the top of the lid pulls inward, which is accompanied by a slight click. As a result, a vacuum effect is created in the jar. Therefore, before rolling up jars with screw caps, it is necessary to heat the lids.
Most housewives, having looked at their neighbors or friends, decide to buy such lids for themselves, but do not know how to roll up jars with screw-on lids. There is nothing complicated here. First you need to sterilize the jars in the same way as regular ones. At the same time, this can be done with lids. The temperature for lids should not be more than 60 degrees. Otherwise, this will lead to destruction of the polymer coating.
The heated lid is placed on the jar ready for sealing. In this case, it is necessary to ensure that the grooves on the lid coincide exactly with the stripes on the jar. And it is also important to inspect the jar, or rather the neck, before rolling up jars with screw-on lids.
HOW TO CORRECTLY CLOSE JAM
Before pouring jam into jars, be sure to check that they are completely dry on the inside. If you pour the jam into wet jars, it may well turn sour. It will be a great pity then it will turn out that all your efforts will be useless.
It is recommended to distribute the jam that you need to roll into jars while it is still hot. Then the cans are rolled up using a special seaming machine, turned upside down and covered with some clean terry towel or blanket. In this form, it should cool down, and then it is transferred to a shelf for storage. Sometimes, for an even greater guarantee, it is recommended that the jam be pasteurized before sealing the jars. When you pour the hot jam into the jars, they should be closed with sterilized lids, placed in a pan with warm water and boiled for 10 minutes. Only then the jars Of course, they seal it and put it upside down to make sure that the packaging is tight. As in the previous case, cover the jars with a warm, clean towel and leave.
See also:
| How to sterilize jars |
A clean jar is the key to successful harvesting. Read on for details on preparing for conservation. About how to properly wash and sterilize in the oven, dishwasher, over steam, in the microwave, in a saucepan.
| Tomatoes in a jar |
We won’t open America to you now, but we’ll still tell you how to diversify your pickling. Let's get started?
| Faces in jars |
Production volumes of semi-finished products are decreasing slightly, and you can boast a little
I created these jars yesterday after reading the recipe on Hacienda.
Place parsley, dill, peppercorns, and bay leaves in prepared (washed) jars.
Peel the onion and cut into thick rings. Place onions in jars...
| HACIENDA BANK. UKRAINE |
I can offer cuttings of junipers and thujas for further cultivation
If I wrote “husband” opposite the plant. or if you didn’t write anything at all, it means there are no berries on the plant
If it says “female” it means eating berries
— rocky Blue Arrow
— rocky Skyrocket (men and women)
- Cossack Tmarisktsifolia (husband...
| When the house runs out of cans |
Greetings to all residents of the Hacienda.
I want to tell you this story. A month ago, I intensively mixed tomato preparations (ketchup, juice), and made apple puree. And at one point I ran out of cans. There is nothing to do, there are a lot of products, you need to go to the store. My husband and I went to get some cans...
Your Answer:
If you want to add a comment to a question or check with its author for details, do not
use this form and click “Clarify/discuss the question” under the question text!
Here you can ask questions and get answers from the community, and share your experiences.
In our article we want to talk about how to properly preserve tomatoes, cucumbers and eggplants and other vegetables. We will also provide useful tips on preparing jams and compotes from fruits and berries. Even if you have never done home canning, after studying the materials in our article, you will succeed. Where does the preparation of delicious preparations for the winter begin? With the arrival of summer, our shops and markets abound in vegetables and fruits, but it is physically impossible to eat a lot of them fresh. In addition, I want to extend the pleasure into the cold winter months, when our body receives an insufficient amount of vitamins from fresh vegetables and fruits, and their cost is not small. We offer you canning by pickling, salting, fermentation, and also with sugar. We will study the process from elementary actions aimed at canning. We will gradually tell you what is needed for proper canning.
To engage in home canning, you should stock up on the appropriate equipment, supplies, containers and measuring instruments. It is necessary to stock up on containers in the form of glass jars of various capacities. You can preserve any food in jars because they are durable, airtight, easy to process, and can be used repeatedly. Nowadays you can buy glass jars with lids that need to be rolled up, as well as with screw-on lids. This container has a standard neck, 82 mm in diameter. The capacity of the cans is different and ranges from 0.350 liters to 10 liters.
The cans that are rolled up are sealed with tin lids that have rubber gaskets - rings. It is better if the lids are coated with acid-resistant varnish. The jars are sealed with special manual sealing keys of various modifications. As for screw caps, they can be reused if a seal is not required. These lids can be used to seal jam and other canned goods containing more than 50% sugar. Quite convenient for preservation by pasteurization and lids with clips. These covers can be reused multiple times. If you are preparing canned goods that are shelf-stable or contain a high salt content, such as borscht dressings made from fresh vegetables, they can be sealed with plastic lids. Large glass bottles can be sealed with stoppers, caps and topped with sealing wax or resin.
Opening bottles and cans requires the use of corkscrews and can openers. To store vegetables and fruits frozen, you can use polyethylene containers. You can also store jam and candied fruits in such a container. To ferment cabbage and various pickles, you can use wooden barrels of different capacities. Such barrels are made from aspen and beech. You can peel fruits and vegetables when preparing for canning using various knives, graters and vegetable cutters. Dry spices are ground in coffee grinders and blenders. To weigh and measure food, you can use household scales, as well as measuring cups with divisions. Juices are prepared using juicers and juicers. You can blanch vegetables using a colander and a sieve. To carry out pasteurization, you need large pans, on the bottom of which wooden grates or slats are laid out, then the jar will not burst when heated. Hot dishes should be removed with special tongs. It is necessary to measure the pasteurization temperature with a special thermometer.
To weigh the product without scales during preservation, you can use the table data, weight in grams.
Sugar 800 400 200 25 8
When preserving, there are general rules - these are washing, sorting, grinding, as well as heat treatment, sterilization and storage of finished products. Vegetables and fruits selected for processing must be sorted by size, maturity and quality. It is necessary to remove garbage, wounded and spoiled fruits. To obtain high-quality canned goods, vegetables must be sorted by size and degree of ripeness. Then we thoroughly rinse all selected products under running water. This stage is the most important for canning. Along with the dirt, we wash away any possible chemicals that were used to grow the product, as well as microbes that came from the soil. If vegetables have a rough surface, they need to be washed with a brush. After washing, the product is dried and weighed to determine the ratio of the product and various spices, seasonings, and additives. In some cases, vegetables and fruits should be peeled. Therefore, for example, tomatoes and plums must be blanched and then easily peeled. Blanching can also be done in double boilers - this will preserve valuable nutrients.
If necessary, as indicated in the recipe, grind the finished raw materials. When canning, it is important to prepare the container. The jars must be washed with baking soda and rinsed thoroughly with hot water. Before filling the container, it must be sterilized. To do this, you can use a kettle with boiling water in it. A clean jar is turned upside down and placed in a small pan of boiling water at an angle or placed on a kettle. The jar must be kept in this position for 20 minutes. Sterilization can also be done in an oven or microwave. Lids are sterilized in the same way by boiling them for 10-15 minutes before capping. To preserve food, you need to prepare a brine. Dissolve table salt in water, bring to a boil, cool and filter. The brine is prepared by dissolving a certain amount of salt in the required amount of water.
The main advantages of nylon covers:
- easy to put on and take off;
- reusable;
- affordable price;
- do not rust and do not release harmful substances into workpieces.
You can also store cucumbers, tomatoes, bell peppers, zucchini, etc. under nylon covers for the winter. Everything will be kept intact for a long time.
Very little time will pass - one or two months - and the annual folk entertainment “Operation Conservation” will start. Experienced housewives roll up everything that grows in the garden, garden and forest for the winter. Strategic reserves of cans and lids are assessed in advance, missing components are purchased, and even innovations in the field of blanks are purchased. On the eve of the season, it would be a good idea to remember familiar technologies or learn new ones.
To create canned culinary masterpieces, lids, glass jars and the necessary devices are used - seaming wrenches of various modifications, pumps, sterilization containers, etc.
Let's start with the lids. To preserve supplies, lids made of tin (metal) and polyethylene (plastic) are used. The most common and affordable are tin lids made by stamping. What should you pay attention to when using these caps? Firstly, such a cover must have a recess of sufficient depth for the rubber sealing ring; there should be no burrs or stamping defects along the edge of the cover. The inside of the tin lid must be coated with a protective varnish layer. You can check how high quality it is: moisten a cotton swab with acetone and rub the varnish surface. Acetone will not dissolve high-quality varnish. It is desirable that stiffening ribs be embossed around the circumference of the lid, this will allow the lid to increase its strength. Tin lids are recommended to be used once. Tin lids should be sterilized in boiling water for no longer than 3 minutes, otherwise the rubber ring may become deformed. The rubber in the lid should not break with a little effort. The lid fits the jar if, when placed hot on the neck of the jar, it does not move (there is no play). The shelf life of the tin lid is no more than 3 years and it should be stored in a dry place.
More convenient, which have earned the recognition of housewives, are the lids called “twist-off” (English: unscrew), or in common parlance such lids are called screw ones. The lids are a little more expensive than regular tin ones, but they are quite affordable and can be used twice or thrice if used carefully. To check whether the lid will hold well, you can do this: pour water into a suitable jar (with a thread) and close the screw lid without much effort; turn the jar over onto a napkin. If drops of water do not appear on the napkin, then the lid will seal the jar securely. Twist-off lids are suitable for sealing all types of preserves. Close the lid on the jar while it is hot and with the contents of the jar still hot. Lids can be sterilized in boiling water. You can open such lids with a special key, or after heating the lid to t+60°, it can be easily opened manually. A special feature of the screw cap is the valve located in the center, which becomes convex if fermentation processes occur with the contents of the jar.
Polyethylene lids are used to seal mainly sweet canned food. These lids are thicker than regular ones. Being cold, they will not fit onto the neck of the jar; only when hot, they can easily fit where they need to be. Thermal lids (as they are also called) should be kept in boiling water for no more than 15 seconds to sterilize. The lid is usually marked “for preservation.” It is advisable to use thermal covers once, since polyethylene is often deformed and cannot provide a tight seal.
The newest, most expensive, most reliable and reusable lids are vacuum ones. The vacuum lid is a convex plastic dome with a valve in the center. The cover includes a pump connected to the valve. This pump pumps air out of the jar, thereby creating a vacuum in which microflora does not develop. Although the lid is not cheap, its cost is justified: the lid can be used 200 times. The vacuum lid can be sterilized in just a few seconds. Another good thing about this lid is that you can leave it on the neck of the jar (you took a few vegetables from the jar and pumped out the air again, the product does not spoil). These lids can be used on jars with or without cutting.
Some useful tips
1. Pay attention to the glass jar: if there is a noticeable “seam” along the jar, then such a jar is more likely to burst. The year of manufacture is stamped on the bottom of the can. If the jar is many years old, then it is better not to use it for preservation.
2. If there are visible glass chips on the neck of the jar, even small ones, then such a jar cannot be placed under the seaming key.
3. It is better not to preserve food in plastic containers; it is harmful to health.
4. An uncorked jar of pickles will be protected from mold and fermentation even in the refrigerator by ordinary pharmaceutical mustard plaster placed under a regular plastic lid (place with the mustard layer down).
During the preparation season, it is important to stock up not only on food, but also on high-quality seaming lids, because they will help preserve the preparations throughout the winter.
To choose a glass jar you do not need any special knowledge: the main thing is to decide on the volume of the container and its convenient shape. But everyone involved in canning should know about the choice of lids for canning, because the success of the canning process will depend on the material from which they are made, their health safety, convenience and quality.
Tin lids "SKO".
These covers are familiar to everyone. Always in demand due to their low price. These lids fit almost all glass jars. Before you buy, pay attention to the internal coating - for a high-quality lid it should be varnished. If you decide to save on cost, you risk getting a terrible tin taste in the preparations, and even poisoning the body during long-term storage. To check the lid, you need to wipe the inside surface with a cotton pad soaked in acetone - if a yellow or green trace remains, the lid will react with the contents of the jar, gradually poisoning it. Be sure to purchase a seaming wrench if you don't have one, and don't use these caps over and over again. Do not buy tin lids “in reserve” - the shelf life of such lids is only 3 years.
Twist-off lids.
Practical and convenient lids for reusable use, there is one requirement - they fit into jars with threads. It is advisable to check the lid before sealing for reliability. To do this, fill the container with water, screw on the lid and then turn it over. If water leaks, such a lid cannot be used; if not, it can be preserved. The main advantage of such lids is their affordable cost, no need for a seaming machine, and convenient storage after opening the jar. It is also advisable to check the varnish coating inside the lid.
Polyethylene (plastic) covers.
Such lids are disposable; after placing them in hot water, they expand and are then put on the jar. It is recommended to store pickles with such lids in the cellar, but for jam you are unlikely to find a better lid in terms of price and ease of use.
Now you know which lids are best to choose for home canning. It is advisable to check all jars for chips and cracks before starting conservation. Also, don’t forget to buy these “saviors” to facilitate the sterilization process: a disc-stand for a pan and a grip for jars. Now you are ready! This means it’s time to start canning at home, because you won’t find such “goodies” in the store.
Signs of quality seaming caps
Ideal seaming lids are made of food-grade metal. In appearance, tin and aluminum covers are almost indistinguishable, but the latter spring back when pressed with your hand.
The lids suitable for seaming are coated with acid-resistant varnish. Preferably on both sides, but definitely on the inside! Otherwise, the metal will rust and ruin the workpiece.
Ideal seaming caps have a rubber ring that fits tightly around the circumference of the cap in a groove. Yellow tin lids resist oxidative processes. White unvarnished, tinned, are only suitable for covering products with low acidity (jam, compotes, jam) and are not suitable for preserving brightly colored fruits and berries. Aluminum lids are used for all types of canned food.
Despite the fact that metal seaming lids are disposable, some housewives manage to reuse them. There are even tools designed to remove the covers with minimal damage. And yet, giving them a second life is undesirable for hygienic reasons.
If you don't remember when you purchased the lids, stretch the rubber seal around one of them. If it has retained its firmness and elasticity, the lids are ready to use. If not, throw it away: changes in temperature and humidity have done their dirty work.
Please note this:
| All about garden plants |
Screw-on lids are heaven for the housewife who has despaired of using a seamer when canning with simple lids with an insertable rubber band.
Seaming machines often break down and then do not close at all or cannot press the lid and attach it to the glass of the jar very tightly. If the jar is not closed tightly, the products will deteriorate. And this is so offensive! So much work in a hot, stuffy kitchen, so many products, and suddenly it turns out that the jars are swollen (that is, the lids on them) or have completely fallen off.
Therefore, in order not to be unnecessarily upset, you need to either buy a reliable seaming machine for lids, or switch to twist-off screw caps.
Jars with a screw neck, closed with twist-off lids - the most common container in which we buy mushrooms, jam, compotes, canned tomatoes, lecho, gherkins, ketchups in glass jars, mussels, some types of cheese, sun-dried tomatoes in oil, juices and baby food. Twist-off technology is used both for capping medicines and for beer caps.
Twist-off caps come in different sizes
How the screw cap works
The hot lid, heated over steam or in hot water at a temperature of no more than 60 C, is screwed on and fits tightly to the glass of the jar.
The polymer coating on the inside of the lid, which acts as a gasket (sealant), softens in heat and allows you to close the jar with the lid as tightly as possible, without gaps. As it cools, the top of the lid is pulled inward (a slight click is heard) and a dry vacuum effect is created inside the jar.
How screw caps work
Today, screw caps are widely used in America and Europe. Products of this kind are called “Twist-Off”; their operating principle is quite transparent.
The inside of the lid has a slippery polymer coating that serves as a gasket. As a result of exposure to high temperatures, this element swells, significantly increasing in thickness. This move allows you to press the lid to the neck of the jar as tightly as possible, preventing air from entering and, as a result, spoilage of the final product.
Thanks to their powerful sealing, screw caps are suitable for preserving jams, pickles, canned goods, etc. When the temperature drops, the gasket shrinks, which is accompanied by a click. The lid sags deep into the jar, this move creates a vacuum effect. Before rolling up pickles using lids like these, they need to be well heated.
Technology for sealing jars with screw caps
Any housewife wants to get the correct answer to the question: “How to properly close jars with Twist-Off lids?” In this case, the process does not present any great difficulties. However, like any other business, it includes certain features that must be taken into account. Twisting will not take much time.
- First of all, inspect each cover for the presence, or rather the absence, of all kinds of defects. The surface of the cover should not have rust “bugs”, strong dents (if possible, exclude such specimens altogether), small and large scratches.
- After you have inspected the lids, they need to be sterilized. The procedure is carried out through thermal treatment. Pour running, or preferably filtered, water into an enamel pan, place it on the stove, and bring to a boil. When the first bubbles appear, place the lids in the container, reduce the heat to medium, and cook household items for a quarter of an hour.
- After the specified period has passed, spread a cotton towel on a flat surface, remove the lids with kitchen tweezers, and leave until completely dry. Sterilization should be carried out immediately before preservation.
- After cleaning the lids, proceed to tighten them. Pour the desired contents into the jars, place the lid on top of the neck, and screw it on. To check the tightness of the rolled container, turn the hot jar upside down, cover with a towel and leave until it cools completely.
- If the rim does not become wet, it means the preservation was successful. In this case, the jars must be taken to a cellar or basement for long-term storage.
Rules for sealing cans for the winter
Sealing jars for the winter with screw caps means closing the jar without a machine. But what is the correct way and what is the best way to roll up cans for the winter with a machine or a snail, the faster to roll up a can with a semi-automatic key or to close canned food with an automatic machine? In fact, there is not much difference, it’s a matter of habit. It is very important to roll up the jars correctly so that the pickles remain crisp, the lids hold well, and do not swell on the rolled up jars of lecho for the winter.
Properly prepared canning will help preserve the taste of summer for the long winter months.
- First of all, thoroughly wash the jars and lids with soapy water.
- We sterilize jars and lids in any convenient way.
- We sort the products needed for the recipe. We select hard, pickling varieties of cucumbers for preparation, leaving salad varieties for preparing okroshka. Large cucumbers can be salted to make cucumber salad for the winter. Wash the vegetables well and soak if necessary.
- We clean raspberries for jam from leaves and bugs, and discard rotten ones. Strawberries are washed and dried before processing into jam and berry jam. We remove the tails from berries and fruits before putting them in jars.
- Fill the jars tightly, following the recipe.
- Jars filled with cucumbers, green tomatoes, and red tomatoes are filled with brine. Berries and fruits are poured with syrup.
- Using a recipe without sterilization speeds up the process of sealing jars for the winter. You need to close the canned food with a lid immediately after filling the cans.
- Screw on the lid.
How to check for leaks
If you buy a high-quality key and close the lid correctly, it will stay on the jar for a long time and will not swell. To prevent jars from exploding, you need to check that the lid on the jar is tightly closed. Checking for leaks is very easy.
Once screwed, turn the jar upside down and let it sit for 10 minutes. If syrup or brine leaks from under the lid, the seal is broken, the lid is not rolled up properly. Such preservation is not suitable for long-term storage. You'll have to re-roll the jars for the winter.
How to Store Screw-Lid Jars
- Jars sealed with screw caps should be stored in a room with optimal humidity (up to 40%) and a stable temperature. An ideal option would be a ventilated pantry, a dry basement or a glazed loggia. Give preference to rooms or areas that are well ventilated. This move will prevent the formation of mold that appears due to condensation. Important! Do not store jars with screw caps in the cellar, as the humidity in such a room is too high. You should also not keep containers on an open balcony, where the temperature often fluctuates.
- If jars of homemade twists are small (canned food, jam, etc.), store them on the bottom shelf of the refrigerator or in the cellar. This category refers to compounds prone to rapid fermentation, so the room should be cool.
- Do not rush to send jars with seaming for long-term storage immediately after conservation. First you need to place them with the neck down, wrap them in a warm cloth and cool to room temperature. After performing the leak test, check that the cap is not bulging. If everything is in order, the containers can be moved. Homemade pickles are stored in jars with such lids for six months or longer.
- The service life of screw caps is quite long provided all operating conditions are met. If you do not find rust, dents, or large scratches on the product, the lids are reusable. If you clean the varnish coating with a hard sponge, the product will quickly become unusable. As a rule, the duration of service varies from 3 to 5 years.
Filling jars correctly
In the canning process, every stage is important, because ultimately everything affects the quality of the product and its shelf life. Therefore, let us dwell in more detail on the stage of filling the jars (Figure 4).
Here are the basic rules:
- The jars must be dry before filling. They can be dried either naturally, by placing the neck down on a piece of clean cloth, or by blotting with an ironed cloth.
- The temperature of the container must correspond to the temperature of the raw materials that are placed in it. That is, you cannot put hot raw materials into a cold jar and vice versa, since the glass may not withstand temperature changes and burst in your hands.
- When hot filling, it is more preferable to fill the jar “under the neck”, since in this case less air remains in the container, which means that the likelihood of oxidation or microbial growth will be minimal. If, after filling, the jars with the contents are still sterilized, then it is better to fill them without adding 1.5-2 cm to the neck (for half-liter and liter jars) and 5-7 cm for 3-liter jars. This is done so that during sterilization the contents of the jars do not spill out.
- Vegetables and fruits should be placed fairly tightly, but not cramped. So, the berries are poured into a jar, and large fruits are laid out in sequential rows. For example, when pickling cucumbers, larger specimens are placed on the bottom, and small ones are placed closer to the top of the jar.
- Spices are placed on the bottom of a small jar, and in containers with a volume of 3 or more liters they need to be evenly distributed throughout the entire space of the jar, laying (sprinkling) on the fruit.
Figure 4. Methods of filling jars
A special art is the beautiful filling of jars, when the preservation not only tastes good, but also looks very aesthetically pleasing. For this purpose, you can cut the fruits into pieces of different sizes and shapes, use curly knives for slicing, select fruits by color and combine them, laying them out in layers.
It is not recommended to mix fruits that can be heavily colored (for example, light fruits with very bright ones). Therefore, peaches, apples and apricots should not be combined with cherries or plums in the same jar.
How to open a screw top jar
There are often cases when even the most experienced housewives complain that they cannot open a jar with a screw-on lid.
The difficulty lies in the impossibility of asking a representative of the strong half of humanity, who is not always nearby. At the same time, you also don’t want to spoil the product by making a hole in the surface with a knife to let out excess air.
To simplify the procedure, turn the container upside down and hit the bottom with your palm several times. After this, try unscrewing the cap and repeat the procedure if necessary.
It is not difficult to roll up jars with screw caps if you have sufficient knowledge regarding the available technology. First, sterilize the lids, pour the contents into containers, and immediately screw them on. Store in a temperature-stable room where humidity fluctuates within acceptable limits.