The popularity of root celery in recent years in our country has become great. And this is fair, he rightfully deserves such attention. More and more often it can be found in the gardens of Russians. But why then, on the contrary, do stores sell products from foreign (usually Dutch) manufacturers? Can’t we ourselves grow a root vegetable that has wonderful properties? Not without this - because it is not so simple.
Every year I manage to obtain high-quality celery root crops weighing up to 3-3.5 kg, and very often I have to answer numerous questions from gardeners about my growing experience.
What's good about celery?
Celery is a real storehouse of health. It is recommended for cardiovascular diseases, nervous disorders, anemia, liver and kidney diseases, gastrointestinal tract, and skin diseases. Protects the body from premature aging, regulates metabolism. Celery is a powerful aphrodisiac that increases libido and enhances male potency, and in this it can compete with newfangled overseas drugs with their exorbitant prices.
Container for seedlings of petiole celery
It is best to plant celery seeds in separate seedling containers (for example, cassettes or individual cups); you can sow 2-3 pieces at a time. If it is not possible to sow separately, you can use boxes, but in this case the grown seedlings will have to be plucked.
Before sowing, moisten the soil and begin sowing the seeds. Sow the seeds shallowly, superficially, sprinkling a little sand or peat on top so that the seeding depth is no more than 0.5 cm. To create a greenhouse effect (so they will hatch faster), you can cover them with film. Be sure to monitor the soil moisture by looking under the film from time to time.
The box with the planted seeds is placed in a dark, warm place. The air temperature during their germination should be maintained within 20-25°C.
After the seeds germinate, the film is removed and the seedlings are placed on the windowsill, the air temperature is lowered to 16°C (at night to 10-12°C), otherwise the seedlings will stretch. Daylight for celery seedlings should be at least 10 hours a day, so additional lighting is simply necessary.
Currently, this is not a problem; many people purchase phytolights for these purposes, but fluorescent lamps can also be used for this.
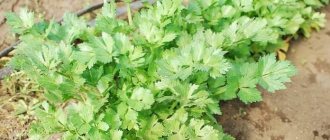
Which type of celery should you choose?
There are three varieties of celery: root, petiole and leaf. They are all good and useful. However, not all people like the specific smell of celery, which is explained by the presence of an essential oil with a strong aroma. And if for this reason some people dislike leaf celery, then it is better for them to give preference to root celery, which contains less essential oil than other varieties. The roots are no less useful; they contain potassium, calcium, phosphorus, sodium, magnesium salts, vitamins C, B1, B2, PP, K.
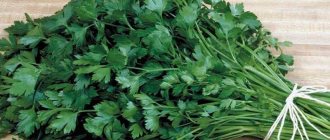
Features of agricultural technology
Leaf celery is a fairly unpretentious plant. But you can’t just plant it and forget it. To obtain a bountiful harvest of fragrant greens, you need to follow the general rules for caring for this crop.
Landing
Leaf celery prefers sunny, wind-protected areas with light, fertile soil. The best predecessors for this culture will be:
- legumes,
- cucumbers,
- cabbage,
- onion,
- garlic.
It is not advisable to plant leaf celery in beds occupied last season with carrots, dill, parsley and other umbellifers, since these plants have common pests and need the same nutrients. The closest neighbors of leaf celery can be any garden crops. But experienced vegetable growers prefer to place its plantings close to beds with onions or garlic, since their strong aroma can repel many pests. Nasturtium, marigold and savory have a similar effect.
The beds for leaf celery begin to be prepared in the fall. They are carefully dug up and cleared of weed roots. In spring, the soil is loosened well and mineral and organic fertilizers are applied. Typically, per 1 m2 they spend:
- 5–7 kg of humus;
- 25–30 g superphosphate;
- 15–20 g potassium sulfate.
Wood ash is an excellent alternative to mineral fertilizers. It is added at the rate of 0.5 liters per 1 m2.
Wood ash contains potassium and other minerals needed by leaf celery
Growing by seedlings
Due to the rather long growing season of leaf celery, in most regions of our country it is grown through seedlings. To ensure that young plants are sufficiently strong by the time they are planted in a permanent place, sowing begins in late February - early March.
Algorithm for preparing seeds and planting them:
- First, they are disinfected by placing them in a pink solution of potassium permanganate for several hours, and then wrapped in wet paper or gauze and left in a warm place, for example, on a radiator, for 2-3 days to hatch.
You can speed up germination by adding a few drops of aloe juice or any other growth stimulant to the wetting liquid.
- Any shallow container with small drainage holes is ideal for planting leaf celery. They are filled with a well-moistened mixture of coarse sand, peat, humus and leaf soil, taken in equal parts.
- The dried seeds are evenly distributed over the surface of well-moistened soil and lightly sprinkled with sand.
- To maintain an optimal level of humidity, the containers are covered with glass or transparent film.
- Containers with seeds are placed in a warm (optimal temperature is from 20 to 25°C) and bright place. Under favorable conditions, seedlings appear in 15–19 days.
When should I sow and in what containers?
Of the three types of celery, root celery is the most difficult to grow. One of the reasons is the long growing season (up to 200 days). Therefore, it must be grown only through seedlings. I sow the seeds from February 5 to February 15, maybe a little earlier or a little later. Celery seedlings almost never outgrow, but delaying the sowing time is fraught - you may not have time to get standard root crops (especially large ones) if you sow in the second half of March.
It is very important to decide not only when, but also where to sow. Reading the literature on gardening, you see one piece of advice - sow in boxes, and then dive. Perhaps this recommendation is acceptable if you are planning to plant an entire plantation with celery in order to take in quantity rather than quality. We must remember that when picking, the central tap root always breaks off, which causes active growth of lateral roots, and this is what we do not need. Because of this, we will face many problems in the future.
My practice has shown that it is better to sow in small cups or cassettes with a diameter of 3-4 cm. I compact the soil in them and place three or four seeds in each container, pressing them lightly (for better contact with moist soil), cover them with film and place them in bright place until germination. They appear from pre-soaked seeds after eight to ten days, and from dry-sown seeds - after 15-20 days.
I would especially like to note that the seeds should not be covered with soil, otherwise they may not germinate.
How and where to store celery root in winter
Cellar, basement
This is ideal. The required temperature should be maintained +1...+30 0C and humidity not lower than 90-95%. A glazed, insulated loggia or balcony is also suitable. Focus on temperature indicators (not lower than +10 C).
Recommended winter storage methods:
- Wooden or plastic boxes
Fill the boxes with holes for ventilation with clean river sand. All that remains is to place the root part of the celery vertically in the sand, leaving a small part of the petioles on the surface.
| Advice. You can use boxes with walls without holes. Place healthy celery roots in them, sprinkling them with clean sand. The sand layer on top should be at least two centimeters. |
Photo: You can store celery roots in a box.
- Clay chatter. A well-known method used for storing other root crops. Make a solution of clay with water until it becomes sour cream. Next, all that remains is to dip all the root vegetables in this mixture one by one and dry them, laying them out for storage, preferably in one row, but it is also allowed in stacks if there is a shortage of space.
- Sand (earth) with ash. Place healthy, intact, succulent roots in low piles on the floor or any bedding and cover the top well with this mixture. Its ash component acts as protection against mold, rot and other diseases. Similarly, you can use sand with crushed chalk, pouring fresh roots laid in layers in various containers with the petioles facing out.
- Plastic bags with small holes. Place the prepared celery root organs and tie them. You can also use foil packaging instead of polyethylene.
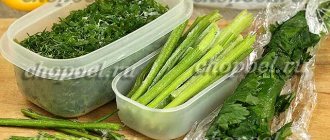
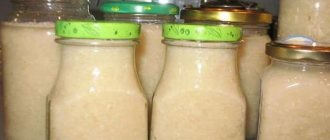
Storage in the apartment. This is quite problematic to do, especially if the room is well heated. The best way out for this case is to store it in a processed form: dry or freeze.
Photo: Freezing celery root for the winter
How to grow good seedlings?
I would call the first month of celery seedlings critical; it is very important to pay special attention to them.
As the shoots appear, I place the cups under fluorescent lamps for better illumination. I try to maintain the temperature at 19-20 degrees. I water the seedlings very carefully, maintaining moderate soil moisture. All this helps to avoid blackleg disease.
In the future, I leave one, the strongest, plant in each glass (I carefully cut off the rest with scissors).
In mid-March, I transfer the seedlings into large cups (8-10 cm in diameter). Two to three weeks before planting the seedlings, I begin to expose them to the open loggia, gradually adapting them to environmental conditions.
Seedling care
With the appearance of two true leaves, celery seedlings can be planted into separate pots. Plastic disposable cups or special seedling cassettes with a capacity of 150–200 mg are suitable for these purposes. Before picking, seedlings must be watered so as not to injure the roots of the plants.
Dive sequence:
- Fill the prepared containers with soil and compact it slightly.
- Use a stick or pencil to make an indentation in the center of the cup.
- Pick up the celery seedling with a stick, carefully pull it out and transfer it to a separate glass.
- Place the root in the hole and press the soil around it.
- Water the seedlings and, if necessary, add soil without deepening the sprout.
When picking, the growing point of the celery rosette should remain above the soil surface
The harvested seedlings should be placed in a cool, bright place. Growing seedlings must be watered regularly, but very carefully so as not to damage the delicate sprouts with a stream of water. An ordinary medical syringe is best suited for this.
Rooted seedlings need to be fed. This usually happens 7–10 days after the pick. You can use an aqueous solution of nitroammophoska, but the concentration should be 2 times weaker than for adult plants. Therefore, 0.5 tbsp will be enough for 1 bucket of water. l. fertilizers You can feed seedlings only in the morning and in damp soil. If the soil in the containers is dry, preliminary watering is necessary.
Before planting seedlings in the ground, it is necessary to harden off the plants for 2 weeks. To begin with, take the containers out into the garden (or onto the balcony) for 15–20 minutes. This should be done in the morning or evening hours so that the tender leaves do not fall under the scorching sun. Every day, increase the time of exercise so that by the time of planting the seedlings can be in the air all day.
Grown hardened seedlings can be planted in open ground
Is it possible to do without fertilizing with mineral fertilizers?
We said above that celery has a large and complex composition of nutritional and chemical elements. He receives all this from the soil, which, without appropriate replenishment, is not able to provide nutrition to the root crop. It is impossible to regulate the level of one or another element by fertilizing with organic matter.
My “menu” for celery: May - nitrogen fertilizers, June - complex organic and mineral fertilizers with a predominance of nitrogen, July - complex organomineral fertilizers with a balanced composition, August-September - phosphorus-potassium. The feeding interval is 10-12 days.
Caring for celery in open ground
Caring for celery after planting seedlings in the beds is simple. If the plants are not mulched, then regular weeding and loosening of the rows are necessary. A layer of mulch 5–7 cm thick eliminates unnecessary work and reduces watering. Celery will tolerate a short period of lack of moisture, but should have enough water to grow well.
Mulching celery will make caring for the plant much easier.
To increase green mass, plants need fertilizing, especially when grown in poor soil. The first application of fertilizers can be done 2 weeks after planting the seedlings. The main rule remains the same - fertilize only on moist soil.
Fertilizer application scheme:
- 2 weeks after planting, dilute 40 g of nitrophoska in a bucket of water and water the rows.
- 2 weeks after applying mineral fertilizers, fertilize with organic matter - dilute mullein infusion with water in a ratio of 1:10.
- A month later - a complete mineral complex fertilizer (for example, Kemira Hydro - 10 g per 10 liters of water).
In the future, it is better to use only organic matter for fertilizing. To avoid getting on the leaves, an infusion of chicken droppings, mullein or green (herbal) fertilizer is applied between the rows. This should be done no more often than once every 2 weeks on poor soils and once a month on fertile soils.
When to harvest?
Here you need to choose a middle ground. If you harvest it early, the root crop will not gain maximum weight (its active growth occurs in September); if you are late in harvesting, it may freeze. Although celery is cold-resistant (mature plants can withstand up to 7 degrees below zero), it is undesirable to allow root crops to freeze - they will not be stored well.
I harvest before the onset of heavy frost, from October 20 to 30. I carefully dig up the plants, shake off the soil, cut off the roots and leaves, and dry them.
Beet varieties for sowing before winter
'Podzimnyaya A-474' Mid-early variety, ripens in 55-100 days after germination. It is valued for its cold resistance, resistance to cercospora and flowering (formation of flower stalks), high taste and shelf life.
' Cold-resistant 19 ' Mid-season variety, from germination to harvest it will take 65-75 days. High taste, resistant to cold, color, and stores well.
' Egyptian flat ' Mid-season variety, 95-120 days from germination to technical maturity. It is valued for its consistently high yield, excellent taste, and resistance to the formation of peduncles. Zoned everywhere.
' Polar flat K-249 ' The variety is zoned for the northern regions; root crops will form 50-90 days after germination. Valued for its high resistance to cold, flowering, and pests (root beetles).
And beet seeds for winter sowings can be selected in our catalog, which contains offers from many large garden online stores. Select beet seeds:
Which varieties are better?
First, the worst. If you want to lose a year, plant the Apple variety. You are unlikely to find anything in the huge “beard” of roots.
Of those tested, Egor, Esaul, the Danish Giant, and Frigga were not bad.
The best are Prague Giant (up to 3.4 kg), Diamant (up to 3 kg), Albin (up to 3.5 kg). In terms of the sum of all qualities (evenness, absence of lateral roots, taste) I have the leader Diamant.
Unfortunately, purchasing celery seeds in our country is akin to roulette. You can always run into a surprise: get a huge rosette of leaves instead of a root vegetable (all forms are easily cross-pollinated). In addition, different companies have different copies under the same variety name. But all these are trifles for someone who has managed to become a true fan of this miraculous vegetable!
Igor DUNICHEV.
The best varieties of celery root
Celery is called both a vegetable and a herb, depending on which type of crop the gardener chooses. And there are three of them - leaf, petiole and root. The most popular of them is the root one, although the root crop has a long ripening period: it lasts up to six months.
This vegetable has round, fleshy roots, hollow petioles, and thin leaves. The most valuable and appetizing part is the root vegetable with white juicy pulp, shaped like an apple.
Those who have been growing root celery in open ground for a long time have decided on the choice of the best varieties for their region. You should focus primarily on the climate. In the south of Russia, spring comes early, so any variety will have time to ripen, but in the Moscow region or the Urals it is better to give preference to early ripening types of celery.
In central Russia, with snowy winters and humid summers, the best choice will be root varieties of celery: Anita, Alabaster, Kornevoy Gribovsky, Zolotoe Pero, Yablochny.
For cultivation in the areas of Siberia and the Urals, it is worth paying special attention to the varieties Egor, Russian size, Invictus, Silach, Esaul.
The Anita variety can be called universal. It grows and bears fruit with equal success in the Moscow region and in Siberia. Mid-late root crop weighing up to 400 g. not afraid of slight frosts, stores well.
In regions with long summers, the mid-season varieties Gigant and Silach are called the best, and among the late ones, the Maxim variety is especially distinguished.
For testing
Fish in foil
Rub the fish fillet with salt and pepper (you can first marinate it briefly in lemon juice). Place the fillet on a piece of foil, and on it - a little celery and carrots, grated on a coarse grater. Mix mayonnaise with grated cheese and herbs, brush fish and vegetables with this mixture on top. Wrap in foil. Bake in the oven at 200-220 degrees for 15 minutes.
Salad
Grate the celery root on a coarse grater, add two sweet and sour apples, cut into cubes, grated hard cheese, season with mayonnaise.
Cleaning rules
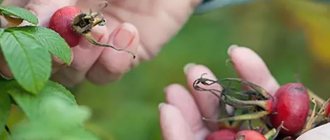
To prepare for storing the crop, it should be properly collected:
- Celery root is very fragile, so a flat-toothed fork is used to harvest it. When digging up tubers, it is important not to damage them, otherwise you will have to immediately send them to the salad. It is impossible to store such a vegetable.
- Immediately after removal from the ground, the root crop must be cleaned of large pieces of earth without damaging the skin.
- The tops are cut at a distance of 2-4 cm; they can be used for food immediately.
- The tubers are then transferred to a cool, dark, well-ventilated area to dry.
Control of diseases and pests of celery
The main enemies of celery are bacterial leaf spot, heart rot, stem rot, blackleg, viral leaf mosaic and white rot of stems. This plant is also threatened by slugs and snails, carrot fly larvae and cutworms.
The main means of combating bacterial and fungal diseases of celery is strict adherence to cultivation technology. In particular, you need to remember the need to observe crop rotation, weed control and thinning of crops. Also in recent years, the method of mixed plantings has been gaining popularity, when different vegetables and herbs planted side by side in the same bed mutually protect each other from pests and diseases.
Finally, in order for the cultivation of root celery to bring results, one should not over-irrigate or use stagnant water for these purposes. Excess moisture in the soil or stagnant water can easily become a source of plant rot.