How to choose a pumpkin for drying and creativity
The key to getting a good result is choosing the right fruit. Not every variety is suitable for drying and making crafts. Decorative varieties have a rounded shape and pronounced convexities. The surface of the “inedible” pumpkin has an even orange or brown color. It is easy to determine the maturity of a decorative pumpkin. You need to shake the cut fruit - if you can hear the rumble of seeds inside, it means the harvest is ripe.
Advice!
The size of the vegetable is chosen based on your creative idea. The smaller the product should be, the smaller the fruit can be taken. It is better to avoid drying giant fruits yourself!
Regardless of the grade and size chosen, the surface should be hard, smooth, and free of dents, soft spots, and signs of rot. Only a healthy fruit will produce a complete dry product. It is important that the pumpkin has a stalk. If the fruit is cut incorrectly, the juice will leak out during the drying process and the insides will begin to deteriorate.
Popular varieties of decorative pumpkin:
- Small orange (8-10 cm in diameter);
- Small warty (10-16 cm in diameter);
- Pear-shaped (10-12 cm long);
- Ten praises (10-15 cm in diameter);
- Large-fruited turban (30-50 cm in diameter);
- Lagenaria vulgaris ("bottle");
- Baby boo (diameter 10 cm).
Choosing the right one
This vegetable is usually used to make decorations for Halloween and also to make dishes. It is believed that the water in it does not spoil for a long time, has a special taste and helps with diabetes.
But not all pumpkins are suitable for this; it is worth choosing a plant of two varieties for crafts - “Cukurbita”, “Legenaria”. And if the pumpkin of the first type is small in size, with a bright color, which then fades, then the vegetable of the second variety has a thick green peel. True, over time it will turn golden.
To obtain high-quality material for crafts, you must follow certain harvesting rules:
- The stalk of the plant should dry well and turn brown;
- It is necessary to remove the fruits, leaving 7 cm of the stalk;
- You can't pick pumpkins after frost.
What you need to dry a pumpkin for crafts
The process of drying ornamental vegetables should be approached carefully. Preparation for drying:
- Wipe off any visible dirt with a soft cloth.
- Rinse the surface under warm running water.
- Dry with a towel.
- Leave in a dark, dry place for 60 minutes, then wipe again with a dry cloth.
- Make sure the peel is completely dry.
Further drying can take place indoors at room temperature (there is a high risk that the vegetable will rot). You can also speed up the process using various devices:
- air fryer;
- electric berry dryer;
- microwave;
- oven.
Preparation
Even before you dry the pumpkin you like to make crafts from it, you will have to properly prepare it. This process does not hide any special tricks and boils down to the following procedures:
- To begin with, the peel is washed in soapy water and thoroughly dried.
- After this, the fruit is wiped with alcohol or any liquids with its “participation”.
- All that remains is to move the pumpkin to a place protected from sunlight. Such a room should have good ventilation. The workpiece will remain there until its shell begins to change color (this is about 1–2 weeks).
How to dry a pumpkin for crafts
You can dry the decorative pumpkin whole or in parts, depending on the desired result. There are several methods for preparing vegetables for creativity.
Whole drying
To obtain a whole piece, choose a small fruit. Drying can be done in a dry room without insects. It will take at least 3 months, during which the vegetable is regularly turned over to check for rot or mold. You can also use an oven.
In the oven
The simplest and fastest drying method. Algorithm of actions:
- Preheat the oven to 60 degrees, and place the pumpkin on a baking sheet covered with parchment. Keep the door open.
- Turn the vegetable over and check every 10-15 minutes.
- Dry for 2-8 hours, depending on size.
Advice!
In this way, both pumpkin slices and the whole fruit are dried.
Flowers made from pumpkin seeds for the autumn holiday
Flowers made from pumpkin seeds are very lush and incredibly beautiful. The seeds are so unique that the flowers from them can look like chrysanthemums, daisies, and even sunflowers. You can give them a different color shade thanks to the white base. Using additional handy materials, entire bouquets begin to bloom. Create them with your kids for a gift or for display. Unlike the pumpkin itself, such crafts last for a very long time.
Thanks to painstaking work, you can make such a voluminous composition. The base is plasticine
Here are such a variety of flowers from the same seeds
How to determine readiness
There are several signs that the fetus is ready for further creativity:
- Dry pumpkin is brown in color both outside and inside.
- The crust should be hard and the inside should be dry.
- When weighed, dried fruit weighs significantly less than fresh fruit.
- If the fruit has been dried whole, when shaken, you can hear the seeds “ringing.”
Features of drying decorative species
Methods for drying decorative species depend on how long you need the craft for. If you need to get creative for a school competition, use the quick pumpkin drying method.
- Cut off the top of the pumpkin and remove all the pulp.
- Using a sponge, disinfect the outer and inner surfaces of the product with alcohol.
- Stuff the fruit with old newspapers and place it in a warm, dry place, preferably in the sun.
- Change the paper filling as the newspapers get wet, but at least 2-3 times a day.
- After 3 days, you can use the pumpkin head to make crafts. However, keep in mind that the creative object will last no more than 2-3 weeks, then it will begin to deteriorate.
Another way to quickly dry your pumpkin is to use a hair dryer. Thanks to this device, you can dry the rind of a small fruit in just a couple of hours. However, keep in mind that you need to work with such a vegetable very carefully, since sudden temperature changes make its peel very fragile.
To make better quality crafts, you should dry the pumpkin for less than 6 months. During this time, the fruits acquire the hardness of wood and can retain their appearance and shape for a long time. To ensure proper drying, place vegetables in a dark place with good ventilation.
Regularly check drying workpieces and spare no expense in discarding specimens that have begun to deteriorate, wrinkle or soften. If traces of mold are found on future crafts, try removing them with bleach. You can determine the readiness of the fruits for further work by the rustling sound of the seeds when shaking and a noticeably decreased weight.
Adviсe
To get an excellent result the first time, you should follow some recommendations:
- Do not use large specimens grown for food for creativity.
- The pulp of the “cucurbita” variety dries 2 times faster than the pulp of “lagenaria”.
- The lower the room temperature, the longer it will take to dry.
- If the peel peels off, it is sanded with sandpaper.
- When preparing the vegetable for Halloween, keep the flesh slightly moist. Therefore, vegetables begin to be prepared 1.5 months before the party.
Home decoration
Not everyone knows how to prepare for Halloween at home. Based on the recommendations in this article, it won’t take that much time. You can decorate your home like this:
Prepare in advance after any holiday champagne bottles and ordinary cylindrical candles. The main thing is that they fit freely into the neck. We insert one into each bottle and set it on fire. While the candle flame is burning and wax is dripping onto the bottle, such a festive interior item as Gothic candles will be made.- In addition to candles, you need to hang spiders and cobwebs throughout the house. To do this, you need to buy toy spiders in the store and stick them on doors or other pieces of furniture using tape. The web, of course, is not for sale, so we’ll make it ourselves using regular black sewing thread. You can also hang bats made from colored paper if you wish.
- To completely intimidate guests coming to the party, we recommend scattering towels with bloody prints throughout the apartment. Take old towels and, applying red gouache to your hand, make prints on them. To enhance the horror effect, make a few bloody marks using a regular brush.
- And finally: not a single holiday of evil spirits would be complete without the main decoration - a pumpkin head. The so-called Jack lamp must be present in the interior decoration of the room. And it’s best if there are several of them.
Storage
Dried vegetables can be stored for a long period of time if certain conditions are met:
- In the room where the vegetable is stored, the temperature should be +12-280C, and sudden changes are not allowed.
- Dried vegetables should not come into contact with dampness and moisture, especially if it is intended for decoration or crafts.
- To extend the shelf life of Halloween pumpkins, the cut areas can be coated with clear varnish.
For crafts
Some housewives, if they make large preparations of pumpkin for eating for the winter, add salt.
Drying options
Kitchen utensils are used to dry pumpkins.
For decoration
To dry a pumpkin for decoration so that its crust becomes more rigid, you can use household appliances such as:
- Oven at t = 80 degrees;
- Air fryer at t = 70 degrees;
- Electric dryer at t = 80 degrees;
- Microwave oven, mode at 600 W power.
In order for the pumpkin to dry and not burn, it must be turned over periodically.
For crafts
If you do not plan to store the decorative item for a long time, you can dry the pumpkin for crafts as follows:
- Cut off the top, remove the pulp.
- Treat the inner surface of the vegetable with alcohol.
- Stuff the insides of the pumpkin with newspaper and place in a well-ventilated place. The paper needs to be changed as it gets wet.
Preparing for drying
The drying process can last 6-18 months, it all depends on the thickness of the peel, the amount of pulp, temperature conditions and the size of the vegetable. It is recommended to dry several vegetables at the same time, because some of them begin to deteriorate at the initial stage, literally on the 5-7th day.
For Halloween
You need to start preparing this vegetable for Halloween several months in advance. To do this, it is preferable to choose varieties with a not very hard crust, so that it is easier to cut out scary faces. You need to cut off the top, remove the seeds, stuff paper inside the vegetable and put it in a dark room.
In the West, pumpkins are treated with specialized antiseptic solutions to extend their shelf life. At home, you can try spraying the vegetable with a bleach-based solution. This will prevent the development of pathogenic microorganisms that contribute to spoilage.
For food
Pumpkin varieties intended for eating are pre-washed and then wiped dry with a paper towel.
Further actions are as follows:
- Cut out the stem.
- Cut the vegetable into 2 parts.
- Remove seeds.
- To peel.
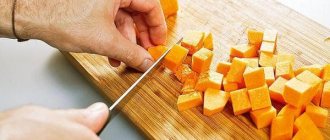
- Cut into thin slices or cubes.
To prevent the pumpkin from darkening, blanch the slices in boiling water for 120 seconds, then cool in cold water.
- In the sun. Place in an even layer on a wire rack and cover with gauze on top. This process takes about 10 days in very hot weather.
- Above the gas stove. Place the cut using a needle on a strong thread. Hang over the stove and wait for the liquid to evaporate from the product.
- In an electric dryer. Place the slices on the racks, not close to each other. Temperature + 50-60 0 C. The whole process will take 12-20 hours. To prevent the slices from sticking, they must be turned over periodically.
The ready-to-eat product should be stored in glass containers with tightly sealed lids, which are best stored in a dark, dry place where dried seasonings are usually stored.
