Jam is one of the most popular preparations for the winter. But it’s not enough to make good, tasty jam – you still need to preserve it. Do you know how to seal jam correctly? So that the results of your labors do not go to waste, but turn into orderly rows of jars on the shelves of your pantry. If not, then we will tell you about it now.
What kind of jam is there?
Jam for the winter can be prepared in different ways. Although, strictly speaking, classic jam should be cooked using the traditional “grandmother’s method.” Unfortunately, such jam contains a minimum of vitamins, since many of them are destroyed under prolonged exposure to high temperature. That’s why today housewives prefer to either cook the jam in a “quick” way, keeping it on the fire for no more than 7-10 minutes, or even less. Or, don’t make jam at all, but simply grind fresh berries and fruits with sugar. This method allows you to preserve most of the vitamins and nutrients, but such jam requires mandatory preservation. You can store jam rolled up under tin lids both in the cellar and at normal room temperature, without taking up space in the refrigerator.
How to properly sterilize jars to seal jam
Before pouring the jam into jars and using a seaming machine, these jars must be carefully prepared. First, they need to be washed very well with soda, not only from the inside, but also from the outside.
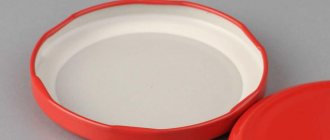
Sterilization is the process of treating jam jars with high temperatures to kill all bacteria. You can sterilize jars either using steam or simply placing them in the oven, preheated to 100 - 120 degrees. It is also necessary to sterilize the metal lids with which you will close the jars. But with lids it’s easier - you just need to boil them for 5-10 minutes in a covered pan.
How to seal jam correctly
Before pouring jam into jars, make sure they are completely dry on the inside. If you put jam in wet jars, it may turn sour and then all your work will be in vain.
It is recommended to pour jam into jars while hot, then roll up the jars using a special seaming machine, turn them upside down and cover with a clean terry towel. In this form, the jam cools down, after which it is sent to the shelf for storage.
Sometimes, for additional guarantee, it is recommended to pasteurize the jam before sealing the jars. In this case, after you pour the hot jam into the jars, they need to be covered with sterilized lids, placed in a pan of hot water and boiled for an additional 10 minutes. Only after this the jars are finally sealed and turned upside down to ensure that the packaging is sealed. The jars, as in the previous case, are covered with a warm towel and left to cool in this form for 10-12 hours. And then they are put away for storage.
How to seal traditional jam correctly
Jam made in the traditional way does not require sealing with tin lids. Due to the high sugar content, it is perfectly stored without it, even at normal room temperature. However, if you want, of course, you can seal such jam, but this will only be a waste of time and effort. In order to preserve traditional classic jam, it is enough to know how to seal it correctly.
As in the previous case, jars for storing jam must be thoroughly washed, sterilized and, no less thoroughly, dried. Remember that jam can only be poured into clean and completely dry jars.
Before putting the jam into jars, unlike the previous case, you need to cool it. You can cool the jam in the same bowl in which it was boiled, you just need to cover it on top with gauze or clean white paper. But there is no need to use a lid; the jam should evaporate moisture freely.
After the jam has cooled, place it in clean jars, making sure that the berries and syrup are distributed evenly. Then a circle cut out of paper and soaked in alcohol or vodka is placed on the neck of the jar, covered with another sheet of paper on top and tightly tied with twine soaked in hot water. If you don't have twine, you can use strips cut from fabric. They also need to be moistened with hot water and tied tightly around the neck of the jar. When dry, the twine or fabric will shrink and hug the jar even more tightly.
Instead of regular paper, you can use parchment or plastic lids.
If you prefer parchment, then you need to close the jam in the following way: put one piece of parchment on the neck of the jar, place a circle cut out of cardboard on top, cover with a second piece of parchment and tie everything tightly with twine.
In the summer we are pleased with delicious berries and fruits, we can buy them in stores, markets, and some grow them themselves and can collect them at their summer cottage. After all, these healthy treats are needed to maintain good health and good mood. So that you can enjoy them during the cold season, as well as preserve the beneficial properties of fruits and berries, they can be canned. And then at any moment everyone will be able to open and enjoy their favorite fruits or berries in the form of aromatic jam. Homemade is always better than store-bought, and healthier!
Let's look at how to seal jam in jars for the winter and what you need for this
In order for jars of treats to be stored for as long as possible, you need to carefully prepare everything:
- Collect ripe berries or fruits, select those fruits that are not spoiled, that is, the best!
- Prepare glass jars, they must be without damage or chips!
- Also, for canning you need lids; they come in several types (metal, polyethylene or screw-on).
- Depending on the type of container and lid, you may need a special key to close it.
- You need a large saucepan for sterilization (by the way, this is the method they used or are using the old fashioned way). Some people nowadays sterilize using special devices - sterilizers, some in the oven, or if the jars are small, they can be sterilized in the microwave. Everyone chooses the method they like!
- You also need an enamel basin for cooking the berries or fruits themselves.
When everything you need is ready, we can get to work!
Stage one: preparing the jam
First of all, we sort out the berries, remove any debris, rinse them well with water so that they are clean. If there are bones, then remove them. Place the fruit in an enamel bowl. Then sprinkle with granulated sugar, making several layers (berries or fruits - sugar). Place the basin on the stove and cook the jam, always skimming off the foam. You need to cook until all the sugar has dissolved, or maybe a little longer. There are two cooking methods - fast and slow. We will write more about these methods below.
Is it possible to roll jam cold?
After preparing the dessert according to certain recipes, it needs to be cooled and poured into cold jars. Cooling before distribution is recommended for the following sweet preparations:
- According to grandma's recipe. This method was used several centuries ago. You need to keep the pan with the berry slurry on the fire until it thickens. To check readiness, drop a teaspoon of jam onto a plate or pan lid. If the liquid spreads, then the dessert is not yet thick enough. When ready, the cooled sweet mass is poured into jars without sealing them with lids. The thicker the resulting product, the longer its shelf life.
- Mashed berries with added sand. This method also does not require spilling hot liquid. This recipe is especially popular among young housewives. It is convenient in an apartment, because a woman does not need a large container for cooking, as well as a lot of space for cooling and distributing the product among containers. This jam can be stored for up to a year.
Stage two: preparing containers
Wash jars and lids well with detergents. Then we rinse them thoroughly, let the water drain, and dry them. As described above in our article, there are several ways to sterilize containers; we will describe boiling. Pour clean water into the pan, heat it until the water begins to boil, put the jars in the water so that they are completely in the water. Boil for a few minutes and remove. Now about boiling the lids. If you are using lids that are screwed on using a seaming wrench, then they need to be kept in boiling water for a couple of seconds. Polyethylene lids are immersed in boiling water for two or three minutes; screw-on lids are sterilized in the same way. The lids can be processed in the microwave.
Jam packaging
The best containers for packaging and storing finished jam are glass jars with a capacity of 0.5; 1; 2 l. The jars must first be washed in hot water, preferably with soda ash or another detergent, until completely clean, then rinsed with clean boiling water and turned upside down to drain the water. After this, the jars are dried in the oven until the moisture is completely removed. Immediately before packaging the finished jam, the jars must be completely dry and hot.
Regardless of the heat source used, the jam should be cooked for no more than 30-40 minutes, excluding the resting time. In the first 5-10 minutes from the moment of boiling, the jam should be cooked over low heat, since during this period the greatest foaming is observed and the contents of the basin may boil away. As the intensity of foam formation decreases and as the syrup thickens, the heat must be increased, making sure that the jam boils evenly and does not overflow over the edge of the basin.
Syrup for jam, which contains fruits or berries, must be transparent and colored in a color that is characteristic of these fruits or berries. It should not have any brownish or brownish tint. The latter indicates that the jam was overheated or cooked over too much heat.
It should be thick enough that it does not flow quickly from the surface of the spoon. The jam should contain equal amounts of berries and syrup. Excess or insufficient amount of syrup indicates a violation of the rules for making jam.
Stage three: how to properly seal jam in jars
After the jam is cooked, pour it into jars and close the lids:
- After boiling, the lids, which are rolled up using a special seaming key, are immediately applied to the jars and screwed on. The vessels will need to be turned over and left like that until they have cooled completely.
- Polyethylene covers. After boiling, they need to be quickly put on the jars, and the containers themselves must be turned over after cooling. To understand whether the lid is put on correctly, after cooling, you need to see if there is a recess on top of it. If yes, then everything was done correctly.
- The twist-on ones are put on similarly to the polyethylene ones. This type of lid is placed on jars with threads. When opening containers with these lids, a click should be heard; if there is none, then it is better not to eat such food!
Lids can be bought at the nearest hardware store and even supermarket, especially in season, or you can save a little and order canning lids in bulk https://istr.com.ua/products/dlja-konservirovanija/.
How to seal the jam correctly - hot or cold?
It all depends on the method by which the food was prepared.
If it has been cooked for a long time, then it can be placed in cold containers and does not need to be rolled into jars. You can simply cover this jam with a plastic lid and that’s it. And if the food is cooked quickly, then it is poured into sterilized jars while hot, covered with metal lids and immediately turned over. Then it is left to cool. Therefore, if you are wondering how to seal the jam - hot or cold, choose the cooking method. And the answer will come immediately!
Is it possible to pour hot jam into jars?
Some recipes call for the treats to be hot when they are placed into the containers. Among these cooking methods:
- Cooking "Five Minutes". Its name comes from the brevity of the cooking method. Since the dessert did not lose its beneficial properties during short cooking, it is recommended to seal it in containers while hot. However, the shelf life of such a product is short - up to 9 months.
- A dessert that did not use a large amount of sand when cooking. By reducing glucose, the calorie content of the product is reduced. Moreover, this option is recommended for baby food, because baby teeth are often susceptible to caries due to sweets. The delicacy can be stored for 10 months, but if it is cooled, the period is reduced to six months.
How to close jam jars to prevent mold
Properly prepared and sealed food in jars can be stored for a long time.
But if the container or lids were poorly processed or the jam was poured incorrectly, then it may deteriorate and mold will appear in it. That is why all the points described above must be observed. Signs by which you can understand that you did something wrong when cooking:
- The color of the dish is dark, there is no fruity aroma - you have overcooked the jam.
- The berries (fruits) are not uniformly distributed in the syrup; they either float up or at the bottom, this indicates that the technology is broken. If the berries (fruits) settle, then this is a sign that you did not add enough sugar. But if, on the contrary, the berries float, then you may have undercooked them.
At the beginning of summer, when warm weather sets in, the aroma of the first summer berry - strawberries - spreads over the beds. We try to eat as much of it as possible: sweet, fragrant, healthy. But summer flies by quickly, so you need to seize the moment and prepare this wonderful berry for the winter.
You can simply freeze strawberries in the freezer, preserve them with compote, or make sweet, delicious strawberry jam. We will discuss the features and nuances of how to make strawberry jam for the winter in this article, and I will also give you my personal step-by-step recipe for making strawberry jam with photos of the entire process.
There are several ways to make strawberry jam. And every housewife also has secrets known only to her. Today we will look at two recipes for strawberry jam.
– strawberries 1 kg
- granulated sugar 1-1.2 kg.
- an enamel pan or basin.
Ripe sorted berries are thoroughly washed with water. The most convenient way to do this is to use a colander. Berries are placed in it and washed well under running water or dipped into a bucket of water at least three times. Dust and sand on the berries will settle in the water.
Let the water drain from the strawberries. Then peel off the leaves and place in an enamel bowl. Pour granulated sugar on top, in an approximate ratio of about one to one, that is, one kilogram of sugar per kilogram of strawberries, and leave for 3-4 hours. During this time, the strawberries will release some of the juice, which will slightly dissolve the sugar. This will allow the jam to cook rather than the sugar to fry.
It is correct and necessary to cook strawberry jam over low heat, stirring frequently. When cooking until boiling, foam (noise) will constantly be released, which must be collected with a slotted spoon or spoon.
The foam contains many air bubbles, which can subsequently cause fermentation and swelling of the jar in winter. Since living microorganisms remain in the air, which then, during long-term storage, will wake up in the jam. But no one will forbid you to collect this sweet foam and enjoy it with pleasure.
Also be prepared that the mixture may rise before boiling, especially if you have turned the heat up higher than necessary. Don't miss this moment so as not to catch berries all over the kitchen.
After boiling, cook the strawberry jam for at least an hour over very low heat. Don't forget to stir it at the same time.
How to prepare jam jars
While the jam is cooking, you need to prepare jars for it. To ensure that your preserves last a long time, choose jars with necks without chips, cracks or nicks.
Only you can decide what size jars of jam it is more convenient for you to use: two liters, liters, half liters or even smaller ones.
How to sterilize jam jars?
Prepared jam jars should be thoroughly washed and, if possible, sterilized.
To do this, keep the clean jar over steam for 10-15 minutes. It is very easy to do this at home. Pour water into the pan and bring to a boil. Cover with a metal sieve or colander, and place a jar on top and simmer over low heat. You can also “cook” the jars in the oven. To do this, place clean jars neck down on a baking sheet and place in a cold oven. Turn on the oven and heat to 150ºС and fry for 15 minutes.
A steamer can also act as a sterilizer. Place the jar upside down and turn on the cooking mode for 10-15 minutes.
Sterilization of caps
Of course, don’t forget about the jam lids. They also need to be sterilized. To do this, clean, undeformed lids are boiled in boiling water for 5 minutes. You can also steam the lids, like the jars, in a sieve over boiling water for 5-10 minutes.
An important aspect of preserving jam in winter is that jars and lids must be dry before capping. Even a small amount of water is enough for the development of pathogenic microflora. After sterilizing the jars and lids, let them dry.
Pour the jam into jars
When the strawberry jam according to my recipe is ready for winter, pour it into jars and seal it. If you are afraid of getting burned, it is permissible to let the mixture “dry” a little. The jars are cooled by simple air cooling to room temperature. After cooling, your workpieces can be stored in the cold: in a pantry or cellar.
In order to prepare strawberry jam in sugar syrup we need:
– strawberries 1 kg
– sugar 1.2 kg
- water 1.2 cups
Sugar syrup for jam
To prepare strawberry jam in sugar syrup, you first need to prepare the sugar syrup itself. Brew the syrup in an enamel saucepan: stir 1.2 cups of water with 1.2 kg of sugar. Stirring until completely dissolved, brew the sugar syrup over low heat.
Making jam
Pour the washed and peeled berries with hot syrup and leave for four hours. After this, the strawberry jam is cooked over low heat in three stages.
The first time the mixture is cooked for 30 minutes. The jam sits for two hours. The second cooking is again 30 minutes and again kept for two hours. Then cook until done.
Ready-made strawberry jam according to this recipe is packaged hot in sterilized jars. Seal and cool in air.
Pasteurization in jars
In addition to the methods described, pasteurization of strawberry jam in jars is possible. To do this, semi-ready hot jam is poured into heated jars, loosely closed with dry lids and placed in a pan with hot water. The water should be 3 centimeters below the neck.
Pasteurize over low heat for 10-15 minutes. After finishing, twist it completely and leave it to cool in the air.
How can you tell when the jam is ready? Although all recipes indicate cooking time, all housewives have their own concepts of low heat, and strawberries differ in juiciness and density. There are external signs by which you can determine the readiness of the jam.
.
- The foam gathers towards the center of the pan or basin, it is no longer so airy and loose.
— Strawberry fruits become translucent, no longer rise to the surface, but are distributed evenly in the jam.
- Take a small amount of syrup with a spoon, cool slightly and drop a drop on your nail. In this case, the drop spreads a little.
Well-cooked strawberry jam, or any other jam, can be stored sealed and does not spoil even at room temperature. And an open jar naturally needs to be stored in the refrigerator.
And yes, of course, the correct preparation of strawberry jam for the winter according to the recipe is a rather painstaking and long process. But when you open a jar of aromatic, sweet food in winter, you will happily enjoy a piece of summer. This is a great addition to pancakes and pancakes, and porridges, for example, in the photo, strawberry jam with oatmeal with milk.
The jam is also delicious to eat with buns and tea, add to porridges and desserts when cooking, or just with a large spoon. Homemade strawberry jam - what could be tastier? So my advice for today is to preserve the wonderful taste of summer with strawberry jam. And bon appetit! Also in other articles, from and, or for example, and also look at mine, for which I usually use this jam.
With the onset of summer, every housewife tries to stock up on more jam for the winter. It is not only sweet, but also a source of vitamins and minerals, as well as protection against infections and viruses. And how many fragrant pies, bagels and cookies will be made from such preparations on winter evenings! The main thing now is not to miss the moment, to cook the jam correctly, preserving all its beneficial properties, but preventing possible souring of the product.
How to close the jar
If the jam is intended for long-term storage, it must cool completely. Then it is poured into a clean, dry container. But it’s better not to use a metal lid. It is best to use parchment paper and twine. Glass jars are thoroughly washed with soda, dried and kept over steam. After this, the cooled jam is placed in hot jars. It will need to be stored in a dry place. The procedure is quite simple. Place parchment on the jar, a circle of cardboard on top and then parchment again. They are tied together with moistened twine, which, when dried, blocks the flow of air into the jar. Some housewives use different techniques. They pour the jam hot and seal it under a metal lid. In fact, we have already described to you how best to pour the jam - hot or cold. The rest depends on your personal preferences.
Jam is a sweet dessert that consists of fruits - fruits or berries, boiled whole in sugar or honey syrup. And although jam has been brewed for, perhaps, hundreds of years, in connection with its preparation, no, no, and various questions arise. For example, should jam be poured into jars hot or cold?
Indeed, in order for the jam to turn out tasty and to be stored for a long time, certain rules must be followed when preparing it.
Secrets of proper jam
Well-made jam should have the color and flavor of the fresh fruits and berries that were used in its preparation. Such jam retains the absolute majority of vitamins, including a significant part of vitamin C. Jam can be stored for a long time due to the fact that it contains a large amount of sugar - usually about 50%. In such a thick, rich syrup, microorganisms that cause fermentation or mold cannot develop. But if you do not put enough sugar in the jam, it can easily turn sour. The same thing happens if you put it in poorly washed or damp jars. Or you don’t follow the storage rules - for example, the room in which the jam is stored is poorly ventilated or damp.
Berry picking
In order for the finished dessert to be of excellent quality, you need to provide yourself with the best berries. To do this, they must be collected in warm and dry weather. If you do this in the rain, the berries will absorb a lot of moisture, fall apart, and the delicacy will be watery. The entire collection should be the same in ripeness, then it will turn out much tastier. In parallel with the berries, you need to choose the container into which you will pour the finished product. Usually these are glass jars. Their preparation will directly determine whether the jam is poured into jars hot or cold.
Berry jam
Delicate berries - raspberries, blackberries, strawberries, cherries, small plums, cherries with pits, currants - are boiled in several stages, with breaks of 8-10 hours. The first time, the syrup with berries is only brought to a boil, and then left to stand. The second time, the jam is boiled for 10-15 minutes and left to stand again. Only the third time can it be brought to readiness over high heat. Strawberries, cherries, sweet cherries and pitted plums can be cooked in one step - first over low heat, then over high heat.
With easily boiled berries you can do the following:
After cooking lightly in the syrup, carefully remove the berries with a slotted spoon or strainer, and continue to boil the syrup. Shortly before the end of cooking, the berries are dipped into syrup again, brought to a boil again and then the finished jam is sealed.
Before cooking
Berries or fruits need to be washed and sprinkled with granulated sugar. They must stand for 3-4 hours to release the juice. If the jam is made from cherries, some housewives prefer to extract the seeds from the berries, which can be done using a special machine. At this time, the jars are washed well and prepared for sealing.
Meanwhile, the berries are poured into a wide bowl. A small basin is ideal. It is best to use 2-4 kg bowls. In a large container, delicate berries lose their shape. Do not forget that the cooking container must be perfectly clean. The basin should not be used if it has rust or oxide stains. At this stage you need to decide whether to pour the jam into jars hot or cold.
Preparing the dishes
Well-washed jars are placed on the table for inspection. It is very important now to notice any defect on the glass and immediately exclude such containers in order to prevent damage to the product. Actually, if the crack is small, then it is acceptable to store jam in it. But in this case it is better to leave it in the refrigerator.
In order for the jam to stand in the room, you will need to take better care of its safety. In this case, it would be best to thoroughly sterilize each jar. To do this, you can use a kettle, oven or microwave. Based on this, you can already decide how to pour the jam, hot or cold. A well-boiled delicacy can be placed in sterile jars, even cold, and nothing will be done to it.
First - syrup
Our goal is to prepare not only tasty, but also healthy delicacies. Therefore, you need to start by preparing the syrup. Place sugar and water in a bowl and bring to a boil. Once the crystals have completely dispersed, you can add the berries and cook for 5 minutes over low heat.
Be sure to skim off the foam with a slotted spoon. By the way, it is very tasty. Children will happily eat it with tea. To prevent the berries from shrinking, remove the basin from the heat after five minutes. After cooling, the mixture is heated again. It also depends on the number of approaches whether to pour the jam into jars hot or cold. The five-minute mixture must be poured immediately after preparation, rolled up and put away under a warm blanket. And if you boiled the berries in 4 batches, then there is nothing to be afraid of.
How to sterilize and seal jars?
- First, all jars must be thoroughly washed with soda inside and out.
- The next stage is sterilization of the jars. Previously, housewives sterilized jars by placing them on the spout of a boiling kettle, but now the process is significantly speeded up - the jars are sterilized in the oven on a wire rack (not on a baking sheet) at a temperature of one hundred degrees.
- Tin lids must be boiled in a saucepan with a lid on for 5 minutes.
- When the jars are dried in the oven, they are filled with hot jam to the very neck.
- Then cover with a lid and roll up with a special rolling machine. It is important to choose the right seaming machine.
- The rolled up jars are checked for a tight fit of the lid (so that it does not move or spin) and turn the lid down and wrap it warmly. Leave the rolled jars to cool (approximately overnight).
The second method is sealing with nylon caps.
Jam prepared in this way is stored only in the refrigerator or in a very cold cellar.
- The barges are sterilized as in the first method, and the nylon lids are dipped in boiling water and the heat is immediately turned off.
- The jam is poured into a jar 2 cm below the neck level and covered with a 1.5 cm layer of sugar.
- Cover tightly with nylon lids and place in the refrigerator for winter storage.
Future plans
Already picking berries, the housewife knows what she plans to do with the preparations. You can leave something for tea, that is, eat it right now. And some should be preserved until cold weather. Based on this, the jam should be poured hot or cold. For direct consumption, they most often make a five-minute one, which is not rolled up, but stored in the refrigerator. Therefore, it is better to pour it hot, this will help destroy all the bacteria that survived after washing. In addition, this measure allows you to save time on sterilizing jars. The temperature of boiling jam is very high; it can completely replace heating in the oven or by steaming.
Tips from housewives
Irina Primorochka
I pour the freshly brewed jam into sterile jars, right flush with the neck, screw on the lids and turn it upside down. I just cover it with a towel. After cooling, the lid is pulled inward, creating an additional seal. The jam stays great at room temperature until spring.
I love kids
I pour the jam cold into sterilized jars, and the jam hot, respectively, under a blanket. Our jam has never molded, although there is jam from 2009 – 2013 in the garage now. Well, maybe it won’t mold if we roll it up, but if we closed it with screw caps or nylon ones, then I think it would mold. In general, my mother once told me that whether you pour it hot or cold only the appearance of the jam is different.
Clearfasting
The jam must be poured hot. High temperature helps to destroy all kinds of bacteria. Plus, hot jam has greater fluidity; cold jam is very difficult to pour into jars; there are many air cavities left. Actually, those who make jam know that if you wait until the jam cools down, then it will be difficult to work with it; the top may generally become covered with a frozen crust, which certainly will not contribute to pouring the jam into jars.
Green tomato
Whether the jam is poured into jars hot or cold depends on the cooking method. Previously, jam was traditionally cooked by adding sugar in a 1:1 weight ratio with fruit, and boiling it several times. Such jam was placed in clean, dry jars, already cooled, covered with plastic lids or tied with paper. The risk of spoilage of such jam is minimal. But recently they began to make jam with less sugar and for a shorter time - “five minutes”. This is due to both a lack of time and the fact that more vitamins are retained in such jam. This kind of jam should be poured hot into sterilized jars and sealed to prevent spoilage.
Elena
And I pour it into cold, dry jars. And in general, we don’t make jam anymore, we just sugar it... yum-yum!
Yunna
I always pour it hot because I don’t cook it too sweet to protect against any fungi and bacteria. And I sterilize the jars thoroughly. But many people close it cold and don’t even screw the lids on. For example, my grandmother did exactly this before, when there were no metal lids, they simply covered it with a thick piece of paper and thread and the jam stood perfectly and did not spoil, although they did not spare sugar then. And she poured it cold too. Oh, and there was delicious jam.)
SummerSunshine
I close it while it’s hot, sterilize the jars, and don’t put it under the blanket. They last a long time at room temperature and do not mold. And in Turkey they keep the jam in the sun for several days, pour it cold and don’t sterilize the jars... Well, they often get moldy, they say that in such cases they didn’t keep it in the sun enough... I don’t take that risk.
Sveta
I pour the jam into hot jars. I take a ladle and pour jam into hot jars, then the jar will not burst, but if the jars have a temperature lower than the jam, then I pour the jam, slightly covering the bottom of the jar, wait two, three minutes, then pour the jam to half the jar and also wait two, three minutes, and then I top it up.
Lileyya
And I sterilize all the jars - it’s probably already a habit) As for under the blanket - this is necessary for the fact that it has not been subjected to much heat treatment. Here are cucumbers, for example - if you cover them using the triple-fill method, then of course I wrap them until they cool. And if I sterilize it in a saucepan (or, as correct, pasteurize it? I’m not very strong in terms), then there’s no need to wrap it up. Jam and jam are boiled depending on how you do it, but usually they are boiled. Therefore, as far as I understand, there is no need for additional languor under the blanket. I put them in dry, sterilized jars, close them and turn them over until they cool.
Silver fox
Usually upside down on a wire rack, in a warm (not hot!) oven, then heat it to 200 degrees. Min 20, no more. It is very important - you need to take out the jars from the oven and place them on the table on a dry wooden board or towel, otherwise they will burst. stand for 10 minutes, cool a little, pour hot jam into them. It can be warm, it won’t do anything for him :)) actually. I have a suspicion that well-made jam can be poured into anything and stand anywhere :)))
Mowglenok
Real jam (not five-minute jam) does not need to be sterilized or rolled. I pour it hot into jars (if I’m not too lazy, I rinse the jars with boiling water, but not always), and close them with an ordinary plastic lid. I keep it on the floor under the table.
tYulka
In recent years, I’ve been loading jars into the dishwasher, setting it to double rinse, and then pouring jam straight from it, adding cucumbers, and pouring juice.
For winter storage
To prevent it from souring during storage, only two things are important. The first is getting enough sugar. If there is not enough of it, even prolonged boiling will not help. Therefore, follow the recipe strictly. The second point is the cooking time. You can simply turn on the heat and simmer the mixture for 20 minutes. It will store normally, but will look like jam. Therefore, it is necessary to approach preparation step by step. That is, heat for 3-5 minutes, then cool completely for three hours. It takes more than a day to prepare, but then it will stand at room temperature. As you can see, it is difficult to say unequivocally how to pour the jam correctly, hot or cold. It all depends on your plans for it.
Popular questions
How to seal jam to prevent mold?
There are the following reasons for the formation of mold in twists:
- Not enough sugar. Sugar is an essential component of most preserves. When making jam, it is used as a sweetener, and, more importantly, a preservative. For each can of preserved food, a separate amount of sugar is calculated, which is intended for each kg. berries/fruits. Avoiding this mistake is very simple - just follow the recipe from start to finish, and add sugar exactly in the amount indicated.
- The product is poorly cooked. The finally cooked dessert is moderately thick. Experienced housewives can determine the degree of cooking with the naked eye. Young housewives can use the following trick: put a small amount of jam on a flat plate. If it holds its shape and does not fall apart, you can safely roll it up.
- The jars are screwed while hot. This promotes the formation of condensation, which is an excellent condition for the healthy functioning of mold fungus. When rolling, the jars must be cool.
- Preservation was defined as wet or unsterilized jars. In a damp environment, the product is diluted and, accordingly, the sugar concentration decreases. Its preservative effect is lost and this encourages mold to grow in the jar. Poor processing of the jar has the same effect on preservation.
What to do if mold forms on the jam?
Many housewives, having discovered a moldy jar in the bins of the pantry, immediately say goodbye to it. However, it is worth sending it to cook for 5-7 minutes and adding sugar in the proportion of 0.1 kg for each kg of jam. In the future, you can make jelly or compote from the resulting mass, and it is also not forbidden to add it to baked goods.
Where and how best to store jam?
It is more advisable to store it in small jars - this way it will be consumed faster, and there will be nothing left in the jar to spoil. If the jam is preserved strictly according to the recipe and securely screwed, then it must be stored for two to three years in a closet or on a balcony at a temperature of ten to twelve degrees. If it is made from unpeeled fruits, then it is better to use the product no later than a year later.

