Food printing
Surely, at least once you have felt the desire to “eat” your loved one. Psychologists endlessly criticize this strange desire and offer many trainings to overcome it. We suggest not to restrain yourself and cope with this irresistible feeling without expensive consultations. Print a portrait of your loved ones, place it on a cake and eat it. It’s better to go with them, it’s more fun. And if you suddenly think we've lost our minds, then you definitely need to read on to learn all about food printing.
The world around us has long changed; it has become super-technological. One of these modern technologies that every confectioner definitely needs is food printing. The technology of applying images (photos and drawings) to a confectionery product is practically no different from conventional photo printing. The only significant difference is in the material. The basis for the image is wafer or sugar paper, and food coloring is used instead of ink. Of course, you shouldn’t try to fill the most ordinary printer with gel dyes. Indeed, in addition to consumables, all parts of the food printer are adapted for this special type of printing. You can order food printing at specialized confectionery stores, or purchase a printer and print it yourself.
Differences in printing materials.
Wafer paper varies in density. It can be thin or thick. Wafer paper has no taste or smell; it is unsweetened. Printing on wafer paper is the most economical option, but at the same time, such printing has a number of disadvantages. The structure of wafer paper is quite porous and fragile; it quickly absorbs dyes, so the colors when printed are not so rich and bright. The thinnest version of wafer paper is the most transparent; accordingly, thick wafer paper is less translucent and the image is a little brighter when printed. When working with thin wafer paper, you should pay attention to the original surface. If the cake is covered with bright, contrasting cream (or mastic), then (due to its transparency) the image on thin paper may become visually darker. Printing on thin wafer paper is excellent for small products: gingerbread cookies, cupcakes. And also for making small decorative elements, such as butterflies. Such elements can be glued to the surface of the cake or attached to floral wire. On thick wafer paper you can print both large pictures and images for small desserts. Thick wafer paper is also suitable for individual decorative elements, with the only exception that it (unlike thin paper) cannot be folded. It is not recommended to put wafer paper in contact with cream, as it is extremely “afraid” of water. It is great for mastic, dense, “dry” ganache. If you need to apply a waffle picture to a cream coating, then we recommend first gluing it onto thinly rolled mastic and only then applying it to the surface of the cake. How can you glue a waffle image? For these purposes, you can use a neutral gel (dilute in the proportion of 10 g of gel, 30 g of sugar, 100 g of water; mix, bring to a boil) or vodka.
Sugar paper is the thinnest sheet of sugar mastic, produced in special production facilities. Sugar paper is sweetish and has a light vanilla flavor. It is flexible and durable. Images printed on such paper are of the highest quality, bright and colorful, but the price of such printing is many times more expensive than printing on waffle paper. In addition, it is not recommended to store the image printed on a sugar picture for more than 5 days. After all, like mastic, such paper tends to dry out and crumble when exposed to air. On the reverse side of the image on the sugar paper there is a thin plastic backing. Before applying the image to the cake, it must be carefully separated from the design. If you need to cut out small elements, it is more convenient to do this together with the plastic coating and only then remove it from each drawing. It is also recommended to apply images on sugar paper to mastic coating, icing, or ganache. Butter or curd cream can dissolve the image, and oil cream can cause stains. However, small pictures can be applied to the creamy coating of the cake, after pre-treating the underside with melted chocolate. You can also attach images to sugar paper using neutral gel and vodka.
Application of food printing.
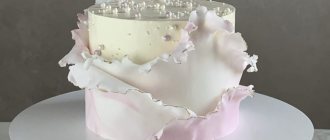
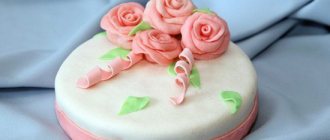
The most common and easiest way to use food printing is to apply a design to the top of the cake. Most often, the design is cut out in a slightly smaller size according to the shape of the cake (circle or square), and the remaining unfilled space is decorated around the entire perimeter with cream, meringue or other details. In addition to this option, you can use small printed elements and place them both on the surface (from the end or from the top if necessary) and above the surface of the cake. Combined techniques always look advantageous and interesting. For example, you can complement the printed element with waffle or fresh flowers, chocolate and other decor. Cakes completely “dressed” in some kind of print or ornament look very modern. For this type of decoration, food printing on sugar paper is used. Cupcakes, gingerbread cookies, macarons - you can also decorate all this with the help of edible printing. Its applications are varied and multifaceted. The final result depends only on your imagination!
Recommendations when preparing for printing:
- make sure that the image you choose is of good quality (recommended resolution 1200px);
- pay attention to the image format (JPEG, PDF, Word);
- calculate the required size and prepare a layout;
- do not forget about the margins (the space between the edge of the sheet and the picture is at least 1 cm, as well as between the pictures themselves - at least 5 mm);
- decide on the type of paper (depending on the desired decor);
- don’t forget about related products (neutral gel; icing; mastic);
- Pay attention to the shelf life of food sealing (for wafer sheets - 1 month; for sugar sheets - up to 5 days).
Edible paper. Application Guide
Edible paper, or food paper, is made from natural ingredients and is specially designed for printing on a food printer.
There are several types of food paper. They differ in composition, texture, color, thickness and taste. As a rule, confectioners use sugar and waffle versions. To work with chocolate, a shock transfer is used.
Sugar paper is recommended for beginners. It is easier to work with, it is not as susceptible to moisture as waffle. One drop of water on the waffle and the picture can be thrown away.
Taste differences
Sugar paper is sweet with a vanilla scent.
Wafer paper is porous and has a neutral taste.
All paper is edible and is used to decorate cakes, pastries, cupcakes and
All types of papers are smooth, sheet thickness is 0.4-0.7 mm. There are no glossy shiny edible papers.
The taste of the chocolate transfer depends on the chocolate where the sheet is transferred. By itself it is tasteless.
Paper handling
Sugar and wafer papers can be easily cut into pieces with ordinary scissors.
We recommend placing paper on mastic, icing, ganache or cream with low humidity. Sour cream and custard are not suitable in this case!
Additional decoration with creams on the paper itself is possible, but do it as an experiment and strictly follow the cream recipe.
WHICH PAPER TO CHOOSE?
We have 3 types of edible paper - thin wafer, thick wafer and sugar.
The best quality printing on sugar paper. I only use it for my cakes - the pictures are clear and bright, it’s easy to work with. Unlike waffle, it is absolutely not translucent, so it can be laid on a surface of any color.
When placing the sugar picture on the cake, you need to spread the gel only on the bottom. The waffle is coated with gel on both sides to make it brighter and lay more evenly on the cake. Accordingly, the waffle picture will shine due to the gel, while the sugar picture will remain matte.
If you want to save a little money or are allergic to mastic, then wafer paper will do. Thick waffle almost does not shine through. Thin waffle is best used only on a white surface.
Sugar paper
For bright, colorful images, sugar paper is most often used; the pictures are clear and bright due to the density of the paper and the use of glaze in production. Sugar paper has a sweet taste, whiter color and high density. Most often, wafer paper is used for secondary decoration (sides and various elements of the cake), and sugar covers the main part of the cake. Printing is carried out on A4 size sugar paper, i.e. The maximum size of a rectangular photo is 20cm*28cm, the diameter of a round photo is up to 20cm. Differences between sugar paper and wafer paper: Taste differences: • Sugar paper is sweet with a vanilla smell. • Wafer paper is porous; neutral taste. Differences in structure: • The quality of the design is higher on sugar paper, it is almost unbendable. • Wafer is more flexible, the pattern is duller. Sugar paper is much denser, almost opaque, smooth, and has a sweet taste with a vanilla aroma. Storage conditions for sugar paper: • Store in the packaging in which you received it. • DO NOT store in the refrigerator! • Store at room temperature, protect from drying out, avoid temperature changes (condensation is very dangerous!), avoid direct sunlight. • If you need to cut/cut out a printed image, do it immediately before placing it on the cake (before serving the cake), otherwise the paper will begin to crumble from drying out and become brittle. • Cut/cut out the printed image ALWAYS with a backing (the backing protects against mechanical damage during storage), then separate it from the sheet itself. • CAREFULLY SEPARATE THE SUGAR LEAF FROM THE BACKING BEFORE TRANSFERING TO THE CAKE. • The shelf life of the picture on the cake is 3-4 days. How to properly place sugar paper on a cake: 1. Place the cake on a solid base/surface to avoid bending it when transferring the paper, because may cause the picture to shift. 2. The sugar picture is placed on the dry surface of the cake. 3. The sugar picture is placed on mastic, icing, cake layer. 4. Place it on a dry surface. IF NECESSARY, MOISTEN THE PICTURE AT THE EDGES A LITTLE BIT WITH WATER so that it sticks. 5. Finish the sides with cream, butter or custard protein cream, etc. 6. If you have cheesecake, then place a thin piece of biscuit on top of the cheesecake, and a picture on the biscuit, otherwise it will melt. • Curd cream dissolves the image. • Fat creams will stain the sugar paper, while liquid cream will dissolve the paper. • Icing (super icing) – must be completely dry, otherwise the picture will dissolve. The cake must be placed on a hard bottom, otherwise the picture will bend and break/tear. The image should be stored on sugar paper until the cake is decorated at room temperature, avoiding overdrying and water, condensation (occurs when there is a sudden temperature change), and do not bend it. Those. It is enough to store it in the packaging in which you receive it. No need to put it in the refrigerator. If you need to cut/cut out the printed material, do it immediately before placing it on the cake, otherwise it will begin to crumble from drying out and become brittle; it is better to cut with the backing and then remove it. In any case, before transferring to the cake, carefully separate the sugar sheet from the base (protects from mechanical damage during storage). The shelf life is up to several weeks, but we recommend printing a few days before the desired date.
For bright, colorful images, sugar paper is most often used; the pictures are clear and bright due to the density of the paper and the use of glaze in production. Sugar paper has a sweet taste, whiter color and high density. Most often, wafer paper is used for secondary decoration (sides and various elements of the cake), and sugar covers the main part of the cake. Printing is carried out on A4 size sugar paper, i.e. The maximum size of a rectangular photo is 20cm*28cm, the diameter of a round photo is up to 20cm. Differences between sugar paper and wafer paper: Taste differences: • Sugar paper is sweet with a vanilla smell. • Wafer paper is porous; neutral taste. Differences in structure: • The quality of the design is higher on sugar paper, it is almost unbendable. • Wafer is more flexible, the pattern is duller. Sugar paper is much denser, almost opaque, smooth, and has a sweet taste with a vanilla aroma. Storage conditions for sugar paper: • Store in the packaging in which you received it. • DO NOT store in the refrigerator! • Store at room temperature, protect from drying out, avoid temperature changes (condensation is very dangerous!), avoid direct sunlight. • If you need to cut/cut out a printed image, do it immediately before placing it on the cake (before serving the cake), otherwise the paper will begin to crumble from drying out and become brittle. • Cut/cut out the printed image ALWAYS with a backing (the backing protects against mechanical damage during storage), then separate it from the sheet itself. • CAREFULLY SEPARATE THE SUGAR LEAF FROM THE BACKING BEFORE TRANSFERING TO THE CAKE. • The shelf life of the picture on the cake is 3-4 days. How to properly place sugar paper on a cake: 1. Place the cake on a solid base/surface to avoid bending it when transferring the paper, because may cause the picture to shift. 2. The sugar picture is placed on the dry surface of the cake. 3. The sugar picture is placed on mastic, icing, cake layer. 4. Place it on a dry surface. IF NECESSARY, MOISTEN THE PICTURE AT THE EDGES A LITTLE BIT WITH WATER so that it sticks. 5. Finish the sides with cream, butter or custard protein cream, etc. 6. If you have cheesecake, then place a thin piece of biscuit on top of the cheesecake, and a picture on the biscuit, otherwise it will melt. • Curd cream dissolves the image. • Fat creams will stain the sugar paper, while liquid cream will dissolve the paper. • Icing (super icing) – must be completely dry, otherwise the picture will dissolve. The cake must be placed on a hard bottom, otherwise the picture will bend and break/tear. The image should be stored on sugar paper until the cake is decorated at room temperature, avoiding overdrying and water, condensation (occurs when there is a sudden temperature change), and do not bend it. Those. It is enough to store it in the packaging in which you receive it. No need to put it in the refrigerator. If you need to cut/cut out the printed material, do it immediately before placing it on the cake, otherwise it will begin to crumble from drying out and become brittle; it is better to cut with the backing and then remove it. In any case, before transferring to the cake, carefully separate the sugar sheet from the base (protects from mechanical damage during storage). The shelf life is up to several weeks, but we recommend printing a few days before the desired date.
Laying on cream cheese and other wet creams
The easiest way is to pour colored or chocolate ganache over the cake and place the picture on the frozen surface, as in the instructions above. You can buy ganache from us using the link.
Another option is to stick the picture onto the mastic. Roll out the mastic thinly. Apply the decor gel to the reverse side of the picture with a brush, place it on the rolled out mastic, expelling air bubbles with an iron or a dry cloth. Cut with a knife. Turn it face down onto a dry tray and coat it with a thick layer of decorative gel. Place in the refrigerator or freezer for a few minutes. Transfer to cake. I can process a picture for you in advance - the cost is 150-200 rubles.
Examples of how to quickly and easily decorate a cake
You can decorate the cake yourself or with your baby. Can you imagine how interested he will be? :) Berries, fruits, nuts, various sweets. From us you can also buy confectionery sprinkles, meringues, mastic snowflakes, stars or flowers. I will soon add an assortment to the site