When is it time to harvest
Cleaning times vary. They are affected by the time of planting seeds :
- If the gardener does not want to grow a large harvest of turnips for long-term storage, the seeds are usually planted in early spring, a couple of weeks after the snow melts. In most of Russia this is the second half of April. They begin to dig up turnips in July. The harvest is harvested gradually, as it ripens unevenly over 2-3 weeks.
- When grown for winter storage, turnips should ripen no earlier than September. To do this, it is planted at the end of June or beginning of July. Late varieties are harvested a little later. The main thing is not to freeze the vegetables, otherwise they will not store well.
- Experienced gardeners grow 2 turnip crops over a long summer, choosing the right varieties. Early ripening ones are used already in July, freeing up the bed. In their place, another variety is planted for winter storage.
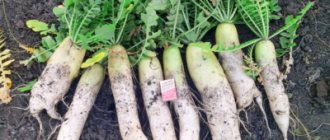
- To determine whether a turnip is ripe, pay attention to its size. It should be approximately 5 cm in diameter, the upper part should be slightly above the level of the bed. Such specimens are sweet and juicy. Larger ones are considered overripe. They become dry and hard. Small turnips are much tastier and contain a large amount of vitamin C, but are not suitable for long-term storage.
If you want to preserve the crop throughout the winter , dig up larger vegetables with a diameter of about 10 cm.
What does the term depend on?
The timing of harvesting turnips depends on its variety and weather conditions. Early ripening vegetables ripen 50 days after germination. They are planted in early spring and used immediately. Mid-season varieties ripen 90 days after the first shoots. Late ripening requires about 120 days.
Reference. The main sign of a ripe turnip is protruding from the soil. Varieties with a round shape emerge from the ground almost completely, while those with a cylindrical shape emerge only halfway.
The timing also depends on the growing region . Many gardeners rely on the lunar calendar to select favorable days for harvesting.
Harvesting from the garden to storage: harvest dates
When to harvest turnips largely depends not only on the variety, but also on the growing region.
When to dig turnips in Siberia
For summer consumption, early ripening turnips begin to be collected from the second half of June or from the beginning of July. Vegetables of late-ripening varieties are harvested from open beds for storage from the beginning of September.
Harvesting time in the Urals
Early ripening varieties are harvested two to three times per season, starting in June. It is important to have time to obtain a harvest of medium and late ripening before severe frosts. Based on weather conditions. In the Urals, cold weather can begin as early as mid-September. In warm autumn conditions, the time period shifts to early November.
Harvesting time depending on variety
Timely and correct harvesting largely depends on the turnip variety . There are:
- early ripening (summer);
- mid-season (autumn);
- late ripening (winter).
Early-ripening varieties are usually harvested in early or mid-summer , mid-ripening - in August or early September. Late-ripening ones are planted only in July and harvested before the first frost.
Note! Early and mid-season vegetables do not store well, so they are placed in the refrigerator.
From weather conditions
The root crop must not be frozen. The harvest is harvested before the first frost arrives .
If prolonged rains are expected , it is better to collect turnips from the garden: at the end of the growing season, excess moisture leads to cracking of the vegetables.
The most suitable temperature for cleaning is +10…+12°C.
From region
Approximate harvest dates depending on the region :
- in the Moscow region and the middle zone - in September;
- in the southern regions - in October, and if autumn is warm, then in early November;
- in the north of the country - in early September;
- in Siberia and the Urals - in the first week of September.
In order not to miss collection deadlines, it is important to carefully monitor the weather forecast . It happens that conditions within one region vary greatly. For example, night frosts will occur in one place, but not in another.
According to the lunar calendar
Many gardeners prefer to additionally use the lunar calendar. It is believed that vegetables collected on days recommended by astrologers will be stored better .
The lunar calendar in 2021 recommends harvesting on the following dates :
- in September - 2, 4, 6, 9–13, 15, 17–22, 24, 29;
- in October - 1, 3, 4, 6–10, 12, 13, 17–22, 31.
During the full moon and new moon, it is not recommended to loosen the soil, prune or harvest.
On a note. First of all, the weather conditions in the region are taken into account. The lunar calendar is used as an auxiliary tool. If frosts or prolonged rains are coming, the crops are harvested earlier.
Factors affecting harvest time
The weather and the variety you choose to plant are the biggest determinants of when to dig up ripe turnips. Let's look at these factors in detail.
Weather
The speed of ripening, and therefore the timing of digging up root crops, depends on the weather. The time for sowing and harvesting depends on how warm the soil is. The amount of moisture during the growing period affects the germination and development of the plant and the juiciness of the pulp.
Excess moisture is a common cause of fruit cracking. Harvesting is recommended in dry weather. This is important for storing vegetables.
Vegetable variety
The timing at which vegetables are harvested from open ground depends on the degree of early ripening. Based on the length of the growing season, turnips are divided into groups:
- Early, which is harvested after 1.5–2 months: “May yellow”, “Glasha”, “Snow White”.
- Mid-season, they try it after 2-3 months, for example, “Milan pink”, “Geisha”, “Nurse” turnips.
- Late, reaches full volume only after 90 days: “Comet”, “White Night”, “Golden Ball”.
It is recommended to choose separate beds for each variety.
Basic rules for digging
For long-term storage, it is important to properly remove turnips from the ground. There are several rules for this :
- Remove the turnips from the soil as carefully as possible so as not to damage the thin skin. If there are various irregularities or cracks, harmful microorganisms will enter through them. Such vegetables are not suitable for long-term storage; they are used as quickly as possible for food.
- It is allowed to manually pull root crops by the tops. If the soil is too dense and wet, use a shovel. It is stuck about 10 cm from the plant and tilted slightly to loosen the soil. The vegetable is pulled out by hand.
- The collected turnips must be dried, preferably in the open air, so that the sun's rays at least partially disinfect the root crops, and the wind speeds up the drying. The harvest is laid out in the sun for 2 hours.
- Immediately after harvesting, cut off the tops with pruning shears or a sharp knife. The length of the remaining cutting should not exceed 1 cm.
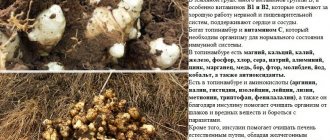
Characteristics and features of turnips
Turnips are native to Western Asia. The age of the root crop, according to experts, is at least four thousand years. In any case, the ancient Romans, who belonged to the poor classes, were well aware of the existence of turnips. Simple agricultural technology ensured good root crop yields. It was baked, boiled, steamed, stewed, stuffed...
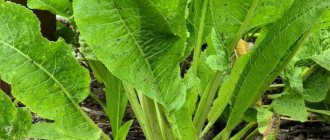
The turnip rhizome, a fleshy root vegetable, is eaten. On the high stem of the plant there is a lot of foliage: at the root they grow coarsely hairy, long-petiolate and pinnately incised, and higher up they are serrated and slightly pubescent (or bare).
In the first year of turnip life, only its rhizome and basal foliage actively develop. Flowers with golden-yellow petals appear only in the second year. Short pods develop from the flowers, inside which dark red seeds ripen, shaped like irregular balls.
Forage varieties of turnips are called “turnips”.
Preparation for long-term storage
To keep turnips for a long time, it is important to prepare them properly.:
- Harvest on time so that the vegetables do not crack.
- Dry the root vegetables.
- Inspect them for rot and damage. Set spoiled vegetables aside or throw away.
- Shake the soil off the root vegetables. They cannot be washed.
How to store turnips fresh
If you prepare vegetables correctly, they will be stored for a long time and fresh. At the same time, they will not lose their taste and beneficial qualities.
In an apartment or house
To store vegetables in an apartment, place them in the refrigerator and place them in bags or plastic containers.
There is another way : unwashed turnips are wrapped in a bag and placed in a vegetable drawer. If drops of water form inside the bag, replace it with a dry one. In this form, the crop is stored for a month.
It will not be possible to store vegetables at room temperature without using bags for a long time . Turnips will be unusable in just a few days. Due to high temperature and low humidity, it will lose its beneficial qualities and become dry.
In the cellar or basement
The cellar usually has the most suitable temperature and humidity for storage . For bookmarks, place plastic or wooden boxes, which are covered with thick paper. A layer of wet sand or fresh sawdust is poured into them. Root vegetables are placed in one layer so that they do not touch each other. The top is completely covered with sand or sawdust.
Advice! For longer storage, clay is used. This is a labor-intensive process, but it allows you to preserve turnips until spring.
Polyethylene is laid on the bottom of the box. Vegetables are placed on it so that they do not touch, and a mixture of water and clay is poured over it . It should have the consistency of sour cream. After drying, lay out the second layer of root vegetables and pour them again. It is not recommended to make more than 2 layers, as the bottom one will begin to deteriorate due to the heaviness of the top ones.
There is a dipping option . To do this, prepare garlic and clay mash. The clay is diluted with water to the consistency of thick sour cream so that it does not drain from the vegetables. To prepare garlic, grind 1 tbsp through a meat grinder. cloves of garlic and dilute the resulting mass in 2 liters of water. The mixture is required to disinfect root crops. If you have garlic intolerance, use only a clay mash.
Unwashed vegetables are dipped first in the garlic mixture and then in the clay mixture. After this, the turnips are sent to dry in a dark and ventilated room. Then they are put away in the cellar, on racks.
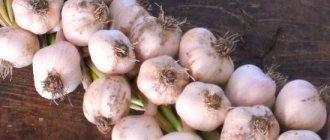
Planting dates for winter and spring garlic
It is very important to determine when permanent frost occurs in a region. In the Urals, garlic needs to be planted about 1.5 months before the arrival of cold weather. The winter vegetable is planted in the northern regions at the end of September, in the central regions from October 1 to 5, in the southern regions from October 5 to 10. However, the recommended planting dates may shift in one direction or another under the influence of weather.
Despite the cold climatic conditions, it is highly not recommended to plant garlic before the specified time: prematurely planted seeds or cloves will have time to form not only a developed root system, but also a rosette of leaves before the onset of cold weather. Sprouted garlic dies when exposed to even moderate frosts.
In contrast to the established recommendation, gardeners living in central regions in the Urals are not recommended to cover garlic plantings with mulch. Instead, the area with crops is covered with plastic film or roofing felt.
Spring planting of garlic begins after the soil has completely melted and excess moisture has evaporated from it - given the climatic conditions characteristic of the Urals, the crop is planted in early May.
You should not plant seeds in waterlogged soil - if it does not dry out over the next couple of days, the likelihood that they will spoil is very high.
Interesting: How to Store Boiled Mushrooms in the Refrigerator
The optimal soil temperature for planting crops is 5 6C. Garlic actively forms a leaf rosette and rhizome at temperatures from 4 to 10C. If you plant the cloves when the thermometer readings exceed those above, the bulbs grow small: when it’s already quite warm outside, the plant stops growing and begins to droop its head. Thus, an incorrect planting date negatively affects the size of the harvest.
The agricultural technology for planting both crops is the same: two weeks before planting, fertilizers are added to the soil and dug up. The most suitable fertilizers for garlic: well-rotted manure, compost, as well as mineral fertilizers that do not contain large amounts of nitrogen.
We suggest you read: How long should different nuts and seeds be soaked in water?
Ural agronomists recommend refraining from applying fresh manure, despite its usefulness for other vegetable plants: after its application to the plot, fungal infections more often affect garlic. Manure also contains a lot of nitrogen, which promotes the growth of tops, thereby slowing down the development of the bulb.
Bulbs of spring and winter garlic are disassembled into cloves immediately before planting them - this will prevent the lower part from drying out too much. Teeth with a slightly dried bottom can also be planted, but they will take longer to grow roots. At the same time, planting material whose bottom is very dry has low germination.
Proper planting of garlic is carried out with the largest cloves and aerial bulbs (for winter crops). It has long been known that planting large planting material will bring a generous harvest.
For good germination, the cloves must not only be large, but also healthy: you should not plant flaccid segments, as well as segments that have mechanical damage, yellow spots, mold, rot - as a result of using low-quality material, germination will be minimal.
When sorting aerial bulbs, you need to select the largest specimens with a dense structure.
For disinfection purposes, planting material is soaked for 2 hours in a cooled ash-based mixture (200 g of the substance is diluted in 1 liter of water and boiled for 30 minutes). A saline solution (1.5 tablespoons of table salt diluted in 2.5 liters of water), in which the teeth should be kept for at least 2 minutes, also kills bacteria well. Then they are immersed in a weak solution of copper sulfate - add 0.5 tsp to 5 liters of water. substances. A vitriol-based solution can also be used to disinfect soil.
Spring and winter garlic are placed in pre-prepared rows, which are located at a distance of 30-45 cm. The average step size between planting material is 8-12 cm. Very small seeds of winter garlic can be planted much denser, because not all of them will sprout. In the Urals, garlic is planted to a depth of 8 to 10 cm.
Garden manipulations for growing garlic in the Urals are slightly different from the actions of gardeners in the central and southern regions of the country.
According to experienced vegetable growers living in this area, there is no need to loosen the soil in the area where winter and spring garlic grows.
The recommendation is based on the fact that during the procedure, damage or cutting off of roots that are located close to the surface is possible. A plant with a damaged root system becomes weak and often gets sick. Instead of loosening, Ural agronomists recommend covering the plantings with a thin layer of mulch when spring arrives.
In order to grow a generous harvest, the following activities should be carried out:
- Watering. The formation of large garlic bulbs requires a large amount of moisture, so watering should be plentiful - after manipulation there should be a moist top layer of soil, 10 cm thick. About a month before harvesting, the crop stops watering: for winter garlic this time falls at the beginning of July, for spring - mid-August. Watering is stopped in order to speed up the ripening of the bulbs, rid them of excess liquid, which negatively affects the taste of the cloves, and extend their shelf life.
Feeding. Under winter and spring garlic, apply 2-3 additional fertilizers. The first of them is carried out when the height of the above-ground part reaches 10 cm: a solution of ammonium nitrate is added to the area (30-35 g of nitrate is diluted in 10 liters of water).
This amount of liquid is necessary to feed 5 m2 of plantings. For the next feeding, which is done after one month, prepare a mixture of nitrate, potassium and superphosphate.
The solution is prepared based on the ratio of ingredients 1:2:2 per bucket of water. If the first feeding activates the growth of the plant, then the second is necessary in order to extend the shelf life of the vegetable.
- Weeding. If you follow the advice of gardeners and mulch the area, there is virtually no need to pull out weeds, since they simply do not break through the mulch layer.
- Loosening. The soil in a mulched area does not need to be loosened. If the plantings are not covered with mulch, the soil is loosened after each watering or heavy rain.
Harvest and storage
In the final process of growing a savory vegetable, the timing of harvesting is very important: winter garlic ripens in the second half of July, spring garlic in September.
You can tell when the garlic is ready for digging by its appearance: the lower leaves have turned yellow and drooped to the ground. Agronomists advise harvesting immediately after the vegetable ripens, since the bulbs, which remain in the ground for a long time, disintegrate.
The procedure for harvesting garlic is identical: the bulbs are pryed with a shovel or pitchfork and pulled out by the tops. Gently shake off the stuck soil and carefully place it on the ground: it is highly undesirable to throw vegetables on a pile or knock them vigorously - such rough actions can damage the bulbs and reduce their shelf life. On beaten garlic, soon after laying, pockets of rot and mold form.
When the sun is shining brightly outside and there is no risk of precipitation, the bulbs are laid out to dry in the garden, with burlap underneath them. In rainy weather, the crop is laid out in one layer under a canopy or in a well-ventilated room.
Harvesting is best done in sunny weather, since the rays destroy all bacteria, thereby increasing the shelf life of the fruit.
After the top part is completely dry, cut off most of it. A 3-4 cm neck is left near the bulb. The fruits are placed in special bags (mesh) or low boxes with holes in them.
The temperature in garlic storage should be from 0 to 3C. Please note that the vegetable does not last long in the refrigerator: the optimal place to store it is a cellar or balcony.
Taking into account the above information, we can conclude that garlic can be grown even in such unfavorable conditions in the northernmost regions. To obtain a generous harvest, you just need to strictly follow all the instructions and recommendations of specialists who have been growing the spicy aromatic vegetable for many years.
Harvesting is best done in sunny weather, since the rays destroy all bacteria, thereby increasing the shelf life of the fruit.
Recycled storage
To further extend their shelf life, turnips are processed : frozen, dried or canned.
Freezing
Severe frost will preserve turnips until the end of spring :
- Vegetables are thoroughly washed and peeled.
- Cut into small pieces 1-2 cm in size.
- Place in boiling water for 5 minutes.
- The pieces are immediately transferred to ice water for 1 minute.
- Wait until they dry and portion them into bags.
- The packages are sent to the freezer.
Important! Repeated freezing is excluded.
Drying
In addition to freezing, drying is often used :
- Root vegetables are washed, peeled and cut into 0.5 cm pieces.
- Pour boiling water over and allow to dry on cloth or paper towels.
- Cover the tray with parchment paper and lay out the pieces in one layer. Place in the oven or electric dryer for 9-10 hours at +80°C.
- After cooling, the turnips are placed in fabric bags.
Note! The shelf life of the product is 6 months.
Conservation
Turnips are suitable for canning. In this case, the shelf life is 2 years .
One of the most common preservation options is making carrot salad. For this you will need:
- turnip - 0.5 kg;
- onion - 1 medium;
- sweet carrots - 2 medium;
- bell pepper - 2-3 pcs.;
- garlic - 2 cloves;
- greens - to taste.
For a 0.5 liter jar you will need to prepare:
- peppercorns - 4 pcs.;
- bay leaf - 4 pcs.;
- vinegar - 1 tbsp. l.;
- salt and sugar - 1 tsp each.
Preparation:
- The petioles are cut off from turnips and carrots, peeled and washed. Cook until half cooked over low heat.
- Remove from the water, cool and cut into medium strips.
- Bell peppers are blanched for 5 minutes and finely chopped.
- Greens, onions and garlic are washed and chopped as finely as possible.
- Place everything in a large container and mix.
- Banks are sterilized. Bay leaves, allspice and vinegar are placed on the bottom. Add vegetables.
- Salt and sugar are dissolved in boiling water. Fill each jar to the top with brine.
- The containers are sent for sterilization: kept in boiling water for 5 minutes.
- The jars are rolled up with pre-sterilized lids, turned over and wrapped in blankets. Leave it in this form until it cools completely.