Fragrant cilantro, just like onions, garlic, parsley, will complement borscht or other dish and bring it to perfection. But tasty, fragrant herbs appear in home garden beds only in the summer season. Experienced housewives know that there is nothing tastier than homemade greens, and when winter comes, they have to use store-bought onions and parsley. But they are completely different in taste; the fact is that store-bought herbs have the same taste. Therefore, we suggest saving homemade onions, dill, basil and other vitamin-rich plants until the next summer season. We will talk about methods of harvesting greens and acceptable recipes for preserving them below.
How to prepare greens for the winter without preserving the flavor
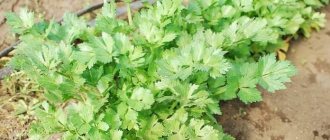
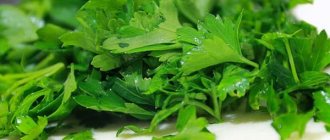
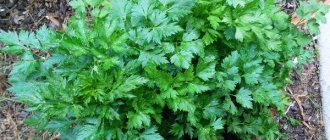
The first greenery in the middle zone appears already in May. It has a special taste and rich color. Dishes using green herbs are especially aromatic. Either because store-bought greens are not so tasty in winter, or because the sun did not have time to scorch the beds, the first shoots are considered the most successful. In addition, newly sprouted greens are still tender; their sprouts have not had time to grow old and harden.
If abundant seedlings have already sprouted in your beds, then during this period it needs to be collected and frozen. Just freeze it, not dry it. Dry herbs lose their flavor during the drying process and, if you compare freshly frozen herbs and dried ones, then during the tasting process you will feel a sharp difference in spices. Therefore, it is better to freeze greens for winter in order to preserve their natural aroma.
How to prepare greens? First we'll talk about the first and easiest way to freeze. Once you are convinced that the green shoots of onions, parsley, cilantro or other herbs have gained full growth and juice, collect them. To speed up the process, you can take scissors or a knife and cut the greens evenly. To obtain flavorful winter greens, they must be processed and frozen on the first day of harvest. This way you will preserve its natural juices.
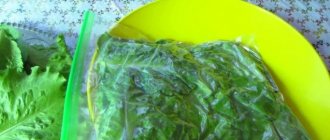
Immediately after harvesting, sort the greens by type: onion stems, garlic stems, parsley, etc. Rinse them under running water so that the greens are already clean by the time they are cooked. Now all that remains is to remove the yellow areas and rough twigs, and you can start cutting. It is not advisable to leave greens whole. The fact is that immediately after being removed from the freezer, the grass begins to melt almost immediately and instead of the usual elastic bunch, you get saggy mucus. You won't be able to cut it, so it's better to use a knife and cut it into small pieces, as in normal cooking. After this, the cuttings are placed in an airtight container to prevent excess odor from entering the herb. In this form, it will retain its aroma and taste until the next season.
The second and not so popular method is method No. 2 for growing greens before winter. Especially for winter preparations, seeds of parsley, dill, and other herbs are sown 1.5-2 months before the onset of cold weather. After its germination and full emergence, we collect it and prepare it for freezing. However, not every summer resident manages to get a decent harvest the second time, so it is better to complete garden preparations immediately after the first successful shoot.
Methods for preparing greens for the winter
Freezing. One of the most effective ways. Natural taste and vitamin qualities are preserved. In this form, greens can be stored for 8-12 months. You can do it longer; the greens will not lose their appearance, but, most likely, they will be saturated with the smell of neighboring products.
Salting. Our ancestors, at a time when there were no refrigerators, salted almost all foods. Therefore, salt in Rus' was considered a very valuable product. Nowadays, salt also helps preserve greens, and it can be stored in a regular cellar or cool pantry. You just have to forget about the color of the plant; the longer the greens are in pickling, the less green pigment will remain in it.
Drying. This is perhaps the easiest way. All you need to do is collect the greens, place them in a ventilated place without direct sunlight and wait until they begin to dry out. There is no need to dry it too much. As for parsley, dill, and basil, you don’t have to cut them. After drying, the herbs themselves will easily crumble into small pieces, so that housewives can easily place them in any container. But it’s better to chop the onions and garlic feathers in advance.
Pickling. For those who like it spicier and tastier, you can pour the marinade over the greens. Natural preservatives that we are used to using for homemade pickles will preserve greens for up to 2 years. In addition to adding to main dishes, the marinated dressing can be used as a separate salad. We will talk about recipes for cooking using the listed methods below.
Rules for storing salted products
Pickling is another way to have aromatic and healthy greens on the table all winter. They usually preserve dill, onions of various types, less often parsley, sometimes they mix everything.
Wash fresh plants, finely chop and salt. Use glass jars as storage containers and cover them with tight nylon lids.
Keep the greens prepared in this way for the winter:
- in the cellar if you live in a private house;
- on an insulated balcony if you are a resident of a high-rise building;
- in the refrigerator on the bottom shelf if there are not a lot of greens.
According to the time of pickling, it can be stored until the spring of next year, when a new harvest appears. If you do this longer, they gradually lose their taste. So calculate the amount of seasoning correctly.
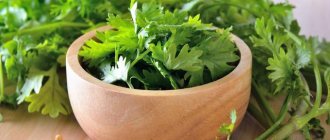
Green cilantro for the winter, recipes
Cilantro in oil
This recipe is prepared quickly, one might say in a hurry. Moreover, you can take as much quantity of the main ingredient as you like.
First of all, thoroughly wash the jars of soda or mustard. To ensure sterility, they can be doused with boiling water and heated in the oven for 1-2 minutes. During this time, wash the cilantro, let it dry a little on a paper towel, and then, without excess moisture, chop it. Place in prepared containers and fill with vegetable oil up to the shoulders.
If desired, the natural preservative can be fertilized with salt. Add salt to taste. During long-term storage, it will be evenly distributed between the leaves and will impart a salty taste. Thus, you will need to add less salt in salads, soups, and baked goods. It is better to store cilantro in oil in the refrigerator under a sterile lid.
Frozen cilantro
Curly herb, as cilantro is sometimes called, is quite aromatic in its content. It retains its fragrant properties best when frozen. Prepare several bags with special fixatives; usually such bags are sold at wholesale stores, markets or dishware supermarkets.
Cut the cilantro bunches into small pieces for ease of future preparation. Immerse them in bags and close them with special holders. If such bags are not at hand, ordinary cellophane bags will do. Some housewives even use packaging film. In this case, the greens are packaged in small bundles-brackets, so that the portion is enough for one dish. Otherwise, the remaining greenery will be impossible to fasten in the future.
Frozen cilantro in a blender
This recipe is especially suitable for those who do not like floating greens in borscht or soup. Selected and washed cilantro is crushed in a blender bowl. Grind until the bowl is filled with cilantro juice. The resulting mass must be divided into portioned ice bags or special containers from the refrigerator for storing the same ice. The container is put into the freezer, and then the resulting cilantro ice is transferred into simple bags for storage in the freezer.
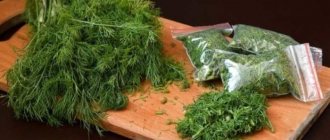
Dill for the winter, recipes
Dill is one of the most edible varieties of greens; it is consumed by vegetarians, meat-eaters and even small children. It is equally useful for everyone. So why not prepare it for the winter? We offer a recipe for pickled, dried and salted dill.
dill in marinade
For preservation, we choose small jars so that they can be conveniently used for consumption in the future. We pre-sterilize, put seasonings and finely chopped dill on the bottom. In a saucepan, boil the marinade with the above ingredients. As soon as it boils, turn it off. Pour the prepared filling over the spread dill.
We roll up the finished sterile lid, turn it upside down and wait until the greens cool down and can be taken out to the cellar. While the dill is cooling, it is advisable to cover it with an old, warm rag. After this, remove the covering fabric and transfer the jars to the cellar.
dried dill in an electric dryer
As they said in Rus', dill is a herb that cannot be spoiled by either pickling or drying. It is equally tasty to add to first courses in fresh and dry form, it is also used to fertilize pies and prepare meat dishes. The simplest method of cooking in an electric dryer requires only collecting sprigs of greenery and free space to place the drying apparatus. For preparation we need 1 kg of grass.
Carefully sort through the harvested crop, inspect the stems for orange larvae, which often appear on succulent grass. Also trim branches that have changed color, wash them and leave the excess liquid to drain on a paper towel. While the greens are resting, turn on the convector and set the temperature. A temperature of 60ºC for 12 hours will be sufficient. During this time, the grass will dry thoroughly.
During the operation of the electric dryer, you sometimes need to look at the pallets. Some of them can be changed by periodically setting the wetter dill to a low level, and the one that has dried out to a high level. Dill is not chopped for drying; the branches dry quite well and break easily when placed in containers, jars or ordinary bags.
salted dill, dry method
Our grandmothers also used this method. A fairly simple recipe that doesn't require much time. 2 kg of dill are formed into bunches. Thick branches of the lower tier, without leaves, are removed, everything else is finely chopped and placed in a basin. Jars are prepared for dill; it is advisable to choose small ones, no more than 0.5-0.7 liters.
The container is thoroughly washed, the first layer of dill is placed in it, and compacted so that when compacted, approximately 1 cm of dill is obtained. The greens are sprinkled with rock salt on top. Extra is not suitable for this, it is too small. Once the dill layer is ready, salt is added on top. Dill-salt calculation: 1:0.5 cm. The greens are laid out in alternation with salt up to the shoulders and covered with a sterile lid. You can store this recipe in the refrigerator or cellar.
Pickled green onions in jars
Fresh and juicy green onions can be pickled like other greens, but it is best to combine them with fragrant dill. First of all, it is selected and washed with cold water. As soon as the onion is dry, cut into small rings and also chop the dill as finely as possible.
The greens are mixed and placed in clean glass jars, and sprinkled with a certain amount of salt on top, at least a quarter cup per 1 liter container.
Now the jars are closed with screw caps; shaking the dishes is not necessary; let the salt remain as the top layer.
Another way to pickle green onions is to roll them whole in brine. The dressing will remove excess bitterness from the green vegetable, it will become softer, juicier and sweet and sour in taste.
To prepare the marinade, use salt, sugar, vinegar and a little fresh or dried dill. The onion is washed with water, small parts are selected that will fit in jars under the neck.
Add bay leaf, allspice, other spices as desired, salt and sugar to taste to the water on the stove. Allow the brine to boil for 10 minutes, add a spoonful of vinegar to it and pour in the hot onions laid out in the jars.
You can store the workpiece in the refrigerator or on dark shelves at a comfortable temperature. There is no need to turn over and wrap warm jars after rolling the lids. Let them cool naturally, this way the onions will better retain their crunchy properties.
Parsley for the winter, recipes
Parsley itself is a fluffy herb and loves space. Each of its leaves looks like lace in a dish. Therefore, it is recommended to place it in loose containers in order to preserve the integrity of the sheet. In this case, pickling, drying, and salting are suitable for parsley. But, if housewives prefer the consistency of this herb to be too fine, then it can be frozen or broken into small pieces immediately after drying. This herb is often used in the kitchen, but it has a special place in cosmetology. You will find several secret recipes for preparation below.
parsley in a bottle
As we have already said, each leaf of parsley is filled with originality, and its leaves look especially beautiful in first courses, but in order to preserve their natural charm, you need to know one little secret. Parsley loves space and is best stored in wide-necked plastic bottles. Chop fresh herbs and pour them under the neck. There is no need to tamp tightly. It is advisable to leave a little space between the branches and leaves. This will come in handy later.
Close the lid tightly and place the bottles in the freezer. As soon as you need a little greenery, open the neck and pour in a little parsley. It will easily pour out of the bottle. At the same time, you won’t need to pick out the parsley with a fork or try to melt the ice. Immediately after use, close the container and return it to the freezer.
parsley with garlic
Garlic and parsley are friends not only in the garden, but also in dishes. The best spice for parsley is garlic. Adjust the amount of ingredients to your liking. On average, 1 kg of parsley requires 4 heads of garlic. For those who don’t like a spicy combination, the number of cloves can be reduced. The garlic in this recipe needs to be finely chopped into cubes. The option where you need to rub it is absolutely not suitable, because... In the future, we will pack the greens in containers, but grated garlic is not so good when frozen. Therefore, it is better to spend a little time cutting it.
Chop the herbs, garlic and mix these two aromatic ingredients together. The resulting mixture can be packaged in bags, cellophane film, bottles, but it is best to make the blanks in plastic boxes. It is advisable that there is enough greenery for 2-3 times, or even for 1 serving. This dosage is necessary to eliminate foreign odors that can be obtained when opening the containers.
parsley ice
Ice and boiling water are a stunning sight when combining two components, especially if it is parsley ice. Where can I use it? In cooking or as a cosmetic product. Try cooking borscht with pieces of green ice; the kitchen will immediately be filled with herbal aromas.
We suggest chopping the parsley finely and placing it in ice-freezing molds. Ideally, grind the parsley in a meat grinder, this will release more juice. Pour running water over the laid out parsley and place the preparation in the refrigerator. After taking on a frozen form, put the parsley in a bag and tie it in a knot until the right moment. This recipe is especially popular for morning treatments. You can take a couple of cubes and wipe your face with them. You will be provided with vigor and cleansing of excess pigment, and parsley also helps well in cleansing the sebaceous glands and losing weight.
Green onions for the winter, recipes
Green onions quickly gain juice and stem strength; it is better to start harvesting them in the fall. Plant several rows with onion heads to reap a harvest of onions and their stems. This way your onions will last until the next harvest.
frozen onions
Do not think that frozen onions will quickly stick together, become crumpled and have an unpresentable appearance. In our method it will be no less attractive than in summer okroshka. So, we prepare fresh bunches. You can collect young stems together with a thin head, or you can cut off juicy stems and onions before they are fully ripe.
We wash the arrows under running water and immediately cut them into thin wheels, as for soup. Place on a tray or cutting board and place in the freezer. In this recipe we do not dry the onion leaves. Excess water will coat the onion slices with an icy glaze, which will prevent the onions from sticking together. Immediately after freezing, the chopped greens are put into bags and put away for storage in the freezer.
onion in oil
The method is very original and is suitable for those who have a lot of vegetable oil. This option is also ideal for those dishes that involve the use of vegetable oil: salads, soups, baked goods. Rinse the prepared bunches, wait for the excess moisture to drain and chop them finely. Next, place in jars and fill with oil.
Baby puree jars are most suitable for this recipe. If there is no such container, then a volume of up to 0.5 liters will do. The oil used is odorless, otherwise the aromatic combination will only be suitable for a vegetable salad of cucumbers and tomatoes.
onions with parsley and dill
Make a preparation of onions, parsley and dill. It will be ideal for winter borscht. Collect fresh herbs, soak them in clean water, remove yellowed and dried areas of herbs. Dry them in a colander, then chop and place in a large bowl. Mix in a container, and then place the resulting greens in bags or containers and put them in the freezer until winter. This way, chopped greens can retain their beneficial and aromatic properties for up to 7 months.
Drying greens
Many people use this method of harvesting greens for the winter as their main method. Perhaps few people know that with this option, very little usefulness remains in the blanks. One way or another, many continue to dry their greens. This method is as old as pickling.
In order to begin drying, the workpiece also needs to be prepared, washed, and sorted. For drying, as for the other two methods, only young twigs are suitable.
You can dry it on an old baking sheet or simply on a flat surface after covering it with gauze.
Spread the finely chopped greens in a thin layer over the surface.
Do not dry in direct sunlight. Ultraviolet light will very quickly deal with your preparations and they will lose light and aroma. Dry only in the shade in a well-ventilated place.
Also, if many people dry the workpieces directly in bunches. Very original. You can hang a couple of bunches in the kitchen for decoration. And also use it as a food additive.
You can speed up the drying a little if you use the oven. Finely chopped greens are laid out on a baking sheet and left in the oven with the door open. Dry for 3-4 hours at a temperature of 30-40 degrees, stirring constantly, and so on until done.
Dried herbs store very well in glass jars with a tightly closed lid.
Used for both first and second courses. You can also add it to some salads.
Garlic greens for the winter, recipes
- Green garlic with onion feathers. Onions and garlic have always gone well together in various recipes, be it first courses or meat dishes. Collect onion and garlic feathers, treat them with water, and then finely chop them. Mixed greens should last 6-8 months in freezer bags;
- Dry garlic. The tastiest leaves will be those that have already started to shoot. Collect them after the green tails have rounded, rinse and then dry in a dryer or oven. During drying, the herb should be turned over periodically so that it dries evenly. After this, the dried herbs are crushed and placed in cotton bags;
- Garlic cubes. They are prepared from young garlic that has just sprouted its juicy leaves. The tops are cut just above the fruit itself. Next, the collection is washed under running water and finely chopped; you can pass everything through a meat grinder or blender to squeeze out the garlic juice. In this form, the garlic pulp is poured from the main container into square molds. Everyone has them in their refrigerator. After gaining strength, frozen garlic is placed into packaging bags.
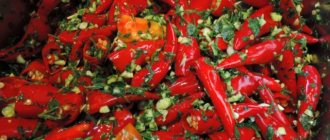
Greens with pepper for the winter, recipe
The uniqueness of this recipe is that it has a rather unusual type of storage. 1 serving of winter dressing fits in 1 pepper. To do this, take a detailed approach to the choice of each pepper. It should be smooth and approximately the same size. Let's prepare the ingredients, wash the pepper, cut off the bottom and take out the inner partition with the seeds. Set the pepper aside in this form (by the way, you can choose any color of pepper). Next, wash and chop the greens. Mix it in a separate bowl, and now you will need to add a mixture of herbs to each washed and peeled peppercorn. Add them until they fill the cavity of the vegetable to the very top. In this form, wrap the pepper in film or put it in a bag and put it in the freezer. Whenever you want borscht or a delicious meat stew in the cold winter, take out the stuffed pepper and cut it into small pieces along with its filling.
Recipe No. 2
You will need:
- 1 kilogram each of dill and parsley.
- 0.5 kilograms of celery root.
- 250 grams of salt.
- 4 tbsp. spoons of vinegar 9% (per 200ml)
How to cook:
- Sort out the green ingredients, wash and leave to dry.
- Peel the roots and cut into thin slices.
- Chop the leaves with a knife.
- Mix with salt.
- Distribute into clean containers.
- Pour vinegar into each container. Let it boil and sterilize for 7 minutes.