Celery root is a valuable, healthy, nutritious product.
More often it is used as an aromatic seasoning for dishes and for preservation, but it is so self-sufficient that it makes an excellent puree as a side dish, for example, for meat.
So much has already been said about the beneficial, even healing qualities of celery by doctors, nutritionists, and cosmetologists that I can’t even believe it – it’s just some kind of miracle vegetable! And the main thing is that all this is proven in theory and confirmed by practice.
Not every gardener takes up growing root celery, because the crop is difficult to care for.
But there are no secrets or “tricks” in agricultural technology, except for one thing: it needs constant attention. And patience.
Celery is one of the longest-growing crops: from sowing seeds for seedlings to harvesting, it will take about six months, or even more.
Growing celery in open ground
Celery is a demanding plant.
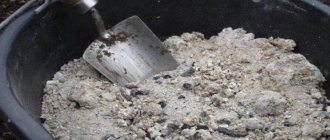
Deep loamy soils rich in organic matter are suitable for its cultivation. Light soils are not suitable for this plant. To obtain a large leaf mass, celery needs to be fertilized with manure. To plant celery, the soil is plowed or dug to a depth of 27-30 cm. Humus or rotted manure along with compost is added to the digging, and in the spring, an additional 150-200 g of ammonium nitrate is added to the digging. In addition to nitrogen, phosphorus and potassium, the soil requires the presence of elements such as calcium, boron and magnesium. Their deficiency causes chlorosis of the leaves. Excess nitrogen causes plant disease and spoilage of root crops during storage.
Celery is a salt-tolerant plant. Prefers fertile soils rich in humus, moisture-intensive and cultivated peatlands. Grows well in loose, non-acidic soils. On heavy soils, it is necessary to add humus, compost or peat under the celery. Acidic and alkaline soils are unacceptable for this plant.
Growing a good crop of celery is a task for the patient: it takes about 180 days to get a large root crop. But if you take up this matter, then you should decide on the method of growing this crop.
Planting celery in open ground
Sowing celery in open ground
Celery seeds are very small and do not germinate well because essential oils delay germination, so they should be prepared before sowing.
With the seedless growing method, the seeds are germinated. To do this, they should be soaked for 2-3 days in water, which should be changed daily. Germinated seeds germinate on the 8-10th day. When sowing with unprepared seeds, seedlings appear on the 15-20th day.
At the end of spring, beginning of summer, as soon as the soil warms up, you can begin sowing celery seeds. Before sowing, the seeds are dried and mixed with sawdust. The optimal rate for sowing is 1 g of seeds per 10 m². Small celery seeds are not planted in the soil, because... they germinate in the light, they are only slightly pressed to the surface
When planting celery, you should pay attention to the correct pattern: no less than 10x10, even for stem ones, because when thickening crops, celery forms stems that are too tall and taste dry
Planting celery seedlings in open ground
To obtain early harvests of greens and root vegetables, celery is grown through seedlings. It is prepared 60-70 days before planting in open ground. Lightly dried seeds are sown in the first half of March in boxes or greenhouses. Since celery seeds are small, it is better not to water them with water, but to spray them with a spray bottle so that they remain in the same place where you sowed them
When transplanting seedlings into the ground, you should pay attention to the temperature. In hot weather, as well as when the seedlings are somewhat overgrown, cut the leaves of the plant by a quarter, and also shorten the root
Celery is a cold-resistant crop. Adult plants tolerate frosts down to minus 7 degrees. But if young plantings are exposed to temperatures below +10 for a long time, then some plants bloom already this year, which significantly reduces the quality of the harvest.
Transplanted young plants must be shaded for 1-2 days
During the day it is important to maintain a temperature of 12-15 degrees, a little later - 14-16, at night - 10-12 degrees. And as soon as the outside temperature rises above 14-16 degrees, you can safely take the boxes with seedlings out of the greenhouses and put them in an open place so that the plants can breathe fresh air
Celery leaves and petioles contain 1.5 times more mineral salts and 11 times more potassium than roots. They are richer in carotene.
They are planted in the ground in the first ten days of May, when the plant has 5-6 leaves and a good root system. Before planting, seedlings must be watered.
Planting depth – 4-6 cm, no more, because When planted deeper, a large number of roots are formed. When planting plants, the soil is well compacted, preventing the tops from falling asleep. The planted seedlings are watered at the roots on the same day, and then periodically until they take root. Watered holes are sprinkled with dry soil.
Celery is afraid of frost. Is celery afraid of frost in the spring?
For many gardeners, the question remains whether celery is afraid of frost in the spring and what to do to help the plant survive it. Celery is not a heat-loving plant, but its seeds are too small and germination is low. Therefore, in the spring it is necessary to try to protect the plant from sudden changes in air temperature.
The crop tolerates frosts more difficult in spring than in autumn.
Ways to protect against late spring frosts
To minimize the impact of frost on the plant, gardeners use the following methods:
- Smoke. This method has become widely known due to its effectiveness. But in windy weather it has a lot of nuances, since it is quite difficult to keep the smoke within your own area, and you should not forget about your neighbors, perhaps this will cause dissatisfaction with them. Light fires on the leeward side of the site. It is important that the material does not burn out, but smolders slowly. This method is effective only if frosts are coming to a maximum of -4 degrees.
- Sprinkling. This method is used much more often than the first. It is effective in frosts down to -7 degrees. Most often it is chosen by gardeners who have a special irrigation system installed on their site, but a regular hose will also work. Sprinkling is carried out several hours before frost.
- Covering material. This method is the simplest; it allows you to protect plants from contact with the environment. For this purpose, small greenhouses, polyethylene, and spunbond are selected. The shelter should not touch the leaves of the plant. In spring, transparent materials are chosen to provide sunlight access to the plant.
Growing celery
When can you plant zucchini seeds in open ground?
Late varieties of leaf and petiole celery, as well as root celery, are grown only by seedlings; early ripening varieties of the first two varieties can be sown directly in the beds.
Sowing celery in the ground must be done as early as possible, but not earlier than April 20. First, the seeds need to be soaked for a day in water at room temperature, this will significantly speed up their germination, then we plant the seeds to a depth of about 0.5-1 centimeter in pre-prepared holes.
Growing celery in seedlings
Root celery is sown for seedlings in early March, and its shoots appear about a month later. It is best to sow celery in containers filled with a light soil mixture consisting of 3 parts peat, one part humus, turf soil and sand. For every 10 kg of this mixture you need to add twenty grams of urea and a glass of stove ash.
To get more friendly and strong shoots, celery seeds need to be stratified: place them in damp gauze, keep them at room temperature for about 6-7 days and put them in the refrigerator for 12-14 days (on the lowest shelf). Only after carrying out all the above procedures do we sow celery seeds with a planting depth of about 0.5 cm.
Immediately before sowing the seeds, the soil should be thoroughly watered. When the moisture is absorbed, scatter the celery seeds without covering them with soil, and, covering the container on top with film, leave it at room temperature. Before emergence, as the soil dries, it must be moistened from a sprayer with warm, pre-settled water. Approximately two weeks after sowing the seeds, the soil must be sprayed with trichodermin (10 mg/sq. m).
Immediately after the celery shoots emerge, you need to reduce the temperature in the room with the seedling containers to 13-16 °C. With the appearance of the first true leaf, root celery seedlings are plucked, and 14 days before planting in the ground they are hardened
You need to pick celery seedlings carefully so as not to damage the tap root of the plant, otherwise the celery will grow ugly and small. Root celery seedlings are planted in a permanent place by the end of May.
You can grow celery seedlings without picking, but in this case they will grow weaker and will take root less well when transplanted.
If you do not have the opportunity to grow celery seedlings, you can purchase them, but remember: good planting material is plants whose height reaches 13-15 cm with a strong root system and four to five branches.
Leaf celery when to sow for seedlings
According to the Lunar calendar in 2021, favorable days for sowing leaf celery:
- January: 16, 17, 21, 22, 26, 27;
- February: 12, 13, 14, 17, 18, 19, 22, 23, 24;
- March: 16, 17, 18, 21, 22, 23 - the most favorable dates, but you can sow on March 1, 2, 3, 4, 7, 8, 12, 29, 30, 31;
- in April, the best days are: 13, 14, 18, 19, 25, 26, but you can plant on 3, 4, 5, 8, 9, 28;
- May 12, 15, 16, 17, 22, 23, 24, 25, neutral dates - 1, 2, 3, 6, 7, 8, 25, 26, 29, 30.
Celery seeds do not germinate quickly, and it will take about two months for the plant to develop from germination to planting in the ground, so sowing is done from mid-January to mid-March. With later sowings, seedlings will have to be transplanted into the ground at the beginning of summer, as a result of which the harvest will only be harvested in the fall. However, in April and May, you can plant early ripening varieties, the growing season of which is about 70 days.
Leaf celery varieties
Kartuli
How and when to plant marigolds in open ground during the flowering period, before winter, or beautifully in a flowerbed in spring Photo
This is a popular variety of Georgian selection, which allows you to get the earliest possible greens. When using the seedling method of planting this plant, the first pruning of greenery can be done on the 65th day. If appropriate conditions are provided, harvesting can be carried out throughout the summer season. The rosette of celery variety Kartuli is dense, erect, with fragrant dark green leaves. With equal success, the greens of this variety will be good both fresh in salads and dried, used as a seasoning.
Among the features of this variety we can highlight its increased resistance to low temperatures and lack of moisture. It is possible to grow Kartuli celery by planting seeds in the ground. However, it will be difficult to achieve good seedlings. Experienced vegetable growers recommend pre-planting seedlings, which at three to four months of age are transferred to open ground. There are no further difficulties with growing this plant.
Variety Vivacity
An aromatic mid-season variety with a high, dense rosette. This species is mid-season and has a growing season of about 70 days. Vigor is characterized by a long fruiting period, which allows you to get an excellent harvest from several bushes. A powerful upright rosette has highly dissected glossy leaves with a delicate aroma.
It should be said that this plant is not afraid of drought and can grow well even with a significant drop in temperature. A gardener can plant seedlings at home, which are transferred to open ground at the beginning of May. Subsequent care of the plantings is not particularly difficult.
Zakhar
Zakhar is a mid-season variety that allows harvesting 100 days after the appearance of the first shoots. It is recommended to use seedling technology for growing Zakhar celery, which will allow you to obtain juicy and aromatic greens by mid-summer. A special feature of this variety is the maximum possible volume of green mass, which allows you to get an excellent harvest from just a few bushes. After cutting off the foliage, a new portion of greenery grows as quickly as possible.
The delicate leaves of the Zakhar species have a delicate, pronounced aroma. The leaves have a pronounced middle lobe, and the rosette itself is as dense as possible. This variety is excellent for processing and is also used fresh. The plants are easy to care for, which makes them quite popular among gardeners.
Gentle
The high-yielding variety Nezhny has a growing season of about one hundred days and is classified as mid-season. The Nezhny variety has a semi-vertical rosette with many side shoots. Such side shoots do not weaken the main mother plant, but rather increase the resulting yield.
It is possible to obtain both juicy greens and extremely tasty petioles. The greens are very fragrant with medium glossy dark green leaves. Leaf celery of this variety, due to its unpretentiousness and excellent yield, is popular among gardeners.
Samurai
Samurai is an early variety that allows the first harvest to be harvested after 75 days. A special feature of this variety is its curly greens, which have a strong aroma and excellent taste. The corrugated leaves form dense vertical rosettes that can reach a height of up to 65 centimeters.
By growing the Samurai variety, a gardener can get not only aromatic greens in his garden plot, but also delicious hollow petioles. The latter are perfect for processing and canning. But greens, on the contrary, are good fresh.
Having studied some types of leaf celery, you can now decide on the choice of varieties needed for your summer cottage. We wish you a good harvest!
Celery root varieties
Since the timing of ripening of root celery is the main point of tension for many summer residents, it is advisable to classify the crop precisely according to this criterion.
So, according to the ripening period, celery is divided into:
Early ripening. On average, varieties of this group require about 120 days from germination to harvest.
Weather conditions in a particular season can either shorten or lengthen the time frame.
Typically, early-ripening varieties of root vegetables are grown for fresh consumption in the current season or for storage in processed (frozen, dried, canned) form.
The most popular varieties of celery root in this category:
- Prague giant - the white juicy pulp of this root vegetable, reminiscent of a turnip in shape, is fully formed and acquires maximum benefits and taste within three months after the first green seedlings appear. It is interesting in agricultural technology because the number of lateral roots is not as large as that of some varieties.
- Apple - suitable for cultivation in the Urals and Siberia. Under favorable weather conditions, it can reach the required condition in 100 days. Root vegetables weigh on average 100-120 grams and are stored well.
- Gribovsky is more often found in the beds of Central Russia, but Siberians also successfully grow it. The pulp is light, with yellowish specks. It is this celery that is often stored dried.
- Globe - large fruits, can reach 300 grams. The pulp is juicy, aromatic, dense. This vegetable is consumed immediately, in the fall.
- Diamond - under the yellowish-gray skin there is snow-white juicy pulp that retains its whiteness after heat treatment. Weight is usually about 200 g.
Mid-season. The period from the appearance of the first shoots to digging ranges from 140-160 days:
- Giant - the name of the variety is telling, since root vegetables can gain up to 700 grams of weight. The variety is very productive, the fruit has almost no lateral roots that need to be removed. The pulp is aromatic and juicy, tastes sweet.
- Strong - almost 400 grams - the norm for this root vegetable with fragrant sweet pulp. Suitable for risky farming regions - Trans-Urals and Siberia. The lateral roots grow very low, causing no particular trouble to the gardener, and the pulp is rich in useful mineral components and sugars.
- Esaul - another Siberian - large fruits, about 300 grams, sweet, aromatic, not afraid of frost.
- Albin is a white, juicy, but dense pulp without voids. The variety is high-yielding, large-fruited.
- Egor - can last up to 180 days, so it is considered a medium-late variety. Fragrant, sweet, popular beyond the Urals and Siberia.
- Jupiter – large (250-300 g), nutritious, aromatic. Suitable for use in any form and for winter storage.
Late ripening. Ripening period is from 170 to 200 days.
The main goal of late varieties is to provide a winter supply of useful products, since late-ripening root crops have the best shelf life.
- Anita is very popular due to its yield and excellent taste both fresh and cooked. Large, up to 400 g, long-lasting, not afraid of frost, and do not shoot. Optimal in the middle zone, the Urals and Siberia.
- Maxim - 500 grams of pulp, slightly creamy in color and piquant in taste. For winter storage.
Celery plant care
Planting onions in open ground in spring and when to plant onion sets
There are a number of rules that people who grow celery need to consider.
- Open and sunny places are ideal for this plant. If there is not enough light when planting and caring for celery, then the harvest will be small.
- Leaves and stems tolerate low temperatures well, so in winter adult plants can withstand down to -9°C, but for root crops such indicators are unacceptable. To grow seedlings, a temperature of + 20-22°C is required.
- If you want to get a rich harvest of celery, growing it involves constantly moistening the soil, but excessive moisture is detrimental to it. Every week you should pour approximately 20 liters per square meter. If the season is dry, then more water is needed.
- Root celery needs to loosen the soil, especially for young seedlings. After each watering or rain, the top layer of soil becomes dense and this crust does not allow the roots to breathe normally. Loosening of young root crops is carried out to a depth of 5 cm and then it needs to be doubled.
- Growing root celery also involves mulching. You can use bark, wood chips or sawdust. The procedure is carried out when the plant is mature and has lateral roots.
Fertilizing celery
In order for the plant to grow strong, not get sick, and the harvest to be rich, it is necessary to fertilize and this is done in several stages:
- The first time the procedure is carried out at the initial stage of the growing season, and this period comes after two weeks from the moment of planting. It is worth using a herbal infusion.
- The next feeding should be carried out two weeks after the first. Use dry manure diluted in water.
- Growing and caring for celery involves a third feeding, and it must be done before July 15th. Use azophoska solution. At the end of the month, use monophosphate. When the head of the root crop forms, water the plant with a solution of boric acid.
- In the summer, when intensive growth occurs, nitrogen fertilizers must be used to properly grow celery.
Should you pick celery?
When planting root varieties, this process is important because the main root is pinched and a large fruit is formed. The celery plant should be pricked at the stage when a pair of true leaves have already formed.
- There are two versions regarding pinching root celery, some believe that it is necessary to cut roots 5-6 cm long by 0.5-1 cm, removing root hairs. Others believe that shortening the central root will harm the celery.
- When growing leaf celery, pinching the root is a mandatory procedure, but in petiole varieties this is done optionally.
How to grow leaf celery?
To grow leaf celery, it is recommended to buy seeds only from trusted outlets, since they must be of the first freshness
Be sure to pay attention to the expiration date. If the seeds are already more than two years old, then you should refuse to purchase
It is best to buy varieties with different ripening periods so that you can harvest throughout the season.
Which celery is suitable for planting before winter?
Before winter, you can sow any celery - leaf, petiole, root, and it is recommended to sow root celery in this way, since the growing season of the crop is quite significant - 5-6 months. Plants sown in autumn will sprout 2-4 weeks earlier, which will extend the growing season and get a larger harvest.
Celery care
Caring for celery consists of weeding, timely watering, loosening and fertilizing.
So, in order to prevent the evaporation of moisture and provide the roots of the plant with more oxygen, immediately after planting celery, the soil around it must be covered with peat, sawdust or simply mown grass.
About a week and a half after planting, the celery is fed with complex mineral fertilizer, for which two grams of nitrophoska are diluted in a liter of water. Repeat this feeding again - two weeks later.
If the celery leaves become pale, then the plant must be fed with urea, diluting 0.5 g of powder in 1 liter of water.
When growing different varieties of celery, plant care should also be different. In addition to a number of agrotechnical measures listed above, three weeks before harvesting, petiole celery plants need to undergo high hilling. This will help whiten the petioles, reduce the amount of sharp-smelling essential oils in them, and also eliminate bitterness.
Caring for root celery should also include several specific techniques. So, in order to get the highest quality root crop, in the middle of summer you need to free its upper part from the ground, tearing off the side roots. Thanks to this simple agrotechnical technique, in the fall the plant will form the largest possible root crop. To enhance the growth of root celery, it is necessary to press its leaves to the ground; the petioles crack during this procedure, but this only benefits the plant and does not harm the growth of the root crop at all.
All types of celery should be harvested in October. Petiole and root celery are removed completely, and leaf celery can be used for forcing greens in the winter, for which the plants need to be dug up with a small lump of earth even before the first frost and planted in small pots.
Harvesting
The harvest needs to be done in late autumn - until the end of October. The root crop can withstand frosts down to -3 degrees. You should remove the celery from the soil, carefully clean it of excess soil, cut off the leaves, leaving 2 cm of tops.
Well-dried celery is stored in a cool, dry and dark place (possibly in the cellar). It does not lose its commercial qualities almost until the summer.
Celery is a source of nutrients necessary for the body. And although the process of growing root vegetables is quite painstaking, requiring patience and hard work, and certain knowledge, the result is worth it. Having received a good harvest, you can provide yourself and your family with the necessary vitamins and minerals for the entire winter-spring period.
Digging and storing tubers
Ripe celery root tubers should be dug up as late as possible. Only in late autumn does celery gain good tuber mass and accumulate the maximum amount of nutrients. Root celery, especially late varieties, is cold-resistant. It can withstand frosts down to -3° C. Therefore, you can keep the tubers on the ridge until mid-October. Excavation begins in the second half of October.
It is better to dig up root celery as late as possible.
- The tuber is cleared of its roots.
- The leaves are cut to zero (you can even cut a small part of the tuber).
- During the daytime, the tubers can be left in the garden bed to dry out a little.
- Then the root crop is sent to the basement for storage. Storage conditions are the same as for other vegetables.
Celery
Celery occupies a special place among green crops. This is a valuable spicy vegetable crop with a high content of vitamins, carotene, and mineral salts. Celery is valued for its specific pleasant smell.
Celery can be root, leaf, or petiole.
In root celery, the root crop, from which an excellent salad is made, grows to a weight of 400-800 g. These root crops are used for forcing greens in winter conditions on the windowsill. Gardeners cultivate several varieties of root celery, primarily Root Mushroom, Apple, Snow Globe, etc.
Leaf celery does not have a developed root crop; it is cultivated to obtain fortified leaves during the summer-autumn period. It is dried for the winter and added to food for aroma and taste.
Petiole celery is grown to produce fleshy petioles; their thickness can be up to 3-5 cm. This type of celery does not form root vegetables. They eat petioles and leaves.
Petiole celery (Utah, Golden Feather varieties) can be sown directly on the bed, followed by thinning the plants (30x40 cm). In petiole celery, people eat mainly the fleshy petioles, which begin to be harvested in August. Cut the petioles into pieces 8-10 cm long, boil for 10-12 minutes in salted water, then remove and add vegetable oil, the result is a tasty dish. In the summer, during growth, the petioles are wrapped in paper, the leaf blades are left open, as a result the petioles are bleached and made tender and juicy. Some gardeners cover petiole celery with earth, this is much worse, since the petioles acquire an earthy taste.
All varieties of celery have a long growing season. To get a good large root crop, it takes 170-180 days, so root celery is grown only by seedlings with sowing seeds on March 1-10. Other types of celery are sown in open ground from April 20-25.
Celery seeds are sown in boxes filled with a mixture of turf soil and humus (equal parts) with the addition of a small amount of sand. Before sowing, seeds are washed with warm water and soaked for 3 days. Then, after light drying, they are sown. The seeds are covered with a small (0.2 cm) layer of humus soil on top. If the seedlings are dense, the seedlings are thinned out, otherwise the seedlings will be very weak and elongated. The optimal temperature for growing seedlings is 15-18°C.
Caring for seedlings involves moderate watering. Plant seedlings with one or two true leaves into pots or paper cups. In this case, the seedlings are immersed in the soil up to 1/2 of the stem. After picking, 15 days later, the seedlings are fed with a solution of mineral fertilizers (1 teaspoon of nitrophoska per 1 liter of water), using 2 tablespoons of this solution per 1 glass.
A few days before planting the seedlings in the ground, they are hardened at a temperature of 15°C, taking the boxes out onto the balcony for the day and at night. Before planting in a permanent place, the seedlings are watered.
Seedlings are planted in the garden bed on May 15-20. For cultivation as root crops, celery is planted with a distance of 35 cm row from row, and 20-25 cm between plants. Seedlings are planted in the afternoon. Add 1 bucket of humus to the garden bed (if the soil is clay or peaty), three liter jars of sand, 2 tablespoons of nitrophoska and 2 cups of wood ash or chalk. The soil is dug up to a depth of 25-30 cm.
During the growth of celery, 2 root feedings are carried out. The first - 2 weeks after planting: 0.5 liters of mullein and 1 teaspoon of urea are diluted in 10 liters of water, using 5 liters per 1 m2. The second feeding is done 3 weeks after the first: 1 glass of liquid chicken manure and 2 tablespoons of nitrophoska are diluted in 10 liters of water, spending 5-6 liters per 1 m2. Water celery once every 6-7 days, 8-10 liters each, depending on the weather; after watering and fertilizing, be sure to loosen it. Root crops are harvested at the end of October and stored in sand at a temperature of 1-3°.
You can make a salad from root vegetables: peel them, grate them on a coarse grater, add sour cream or mayonnaise (this salad is especially useful for sclerosis). In winter, several root vegetables are planted in boxes or pots to force powerful greenery; 1-2 leaves are consumed every day.
Useful tips
When sorting celery, you need to pay attention first to the color - the plants should be a rich green color, without spots or dried leaves. Check the elasticity of the petioles - if they are soft, the workpieces will quickly deteriorate.
If the rhizomes are stored in the garage - in boxes or on shelves, they should be sorted out periodically. At the first signs of rotting - a change in the color of the peel or a softening of the tuber - the celery must be disposed of, otherwise the rot will spread to the entire batch.
Subscribe to our channel in Yandex.Zen! Click “Subscribe to channel” to read Otomatah.ru in the Yandex feed
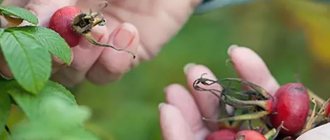
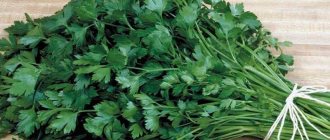
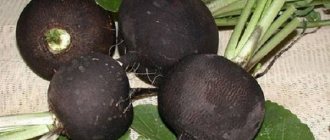
What does celery look like?
This vegetable is presented in three types, which differ in appearance:
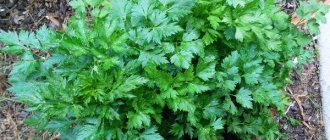
- Sheet. This plant is similar to parsley, which is familiar to many, but the leaves are larger and the stems are dense and fleshy. It can reach approximately 0.5 m in height.
- Chereshkovy. Such celery at home consists of juicy, dense stems, the diameter of which is no more than 10 cm and the length is approximately 30 cm. They are similar in structure to leeks. This species is also called pod.
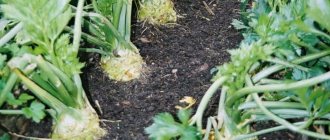
- Root. Externally, this root vegetable can be compared to potatoes or beets, but only its surface is dense and rough. The color of the dense peel is brownish-golden and the surface is uneven due to numerous depressions and protrusions.
Time for planting in the ground
The weather will tell you when to plant celery in open ground. By the time the seedlings are planted, the soil should warm up to +8 degrees. In the middle zone this usually happens in mid-May. By this time, the seedlings should have several strong leaves, a developed root system and be hardened. To do this, it is regularly taken out to the balcony or street during the day.
How to sow seeds in late autumn
To ensure that winter sowing does not cause difficulties, it is necessary to prepare for it from the end of September to the beginning of October. Preparation consists of digging, fertilizing and forming beds, selecting seeds, and purchasing planting material.
A place for autumn sowing must be chosen that is sunny, not windy, elevated - not suffering from stagnant spring moisture.
Select seeds carefully: buy varieties that are resistant to low temperatures and flowering, require short daylight hours, and are characterized by early ripening.
You can apply both organic and complex mineral fertilizers for winter crops, but always with a focus on the crop being sown.
It is necessary to start sowing when temperatures stabilize around the zero mark of the thermometer, usually this is the period of the first morning frosts. However, there is no need to rush with sowing - if the soil freezes and then thaws, this can cause the seeds to germinate and then die.
If time is lost, you can sow the seeds even in light frosts, just sprinkle them not with soil from the garden bed, but with pre-prepared dry loose soil. It is usually made up of equal proportions of river sand, rotted compost and simple garden soil.
The seed sowing rate for winter crops is increased by 25 - 50% relative to the usual recommendations.
The depth of seeding depends on the type of soil: in light soil, sowing is done 0.5 cm deeper than usual.
And under no circumstances should winter crops be watered! But be sure to mulch.
Sowing radishes. spadeandtrowel
Growing root celery - advice from summer residents and gardeners
Celery root fails for many people. Either it will fade into color, or instead of a round root crop it will form an “octopus”. However, given some rules, growing celery becomes much easier.
I sow root celery in early February, 70-75 days before planting seedlings in the ground, on the waning moon. The seeds contain many germination inhibitors, and to speed up the emergence of seedlings, before sowing, I soak them in toilet paper, washing them 3-4 times a day. They hatch in a week, but only if the seeds are fresh, from last year. Previously, when I didn’t know this trick, I sowed two-year-old seeds - only a few sprouted. That’s when I had to use the express germination method - bubbling the newly purchased seeds. As a result, after 48 hours, most of them hatched.
the SEEDS WITH THE RUDIMENTS OF ROOTS using a pointed stick in a nursery (balcony flower box) according to a 2x2 cm pattern. I make the soil loose, I bury the seeds no more than 0.5 cm. When shoots appear, I make sure to turn on the lighting. Without it, the sprouts will stretch out in a matter of days, wither and die.
IN PHASE 1-2 TRUE LEAVES, I dive celery into cassettes measuring 3x3x5 cm, pinching the central root (this makes the root crop larger and more tender, without fibers). I feed with complex (N, P, K) fertilizer once every 3 weeks and constantly make sure that the soil does not dry out. I judge by the leaves whether the plants have enough nutrition. They should be intense green, not pale (starved) or bluish (overfed).
I PLANT seedlings into the soil after the frosts have passed. If the plants freeze slightly, they will not die, just some will go into bloom. The same thing, by the way, happened after the strong May heat. Here you can no longer count on the spine.
PLANTING SCHEME – 20x30 cm, I try not to destroy the earthen ball and under no circumstances bury the bushes. After planting, I water it abundantly. Celery is sensitive to water throughout the growing season. I don’t add mineral fertilizers - celery grows in beds where compost was added last year.
When the plants get stronger, I unhill them - I expose the shoulders, and several times a season I cut off the roots growing horizontally with a knife. If the leaves lie on the ground, I tear them off and use them as a seasoning for soups, vegetables, meat, and in marinades.
Root crops grow most actively at the end of August and September, when the days shorten. At this point, I leave only those leaves on the plants that grow vertically upward, and tear off the rest. And as a result, quite decent root vegetables grow - from the size of a large apple to a large grapefruit (depending on the variety). In September, I cover the celery bed with sawdust - this “coat” protects it from frost. However, when the night temperature drops to minus 5°, I dig up the root vegetables, lightly dry them in the greenhouse and put them in the cellar, sprinkled with dry sawdust.
© Author: I. BOGDANOVA Tver region.
Leaf celery harvest and storage
Now let's talk about how and when to harvest leaf celery.
Leaf celery is harvested in several stages. The first stage begins 2 months after transplanting seedlings into open ground. Leaves that have reached a length of 30-40 cm are cut off. Between cuttings you need to take a break of 2-3 days. This method allows you to preserve the maximum amount of nutrients in the leaves. At the same time, the cutting height directly affects the quality of the product in the future. Therefore, leaves are cut at a height of 5-7 cm from the ground. This height does not damage the central underdeveloped leaves and makes the plant more resistant to rot in winter.
After cutting, there are several ways to store celery:
- in the refrigerator (not frozen);
- drying;
- freezing;
- salting
Each method is suitable for different uses.
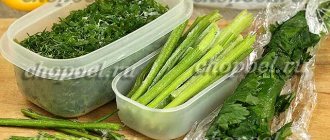
If you know that you will need some of the greens in the next 10 days, you can place them in the refrigerator, wrapped in aluminum foil. If you wrap celery in cling film, it will begin to spoil on the fourth day. Drying celery makes it possible to reduce the volume of the plant and store it outside the refrigerator. To dry the leaves, after collecting them, you need to spread them under a canopy so that they are ventilated, but not exposed to direct sunlight.
You only need to spread the celery in one layer and turn the leaves over to the other side from time to time. The readiness of the product is determined by the crumbling leaves and their change of color. If there is not a lot of product, then it can be dried at home. To do this, paper is spread out, celery is laid out on it and another layer of paper sheets is placed on top. It takes about a month to dry indoors.
If celery will be used to decorate the table, it can be frozen
It is important to understand that after freezing the plant will lose some of its vitamins and minerals. Select non-yellowed branches for freezing.
Grind to the desired size, fill with water and freeze. An interesting way to store celery is pickling. To do this, take 100 g of salt per 500 g of leaves and pickle them in jars. After this, the pickling should be allowed to brew for two weeks and can be eaten. The containers do not need to be placed in the refrigerator, as the salt will prevent the leaves from rotting or becoming moldy.
You can grow a lot of tasty and healthy vegetables, fruits and seasonings in your garden.
Now you can add celery to this list. These greens will not only help decorate the table or cook delicious borscht, but will also be useful when marinating meat or fish, and canning food.
How to Freeze Celery Stems
One option for preparing celery for the winter is to freeze it. This is a fairly simple and convenient way to store this product.
Required Products:
- Celery stalks – the amount you need;
- ice for cooling water.
Preparation:
The first step is to separate the stems from each other. This will help thoroughly wash each one without leaving behind any sand or dirt.
Afterwards, the celery stalks should be cleared of hard threads by prying the ends with a knife. Cut to the size you need.
Next, the celery should be blanched. To do this, you need to boil water and add chopped celery into it. After the water boils again, boil for up to 2 minutes.
Important! Blanch celery to extend its shelf life when frozen.
While the celery is on the stove, you need to prepare ice water. Add a handful of ice cubes to cold water.
Drain the celery in a colander and immediately place in ice water. This will help you quickly stop the cooking process. Throw the already cooled pieces into a colander again and leave for a while so that all the water drains.
Place paper towels in two layers on a clean table. Place pieces of celery on them so that they do not touch each other. Blot the top with another paper towel. Leave for 30 minutes.
Next, take a cutting board, wrap it in plastic and place pieces of celery on top of it, so that they do not touch each other. Place in the freezer for 2.5-3 hours to freeze.
Next, transfer the frozen pieces to a plastic container or plastic bag and return to the freezer for storage.
How to bleach petiole celery
Bleaching petiole celery using a bottle
Most stalked celery varieties need to be bleached to avoid ending up with a sea of tough greens on fibrous green stems. Ideally, celery for petioles is grown in deep trenches, sprinkled with soil as it grows. It is underground that celery petioles acquire that fragile, delicate, juicy taste of the snow-white stem core. In addition, bleached celery does not taste bitter.
But even if you didn’t know (or forgot) and planted celery not in a trench, but in a regular bed, it can be bleached in a special cunning way.
A month before harvest, that is, at the beginning of September, it is time to begin the bleaching procedure by isolating the celery stalks from light. By this time, the plant should stretch at least 30 centimeters upward. The leaves are collected at the top in a bunch and tied loosely with soft fabric tape. Then, from the soil itself, the stems are wrapped with wrapping material. Only the leaves remain unwrapped. The winding is secured with twine or tape and left for three weeks. After this, the celery can be dug up along with the roots without opening the package. One that is not immediately eaten can be buried in moistened sand in a cellar or other cool room.
Bleaching petiole celery using penofol
What materials are suitable for wrapping celery stalks.
- Newspapers and magazines.
- Wrapping paper.
- Unnecessary wallpaper.
- Cardboard and corrugation.
- Boxes.
- Dark plastic bottles or tubes that fit over the stems.
- Penofol.
- Straw.
Self-bleaching celery varieties
If you don’t want to bother with bleaching at all, you should purchase self-bleaching celery varieties for planting:
- "Gold";
- "Latom";
- "Tango";
- "Celebrity";
- "Golden Feather"
Self-bleaching varieties are less resistant to cold. They need to be harvested at the end of August - beginning of September, and the petioles, for the sake of which all the bleaching manipulations are carried out, should be eaten as quickly as possible.
The newest species of this vegetable plant grown in cultivation is petiole celery. If you have a small piece of soil in your summer cottage, try growing petiole celery. It will bring aromatic juicy greens, dense crispy stems and undoubted benefits to the body.
Pre-winter sowing - early vitamins from the garden
By spring, we had already used up the supply of vitamins accumulated over the spring, summer and autumn, when there was an abundance of fresh berries, vegetables and fruits. Fruits and vegetables stored for winter, no matter what ideal conditions are created for them, lose a significant part of their nutrients by spring. How can we make up for the resulting deficit?
You can buy gifts of nature in a supermarket or market. Of course, if you trust the integrity of the manufacturers. Or purchase a complex of vitamins in tablets at the pharmacy (and don’t forget about quality here). But there is another way: to sow vegetables and herbs in your garden before winter.
In early spring, the lack of vitamins is especially acute.
Leaf and head lettuces, arugula, dill, parsley, spinach, spring onions, radishes, beets and carrots - how do you like the star composition for a spring vitamin salad? Do you remember that young leaves and petioles of carrots and beets are a storehouse of vitamins? They are also in the salad! Before winter, you can also sow cauliflower, Chinese and red cabbage, salad mustard, celery (for greens), borage and parsnips.
Choose varieties of greens and herbs for sowing before winter in our catalog, which contains offers from large online stores of seeds and planting material. Choose seeds of greens and herbs.
Brief description of cultivation
- Sowing. Root celery is sown for seedlings in the last days of February, and leaf celery - half a month later. Seedlings are planted in open ground in the first days of May.
- Illumination. Well lit area.
- Priming. Suitable soil should be light, loose and nutritious; sandy or loamy soil, which should be neutral or slightly alkaline, is best suited.
- Watering. Water once every 7 days, while 2–2.5 buckets of water are consumed per 1 square meter.
- Fertilizer. During the season, you will need to carry out 4 feedings: seedlings are fed with Nitrophoska solution 7 days after picking; herbal infusion 7 days after transplanting seedlings into open soil; after half a month, fertilize with a solution of mullein or chicken droppings; superphosphate solution in the last days of July.
- Reproduction. Generative (seed) method.
- Harmful insects. Celery (borscht) flies, carrot flies, bean aphids.
- Diseases. Rust, septoria (late burn, or white spot), cercospora (early burn), downy mildew and cucumber mosaic virus.
Planting in the garden
When to plant
From about mid-May, as soon as warm weather sets in and the threat of frost has passed, leaf celery is planted in open ground. The air temperature for growing celery should be at least +10 degrees.
Attention! For good growth and development, leaf celery needs a temperature of about +18..+22 degrees. Colder air will cause flower stalks to form on plants, and greenery will practically not grow.
Preparing the soil in the garden bed
Celery can be planted after almost any crop, except celery itself, parsnips, carrots, parsley, beets and dill.
You will be interested to know: When and how to sow celery for seedlings to get quick shoots
It is recommended to prepare the bed in the fall or at least a few weeks before planting the seedlings. When digging, the soil is fertilized with compost or humus and superphosphate is added (for each square meter - 25 g of fertilizer).
Transfer
Planting pattern for leaf celery: 35x40 cm. However, some gardeners plant leaf celery more densely according to the pattern - 20x20 cm.
The holes should be of such depth that the roots of the plant enter them, which are sprinkled with soil and watered. When planting, you need to follow the center of the outlet. This is the growth point that should remain above the ground.
Attention! In order for celery leaves to grow vertically, thickly and lushly, after planting in the garden, the plants can be wrapped in foil or paper (as in the photo). Before cutting the greens, the winding is removed.
To make caring for celery easier in the future, it is recommended to sprinkle the soil around the plantings with mulch. It will prevent weeds from growing and will retain moisture in the soil.
Features of celery
The herbaceous plant celery is a biennial, it reaches a height of about 100 centimeters, its root is thickened. During the first year of growth, the bushes develop a root crop, as well as a rosette consisting of shiny pinnately dissected leaf plates of a dark green color. And in the second year of growth, shoots form, flowering begins in mid-July. The emerging umbrellas consist of greenish-white flowers.
This culture is moisture-loving and frost-resistant, seed germination is observed already at 3 degrees, while friendly shoots appear at a temperature of 15 degrees. Young seedlings can withstand frosts down to minus 5 degrees. The round, almost double fruit has thread-like ribs on each half. Today, 3 varieties of celery are cultivated: leaf, root and stem (petiole). The most popular green crops are: celery, dill and parsley.
Heat treatment and canning
The root and petiole varieties of celery are canned. In a dish it can be either the main component or just a flavorful addition. Marinades, purees, and pickles are prepared from celery. Fermentation is considered a relatively simple method:
- Grate the shoots and roots on a coarse grater.
- Add grated carrots, sweet pepper.
- Mix all ingredients and place in an enamel container.
- Place in the refrigerator.
Pickled celery is used in the preparation of soups, vegetable casseroles, and stews. Since celery is so healthy, it's wise to do everything possible to keep it fresh until spring. Simple tips and tricks will help you have tasty, vitamin-rich food all year round.
Article Rating
( 1 rating, average 5 out of 5 )
What to consider when sowing seeds
The seedling method in our climatic conditions allows us to grow large root crops in open ground. The first thing to consider when sowing seeds is the growing season of the variety. This characteristic is important for gardeners in the middle zone and Siberia. The ripening period for root celery is 150-200 days. It makes sense to sow only early varieties.
Celery is a healthy root vegetable
Brief overview of varieties
Summer residents near Moscow, gardeners in Siberia and the Urals, prefer early varieties. Purchase statistics indicate the popularity of root celery:
Judging by the reviews, large-sized, good-shaped root crops can be obtained by growing the Parisian Giant and Diamond varieties. The Early Apple variety has been known for a long time, but the harvest is usually not impressive: the size of the root crop is small, there are many adventitious roots (beards), and the shape is not beautiful. The Parisian giant weighs about 800 g and matures in 120 days. Diamant has smaller specimens (300 g), the growing season is 150 days.
Time of sowing in exhaust gas
Seeds take a long time to germinate – 2 (3) weeks. In the OG, seedlings are planted after May 20-25, which means that seedlings should be sown at the end of February. By this time, purchase high-quality commercial soil. It may be more expensive, but proven. To guarantee, you can water it with a phytosporin solution a week before planting. Soil composition:
- peat;
- humus;
- sand.
Containers for sowing and picking
For sowing seeds, it is convenient to use inexpensive plastic containers with lids with a volume of 500 g. They have the optimal size. When the lid is closed, moisture does not evaporate. It turns out to be an excellent greenhouse if you put the container in a transparent plastic bag.
It is recommended to soak the seeds to speed up germination. But this doesn't make much sense. If you are lucky, the seeds are of high quality, they will sprout well even without soaking. No luck, so soak it, don’t soak it - the result will be disastrous.
Buy disposable cups with a volume of 250-300 g for picking seedlings. Do not need anymore. The plant reaches a small size before planting in exhaust gas.
Sowing seeds for seedlings: step-by-step instructions with video
Sowing work begins with the preparation of seeds and soil.
Seed treatment
Before sowing, it is recommended to disinfect leaf celery seeds for 30 minutes in a strong solution of potassium permanganate, then rinse and soak for two to three days in water.
For soaking, it is recommended to take melt water, which should be at room temperature. A gauze or cloth napkin is moistened in it, onto which the seeds are sprinkled. To prevent the napkin from drying out, place it together with the planting material in a bag or container with a lid.
After 2 days, the seeds are laid out on dry paper and dried. To make it easier to sow, the seeds can be mixed with sand before the procedure.
Soil preparation
Today, soil mixture can be purchased at the store, but many gardeners prefer to prepare soil for seedlings themselves.
The soil for sowing leaf celery seedlings should be loose and nutritious. To prepare it, you can take equal parts and mix:
- garden soil;
- sand;
- peat;
- humus.
It is important! If the soil for seedlings from the store contains a large amount of peat, it is recommended to add ash or dolomite flour to it (20-30 g of deoxidizer per 1 kg of soil). This is necessary because celery does not like an acidic environment.
Sowing procedure
A box or container with drainage holes is filled with slightly moist soil, over the surface of which leaf celery seeds are distributed. Seeds germinate in the light, so they need to be lightly pressed to the ground and sprinkled with warm water on top using a spray bottle. The seedling container should be covered with a lid or cling film to create a greenhouse effect. You will get a greenhouse, which is removed to a bright, warm place with an air temperature within +20..+24 degrees.
Attention! Sowing leaf celery seeds is done in rows, the distance between which should be about five centimeters.
Every day the cover must be removed, condensation removed and the soil moisture checked. If the top layer of soil begins to dry out, it is sprayed with warm water.
Shoots should appear in about two to three weeks.
WATCH THE VIDEO - HOW TO SOW LEAF CELERY FOR SEEDLERY