The benefits of modeling salt dough for children
Modeling is plastic creativity. The process of creating new forms and images allows children to express their mood, emotions, feelings and attitude towards themselves and the world as a whole. Creative thinking, imagination and fantasy become richer. Working with pliable material with your fingers develops fine motor skills, and massaging the nerve endings in your hands allows you to relax.
The creative visual process develops the child’s artistic abilities, teaches him to realize his ideas and contributes to the formation of character.
Creating three-dimensional figures improves spatial thinking. The process teaches you to imagine a three-dimensional image of the final result, achieve it and adjust it as you create the figure. Painstaking work contributes to the development of perseverance; the duration of the process teaches you to plan your affairs during the day. Modeling with adults promotes lively communication. A fun creative process will allow you to spend your time profitably and preserve the results for a long time in the form of original crafts and souvenirs.
Water temperature and its effect on the dough
It is necessary to take into account the effect of water temperature on dough particles. The best swelling of flour and dissolution of crystalline raw materials occurs at elevated temperatures. The higher the dough temperature, the faster the process of dehydration of sugars occurs, and the frequency of interaction between protein, starch and water molecules increases.
The plasticity of salt dough can be achieved at a raw material temperature of 18 to 25 ° C. Elastic-plastic dough is obtained as a result of complete swelling of flour proteins at a water temperature of 38-40°C. To create a homogeneous mass, the mixing process is important. The better the quality of flour and the higher the gluten content, the longer the kneading.
When mixing flour, water and salt into a homogeneous mass, the process of dissolution of crystalline raw materials and swelling of flour colloids is accelerated. Stirring accelerates the process of gluten formation in the dough, so kneading the dough for a long time until a plastic and elastic mass is obtained.
The easiest recipe for salted play dough
This is a classic version of preparing this dough. In order to do everything correctly, you need to prepare the following ingredients:
- a glass of white wheat flour;
- the same amount of fine salt, “Extra” type;
- half a glass of cool water.
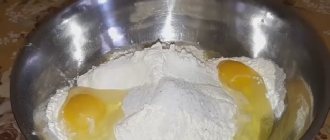
First, mix the dry ingredients in a large bowl, then gradually add the liquid in small portions. You need to stir constantly so that the dough does not form lumps and is homogeneous. At the end of cooking, the dough should be smooth and dense, but not hard.
Be sure to check the integrity of the skin on your hands, as salt greatly irritates the skin, which will cause pain and severe itching. Then rinse your hands with clean water and apply oil or hand cream.
Rules for preparing salt dough
The finer the salt used, the more homogeneous the modeling mass will be.
It is better to take the highest grade flour, as other varieties do not have such stickiness, in addition, they may have a somewhat grayish tint. It must be sifted to avoid lumps, and added to the liquid in parts. Depending on its quality, the same volume of water may require more or less flour.
The colder the water, the more flexible the dough will be.
Salt and flour are materials of different density and mass, so in one glass there will be less flour than salt. Therefore, when preparing salt dough, it is better to use scales.
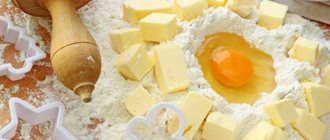
Glycerin based dough
This recipe for salted modeling dough is suitable for those craftsmen who want to give their crafts a natural shine, without the use of acrylic varnish. Glycerin, which is part of the ingredients for preparing this type of dough, ensures that the finished products will have a glossy surface even without varnish.
You will need to prepare the following components:
- half a liter of boiling water;
- two glasses of wheat flour;
- half a teaspoon of liquid glycerin;
- 2 tbsp. l. vegetable oil;
- half a glass of salt;
- 2 tbsp. l. cream of tartar;
- food coloring of any required color.
In a large container, mix salt and flour, add vegetable oil and cream of tartar. Place a pan of water on the fire. After it boils, add the resulting mass to it and boil until smooth. After a while, glycerin and food coloring are added.
When the salted dough is ready, you need to cool it and knead it with your hands until it sticks to your palms. If there is not enough flour, you need to add a little while kneading.
Colored dough
You can add color to the dough both during the preparation process and after final drying.
Paint is added to the dough itself after flour, but before it rests. This will make the color more uniform. You can add any paint to the dough - oil, acrylic or gouache. When water-soluble paints dry, they lose their brightness, the products turn out matte, in pastel colors, and sparkle a little in the sun due to the content of microscopic salt crystals. Oil paints remain just as bright, the products will delight the eye with rich colors and glossy shine. However, such a recipe for salted play dough is not advisable for children, especially if they are very young. The paint still has a chemical composition, in addition, to make parts you will have to use different colors, and it is unlikely to be possible to redo any area.
Painting finished products from salt dough for modeling is no less fun than making the figures themselves. The dough absorbs paint well, so the lines do not blur, and after drying the product does not need to be varnished. However, only well-dried figures should be painted, otherwise they may become covered with small cracks.
Mixture with PVA glue
As you already understand from the title of this section, we will talk about a recipe for salted modeling dough with the addition of PVA glue. Have to take:
- two glasses of white flour;
- half as much salt, it is advisable to take only fine “Extra” salt;
- lukewarm water - half a cup;
- 50 ml of white thick PVA glue.
First, as usual, mix the dry ingredients - flour and salt. Then warm water is poured in and the composition is thoroughly mixed. Some people use a blender to achieve smoothness faster, but it doesn't really matter. You can mix the mixture perfectly with your hands. When the dough has the desired consistency, add PVA glue to the bowl and knead again.
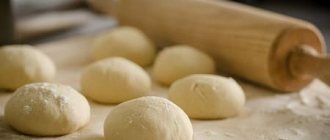
After obtaining a beautiful, homogeneous dough, you need to roll an even and smooth ball, wrap it in cling film and put it in the refrigerator for a while.
Salted play dough with starch
Let's consider another option for preparing dough for making crafts, which uses starch. The composition is as follows:
- one tablespoon of starch;
- the remaining proportions of salted play dough are equal: one glass each of water, flour and fine salt.
First you need to dissolve the starch in half a portion of water. There should be no lumps, the powder dissolves completely, resulting in a homogeneous white liquid. The rest of the water is poured into the pan and brought to a boil. Then the starch liquid is slowly poured in and with constant stirring we achieve a thick jelly.
Mix salt and flour in a large bowl, then add cooled jelly in small portions, stirring constantly. The dough should not be too soft, otherwise the crafts will not hold the required shape and will fall apart.
The salted dough should be tight enough so that it can be, for example, rolled out with a rolling pin and squeezed out with molds, or molded into a sculpture so that it has the correct outline.
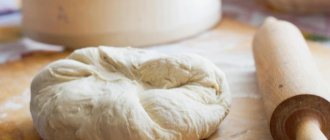
How to make salt dough
Modeling dough is made from wheat flour, fine table salt and water. The amount of ingredients is taken in the following proportion:
- flour – 1 part;
- salt – 1 part;
- water – ½ part.
All ingredients are thoroughly mixed. To make the dough more durable and not break when drying, you can add a tablespoon of PVA glue.
Watch a video from Elena Puzanova on how to prepare salt dough for crafts
Play dough without flour
This is an original recipe that uses potato starch instead of wheat flour. Although, you will still need quite a bit of flour when kneading.
Ingredients:
- 1 tbsp. starch;
- 2 tbsp. baking soda;
- ½ glass of water;
- dye.
Preparation:
- Mix starch and soda in a saucepan.
- Pour water into the mixture in a stream, stirring all the time.
- Cook over low heat until a ball forms.
- Cool and knead, pouring a little flour on the table.
Crafts made from starch dough will be no less successful than those made from flour dough.
Favorite recipe for children
This salted play dough at home is created with additional ingredients that allow products made from it to glow in the dark. Let's look at the composition of such a test:
- 2 tablespoons vegetable oil;
- two glasses of flour (wheat);
- the same amount of warm water;
- 100 grams of fine salt;
- 4 teaspoons cream of tartar;
- 2 capsules or tablets of vitamin E.
First, a dry mixture of flour, salt, and cream of tartar is mixed. A tablet crushed into a fine powder is also added there. After thorough mixing, add water and vegetable oil. But this is not the whole cooking process. The resulting homogeneous mass must be put on fire and simmered over low heat until the mixture begins to stick; the consistency should resemble ordinary plasticine.
How to dry dough crafts
Drying is an important step in making dough figures. The workpiece may deteriorate, crack, burst or warp due to improper drying. Drying dough products can be done in different ways.
The natural way is in the air
In summer, dough pieces can be air dried. It is better to choose sunny places. There, a millimeter of the product will be dried in a few hours. You can dry a small figurine in a day. However, items that are too thin may bend slightly. Therefore, it is better to place thick products in the sun. For drying, you need to choose flat surfaces so that the figures do not spoil their appearance or become deformed.
On the heating radiator
Dough crafts cannot dry in the air in winter, so the heat of the sun will replace the heating radiator in the cold season. The main thing is that its surface is smooth. The products are also laid out on the radiator. They dry faster than in the sun if the radiator is hot. If the radiator has a complex shape, then the dough figures can simply be hung next to each other by a thread. This is more convenient to do, for example, when drying on a radiator.
In the oven (gas or electric stove)
Drying a product in a gas stove takes half as much time as in an electric one.
Example
. A wreath in an electric stove is dried until ready in 6 hours, but drying the same wreath in a gas stove takes only 3 hours! By slightly opening the oven door, you can adjust the temperature in the gas stove (on the lowest heat):
- 1 hour - door half open
- 1 hour - for a quarter
- 1 hour - door closed
To brown the product until brown, add gas and constantly monitor the product so as not to burn it.
To dry the finished product, carefully, using a wide knife or spatula, transfer it from the work table to a baking sheet sprinkled with flour, being careful not to damage it during transfer.
Dry the craft for two days, first in the open air, then in the oven at a temperature of 50°C, gradually increasing the temperature, but not higher than 150°C. If the temperature is too high, the product may swell, sometimes even cracks appear. Swollen crafts cannot be fixed, and cracks are easy to cover up. To do this, dilute a little flour with water, add PVA glue, mix well and apply this mixture to the crack, then rub the mixture into it with a stick or your finger.
The product should not remain damp. Its readiness is determined by its sound. By tapping the finished product with your finger, you will hear a ringing sound. If the sound is dull, the product needs to be dried.
For large items, you can use combined drying: first for several days in the air, then in the oven.
Note. If you start drying the product with the oven door closed, bubbles will form on the surface.
Drying time in an electric stove oven
- 1 hour - at t 50°C
- 1-2 hours - at 75°C
- 1 hour - at t 100-125°C
- 0.5 hours - at t 150°C
Larger pieces will require more time to dry.
You can also use another calculation formula: drying time in an electric stove oven is 1 hour for every 0.5 cm of thickness at a temperature of 75°C. Further, regardless of thickness:
- 1/2 hour at 100°C
- 1/2 hour at 125°C
- 1 hour at 150 °C
- Browning - at 200°C strictly under supervision!
Note. The black baking tray heats up more, and at all stages of drying the temperature is reduced by 25°C.
It is difficult to calculate exactly the time it will take to dry crafts in the oven. All ovens are slightly different. Therefore, to reduce the frustration of ruined work, make several samples, for example, make cakes of different thicknesses and dry them in your oven, changing the temperature.
Where to store the dough
The finished product has its own requirements for storage conditions. In the kitchen, the mixture expires after 1-2 hours. There are two places where you can store the product for a long time. This is a refrigerator and a freezer. Each type of semi-finished product requires special storage conditions, time and temperature.
In a refrigerator
According to the state standard, raw dough can be kept on the refrigerator shelf from 9 to 36 hours. The exact time depends on the type of product or its components. Before you put the semi-finished product on the shelf, you should learn how to properly store the dough in the refrigerator.
- Only small amounts of raw food can be stored on the refrigerator shelf.
- The mass must be thoroughly mixed, collected into one lump, and greased with vegetable oil on top.
- The semi-finished product must be wrapped in cling film, parchment, or placed in a bag. In the case of a yeast mixture, it is very important to leave a small hole for oxygen to enter.
- The mass is placed on the shelf where the temperature is lowest.
In the freezer
You can store the raw product at low temperatures from 1 month to six months. In order for frozen dough to retain its taste, the following conditions must be met.
- The semi-finished product must not be thawed or re-frozen. It is better to divide the mass into parts for one-time use.
- It is necessary to form a dense lump or roll from the mass. A thin layer will quickly lose quality, and products made from such a product will not be tasty.
- All types of semi-finished products must be kept in airtight containers or bags. To avoid sticking, the walls of the container should be treated with refined vegetable oil.
How to determine product readiness
It is important to determine the readiness of the workpiece in time during drying. You can calculate how long it takes a millimeter or centimeter of a product to dry under different conditions, but much in this case depends on weather conditions if drying is done in air, or on temperature if the workpiece is dried in an oven or on a radiator. You can keep the items for the same amount of time, but on different days or in different devices, they will dry slower or faster.
If the figurine is thin, then its readiness is immediately visible: it becomes hard. Larger products are checked for readiness in other ways. Medium-thick workpieces are checked by knocking. It is enough to tap the surface of the figure with your fingertips or a small hard object. If the sound is clear, then the product has dried well.
It is better to check thick figures with a thin match or needle, just as housewives check baked goods. A match is used to pierce the product in a place that can then be disguised. If there is dough left on the match or it easily fits into the workpiece, then the figure is not ready yet. If the product is difficult to pierce even with a needle, then it has dried out.
Cracks often indicate that the figurine has not dried completely. They appear after starting work with the workpiece, during its painting or varnishing. Such cracks appear if the product is still damp inside, so it needs to be dried.
What should I do to prevent the product from swelling and cracking?
Bloating, cracks, brittleness. A carefully sculpted figurine can easily be ruined. Therefore, it is important to know a few secrets.
- The salt dough should be dried either on a light baking sheet, or take into account the stronger heating of a dark baking sheet. In this case, the temperature must be reduced by 25 degrees.
- Hot products are very brittle. They should either be cooled on a baking sheet or removed with a spatula very carefully.
- The figures should not be raw. Readiness is checked in the old-fashioned way - you need to carefully tap the product with your finger. If the sound is ringing, the craft is ready; if it is dull, it needs to be dried.
- An under-dried craft will soon begin to deteriorate, change color and crack.
- To avoid bubbles, it is recommended to start drying with the oven door open.
- Before starting drying, the oven is heated to a minimum, they begin to dry on the top shelf, after the product is browned, it is placed on the middle one.
- The appearance of bubbles and swelling is a sign that the temperature must be lowered immediately, otherwise cracks will appear.
- Bubbles cannot be removed from the figure, but cracks can be carefully covered with PVA glue.
- Figures made from colored dough should be dried at a temperature no higher than 125 degrees so that the color does not change.
- The oven cannot be heated to more than 125 degrees if the craft is to be white. For the browning effect, the oven is heated to 200 degrees.
- After drying and painting, finished crafts are varnished to protect them from moisture.
Advice
The cause of cracking may be flour chosen incorrectly. It should not contain additives. You can add rye flour or 2 tbsp to the wheat flour. spoons of starch. The plasticity of the modeling dough is given by PVA glue (a tablespoon per glass of flour).
Products made from salt dough are one of the most accessible types of creativity. Sculpt with your children, dry correctly, and most importantly, as much as necessary. Enjoy the process!
Drying salt dough
The salt dough product must be thoroughly dried before further work with it - sanding, painting and drawing details. This is the most crucial moment, because the final result depends entirely on it.
There are 3 methods for drying salt dough products:
- Heating method. The product is transferred to a baking sheet covered with parchment paper and placed in a cold oven. After this, it is heated to a temperature of 50-60 ° C, at this temperature the product should dry for about 40-50 minutes. After this, the oven turns off. The salt dough product is removed only after the oven has completely cooled. This method is well suited for fairly thick products, since as the oven heats up, the temperature will evenly increase both on the outer layer and inside the craft.
- Cooling method. It is similar to the heating method, but in this case the product is placed in an already heated oven. This method is suitable for not very stable structures that are in danger of losing their shape. Initially, the high temperature creates a crust on the outside of the product, which serves as a kind of frame. It takes a little over an hour to maintain a high temperature in the oven.
- Natural drying. This is the simplest but longest method. The finished product is left on a flat surface until completely dry at room temperature. With this drying, you can avoid a common problem when working with salt dough: the formation of small and deep cracks. Also, this method is best suited for figures made from already colored dough, since under the influence of high temperature in the oven the product acquires a yellowish tint, which can distort the original colors.
A few words about dyes and varnish coating
Food colorings are available in a wide range of colors at the store. But if you wish, you can give the craft a natural color using vegetable juices. Carrot juice will give it an orange color, beet juice will paint the figure dark pink. It will be even easier to paint an already dried product with markers or water-soluble paints.
Dyes
To add shine and additional strength to the product, water-based varnishes are used. It will be more convenient to use aerosols. Spray varnishes are often sold filled with multi-colored sparkles, which will give the products an elegant look.
Modeling from dough with salt is a very exciting activity that allows both children and adults to realize their creative potential. Handmade helps you relax and immerse yourself in the process of creating new images. Painted crafts will bring comfort and good memories of a fun creative process to your home for a long time.
How to Recover Play Dough
Modeling dough is a convenient material for children's first creativity. It's just a pity that it's not durable at all. But we will still try to extend the life of this beloved children's plasticine.
Children's play dough sold in stores is usually not cheap at all. Therefore, it is doubly offensive when such a toy very quickly uses up its reserve.
So we restore the modeling dough. This can be done in only one way - by adding water and, if desired, a little vegetable oil. I can tell you from experience that it’s not so easy to mix stiff store-bought modeling dough with water. At first, the dough does not want to absorb water and your hands get tired. But, as they say, patience and work will grind everything down. After fifteen minutes, we have a plastic mass that does not even remotely resemble the original plasticine. It is soft, stretchy, the parts stick together well. The only thing is that in large crafts the parts blur a little under the weight of each other. But despite this, the children have already enjoyed playing with the new variation of play dough twice. And until this mass dries out.
So it’s quite possible to soften store-bought play dough. The main thing in this process is not to overdo it with water.
Hiding surprises in the dough and finding them
This is our favorite game. I think all children love it when there is a surprise moment in the game. They are ready to open intricate locks, unscrew stubborn lids, just to see what is hidden behind them. Children are happy to find surprises, even if they hid them themselves!
Therefore, in this lesson, first, together with the baby, we hide the toy in the dough, placing it on one half of the cake and covering the other. Older kids can be asked to pinch the edges, as when sculpting a pie. Mom can do this for younger children. Well, then we ask ourselves the question “Where is our hedgehog?” or “Oh, who’s hiding here?” Perhaps during the first games the baby will have to be shown how to “get to” the toy. Most likely, the baby will catch everything very quickly and will subsequently eagerly pick apart the dough himself.
Even such a seemingly simple activity is incredibly useful for children’s fingers.
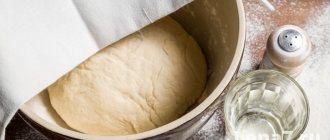
Proper storage
No matter how accurately the required amount of ingredients is calculated, after class there is always a piece left that is a pity to throw away. And I don’t want to make a new batch every time.
To save time and effort, you can leave the modeling material for next time.
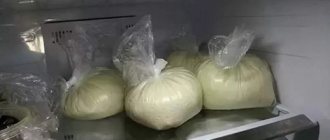
It is best to store salt dough in the refrigerator, first wrapped in a plastic bag or cling film. You can also put it in a food container and be sure to close the lid tightly.
When removing any part for modeling from a container or bag, you need to leave the product in the open air as little as possible, since contact with oxygen speeds up the process, and the mass deteriorates instantly. Weathered dough is the hardest to save; it becomes crusty and dries out.
The finished material, due to its specific composition, even with proper storage, loses its natural color, begins to dampen and darken. It is not recommended to knead the material to create figures for more than 2-3 days; dark spots and inclusions will appear on it.
Multi-colored dough must be stored in separate closed containers.
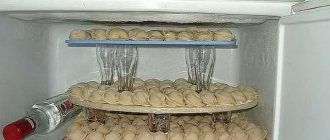
Frozen storage
Storing play dough in the freezer is only possible as a last resort. Under the influence of negative temperatures, the product loses its elasticity, which will be quite difficult to restore.
How to make puff pastry at home?
Making crafts from plasticine is fun, but most kids prefer to create with puff pastry. True, mothers are often busy with household chores and work and cannot constantly prepare materials for crafts. Therefore, the question of how to store the dough so that it does not dry out, lose its elasticity, or change consistency is very pressing. Before you start discussing the nuances of storing the dough, you need to know how to prepare the dough.
The recipe for making this mass is very simple. For children who are just taking their first steps in modeling dough, a simple option is quite enough. To prepare it you need to take: salt, flour and water. Moreover, the amount of salt and flour by weight should be the same. An approximate recipe could be: 300 g of flour and salt and 200 ml of water.
If adults decide to take up modeling, or if a child has achieved good results and dreams of creating elegant figures, then PVA glue can be added to the creative mixture; some people replace it with wallpaper, after diluting it with water. The new ingredient will increase the stickiness of the material.
If you don’t have glue on hand, you can replace it with starch.
Those who decide to engage in professional modeling will need to add glycerin to the dough, which is easy to buy at the pharmacy. The recipe for preparing the mass may look like this:
- flour - 150 g;
- salt - 100 g;
- glycerin - 2 tbsp. l.;
- wallpaper glue - 1 tbsp. l. (it should be diluted with water).
Some ladies complain that the modeling dough comes out uneven and has lumps. To avoid this problem, it is recommended to knead the mixture with a mixer or whisk.
For those who want to get creative material of an unusual color, you can knead it using rye flour. To make such a blank, you will need:
- wheat flour - 200 g;
- rye flour - 50 g;
- salt - 200 g;
- water - 125 ml.
To knead the mass, it is best to use finely ground salt. It dissolves well, and the dough based on it is elastic, wrinkles well, and does not crumble.
Storage tips
Some parents try to prepare the dough for one time, but this is not always convenient: the child may not have enough to make the figure and will be upset. Therefore, most mothers and fathers make a lot with a reserve. In this case, the question arises whether it is possible to store the dough and how best to do it so that it does not spoil.
You can save the material until next time, the main thing is to follow simple rules. The best option is to store the dough in the refrigerator, but not open on a plate. The workpiece must be wrapped in cling film or a plastic bag.
The dough can be kept in a plastic container, but it must be tightly closed with a lid.
Those who plan in advance to preserve the freshness of the modeling mass are recommended to place the workpiece in the refrigerator without delay. Oxygen has a detrimental effect on the material, reducing its shelf life. If the stored mass will be used in pieces, then the required amount should be pinched off from the whole, and the remainder should be sent to the refrigerator.
If the dough becomes covered with a hard crust, it will be very difficult to restore its elasticity.
The composition of homemade plasticine is very specific. Even if you store it in the refrigerator in packaged form, there is a risk that the workpiece will lose its attractive color, darken, and become damp. Therefore, the recommended storage period for the dough is no more than 3 days. You should not make the workpiece for a longer time, since it will be unpleasant to create from such a mass: it will change its appearance, and ugly dark inclusions will appear on it. Some housewives claim that the dough can be stored in the refrigerator for more than a month without spoiling. Of course, anyone can check this statement at home. The workpiece may not spoil, but is it safe to give such material to a child who puts everything in his mouth is a big question.
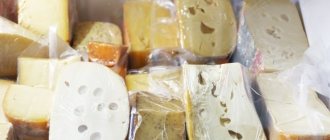
Those who have added dyes to their dough should remember that such material should be stored in individual containers with tight-fitting lids. How long does colored dough last? Yes, the same as usual.
Colored ones can even last longer, since thanks to the dyes they practically do not change the shade.
Is it possible to store the dough in the freezer? Purely theoretically - yes, however, this is not always convenient. The fact is that after defrosting, the workpiece loses its properties and the material has to be brought to perfection. Therefore, the freezer compartment is not the best place for the dough.