Colorful, flavorful and sun-filled vegetables delight us throughout the summer and fall. Will we really have to settle for the rather tasteless products that fill supermarkets during the winter? Not at all. There are several ways to preserve bell peppers for the winter. And each of them has its own merits. Using simple tips, you can surprise your guests with a bright, vitamin-rich salad with fresh vegetables in February, or diversify your usual soups and main courses with a cocktail of colorful frozen pepper pieces.
Dried peppers at home for the winter: in the oven, microwave and electric dryer?
Drying peppers is one of the many ways to preserve the valuable qualities of this vegetable during the winter. Compared to dried peppers, the taste of dried vegetables is much brighter and helps improve many dishes, including vegetable salads. In addition to the peppers prepared in the cellar, as well as frozen in the freezer, you can also enjoy the amazing taste of the dried delicacy.
Bell pepper: pros and cons
But before you start preparing food and learn how to dry bell peppers yourself, everyone should become familiar with who dried paprika can harm. Therefore, it is not recommended to eat it:
- angina pectoris
- gastrointestinal ulcer,
- gastritis,
- hypotension,
- haemorrhoids,
- dysfunction of the urinary tract and liver.
If you do not fall into any of the listed categories, then let's get to work. Healthy fruits with fleshy walls of any color are suitable for drying.
There are several methods that can be used at home: in an electric dryer, in an oven, or in the sun.
Benefit
Almost all vitamins and microelements are preserved in dried pepper. It includes:
- Vitamins A, groups B, C, E and PP;
- Microelements: phosphorus, potassium, calcium, magnesium, manganese, sodium and iron.
Beneficial features:
- Increases the body's immune functions;
- Prevents the development of vitamin deficiency;
- Improves the functioning of the gastrointestinal tract;
- Strengthens hair and nails;
- Normalizes the functioning of the cardiovascular system;
- Prevents the formation of blood clots;
- Has a beneficial effect on the condition of the skin and mucous membranes.
Preparing the vegetable
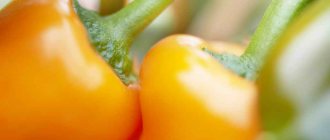
Before drying, you need to select suitable peppers. They should have a sweet taste and a bright red or yellow color. Peppers not suitable for drying:
- Overripe;
- Wrinkled;
- With spots on the skin.
The pods chosen are juicy, fleshy, with dense pulp inside. Rinse the peppers well under running water and then dry on a paper towel. Cut large pods into quarters, medium pods into halves. Remove thin films and seeds. If you dry it without the skin, the pepper will acquire a richer and more delicate taste. To quickly remove the skin, you need to immerse the pepper in boiling water for 2-3 minutes, then cool in cold water for 2-3 minutes. Using a knife, carefully pry the skin and remove it from the pepper.
Sun-dried tomatoes and peppers in the oven:
Salads with sweet peppers for the winter
No matter what beneficial properties frozen or fresh pepper has, you cannot do without preserved food rich in bright flavors, which includes a popular vegetable. Bright salads will decorate the festive table and will be an excellent side dish for meat. When choosing peppers for preservation, you should give preference to thick-skinned varieties that have reached biological maturity.
Winter preparation
Sauerkraut with bell pepper for the winter
Sauerkraut
- a storehouse of vitamins and microelements that our body so urgently needs during the cold season.
Adding bell pepper to the preparation will help make the appetizer even more interesting and healthier. You will need the following ingredients:
- white cabbage - 2 heads (large)
- sweet pepper (preferably red) - 10 pcs.
- carrots - 10 pcs.
- horseradish - 2 leaves
- dill - a few sprigs
- bay leaf - 6 pcs.
- salt - 6 tbsp.
- black pepper - 8 peas
Another delicious dish
Wash the vegetables, chop the cabbage thinly, cut the pepper into strips, grate the carrots. Place in a jar in layers: cabbage mixed with salt, pepper, bay leaf and horseradish, carrots, pepper. Each layer should be compacted, pressed down and the jars should be left warm for 5 days, piercing the cabbage daily to remove accumulated gases.
As soon as the ripening process is completed, the jar is tightly closed with a lid and sent for storage in the cellar or refrigerator.
Bell pepper lecho for the winter
There are many recipes for Hungarian bell pepper dishes. Each housewife prepares the appetizer in her own way, adding additional ingredients or, for example, replacing sugar for tomato sauce with honey. But before you start experimenting, you can master one of the simplest and most delicious options for preparing lecho, for which you will need the following products:
- sweet pepper, cleared of seeds and membranes - 4 kg;
- tomatoes - 4 kg;
- vegetable oil - 200 ml;
- sugar - 1 glass;
- table vinegar (9%) - 6 tbsp;
- salt - 2 tbsp.
Cut the main ingredient of the salad into large cubes or strips. Cut the tomatoes into 4 parts and grind them in a meat grinder or puree them in a blender (you can first remove the skin from them by first dipping them in boiling water for a minute and then in cold water). Pour the tomato into an enamel pan, add butter, sugar and salt, and boil.
Place bell peppers into the boiling sauce and simmer for half an hour, stirring occasionally. At the end of cooking, add vinegar, stir again and remove from heat.
Place the lecho in pre-sterilized jars and cover with sterile lids. The canned food should be turned upside down and wrapped until it cools completely.
A snack prepared according to this recipe can be stored in a cool place without loss of taste for 2 years.
In the fall, when the tops of plants are removed from the garden, the remains of peppers, tomatoes and other vegetables are removed.
The last pepper, as a rule, does not have time to turn red, but I don’t dare throw away such good stuff, so I dry it. After all, bell peppers give dishes a pleasant aroma and exquisite taste. Drying, as a method of preparing for the winter, is good because dried vegetables retain their aroma and nutrients. At home, the safest way to remove moisture from peppers is to use the sun, an electric dryer or an oven. The rules for drying bell peppers will be discussed below. Ingredients:
Unspoiled fruits of bell peppers.
Of course, it is better to use ripe, rich red peppers with thick walls. These raw materials will produce the highest quality drying, but green peppers that have not yet turned red will also work. The main thing is that the fruits are healthy and not spoiled. The pepper is washed well under running water. The fruit stems and seeds are cut out. It's okay if some seeds remain. It is even recommended to prepare them separately, since they also contain useful elements and have a rich aroma. Peeled fruits can be cut into circles or small strips. The thickness of the straws and circles should be approximately 4-5 mm.
Sliced bell peppers are laid out on drying racks in one layer.
The electric dryer is loaded with trays of pepper and turned on at a set temperature of 50-60 degrees.
The drying time is affected by the wall thickness of the bell pepper and the width of the slices. As a rule, dried pepper reaches the desired condition in 12 hours. Sometimes it is recommended to periodically change the drying trays to ensure more uniform drying. How to check the readiness of dried bell peppers? You need to take a slice and squeeze it with your fingers - the dried pepper should crunch. Some people prefer not to dry it to this state. This is their right, but in this case there is an increased risk that problems will arise during storage, since moisture remains in the pepper. You can use dry bell peppers when preparing main courses, sauces and soups. If you grind the dried slices in a food processor, you get paprika powder, which is used as a separate component or in a mixture with other dried and chopped vegetables and herbs.
Rules for drying sweet bell peppers in the sun
The sun's rays have been used for drying since ancient times. The preparation of fruits is identical to the preparation of peppers for drying in an electric dryer. The prepared straws or mugs are laid out on a wire rack and covered with gauze. If it starts to rain outside or if increased humidity is noticed, the grates with pepper are brought into a dry, cool room. Depending on the intensity of solar radiation, drying can last 3-7 days.
Rules for drying sweet bell peppers in the oven
It is recommended to blanch the pre-chopped peppers (2-3 minutes is enough), then dry them in the sun, and then lay them out on trays and place them in an oven heated to 50-60 degrees. Periodically you will need to take out the trays and mix the pepper slices.
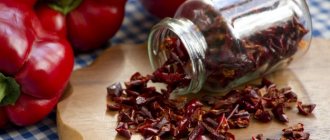
How to store dry bell peppers
A thick linen bag is perfect for storage - this method has proven itself a long time ago. Traditional storage containers use a glass jar, which must be clean and dry before adding dry pepper. Ziploc bags are suitable from modern materials. Store containers of dried fruit securely in the refrigerator in the vegetable compartment. Bon appetit!
Advice
: for preparation they take different varieties of vegetables and even use several at once. Red peppers are fleshy and sweetish, green peppers are tougher and hotter, and yellow peppers are juicy and very tender.
Dried peppers: the most popular methods
To get dried vegetables, you can use an oven, microwave or electric dryer.
In the oven
Select the lowest temperature of the “convection” or ventilation mode. During the drying process, free air circulation inside is necessary so that excess moisture evaporates. In the absence of these modes, do not close the oven door tightly, this will help avoid the accumulation of condensation inside. Place parchment paper soaked in oil on a baking sheet. Place vegetables skin side down, forming small “boats” for filling with various seasonings.
The pepper is dried for an hour and a half, then it needs to be cooled a little, then heated again in the oven for about 40 minutes. The finished pepper should not be immediately removed from the oven; it should stand in it for a couple of minutes. You can start canning only after the vegetable has completely cooled.
In Italian:
In an electric dryer
Place the prepared vegetable in one layer on a special mesh or grill, leaving small gaps between the slices. To prevent the pepper from sticking and burning, it must be stirred and turned over every 30 minutes. The optimal temperature is 75 degrees. With sufficient airflow and careful observation, the pepper will cook in 3-4 hours.
Bell pepper:
In the microwave
Drying peppers in the microwave is a rather labor-intensive process. So that the pepper does not cook in its own juice, but gradually gets rid of excess moisture, it needs free access to air. First, the vegetable is washed, cut into slices, seeds and thin membranes are removed. Add a little oil to the pepper, put it in a deep plate and put it in the microwave. Set the power to maximum. After five minutes, remove the vegetable and drain off the excess juice.
Storing fresh peppers
Before harvesting fresh vitamin fruits for future use, it is worth deciding on a room for long-term storage of vegetables. A cellar, basement or glazed balcony is suitable for these purposes. The main thing is that the humidity is within 80-90%, and the air temperature does not fall below 0 C.
Storage containers, such as wooden boxes, must be dry and free of mold.
Before adding vegetables, it is enough to keep the boxes in the sun for several days. The shelf life of fresh pepper depends on maintaining the optimal temperature and humidity in the room, as well as the careful selection of vegetables for the winter (only fruits that are at the stage of technological ripeness).
If all conditions are met, fresh bell peppers will be able to appear on your table throughout the winter.
Popular methods of preparing fresh fruits for the winter
It is advisable that the fruits do not touch each other. This will prevent vegetables from spoiling for as long as possible. And if one pepper starts to rot, you can simply remove it.
Individual polyethylene packaging with holes for air ventilation is suitable for this.
. The method is convenient in that it simplifies the process of regularly inspecting vegetables for integrity and the absence of signs of spoilage.
Preparing vegetables for the winter
Paper bags have proven themselves to be good for storing bell peppers. They allow the fruits to “breathe” and significantly increase the freshness of the fruits. The bags can be replaced with plain paper, in which the peppers are very carefully wrapped.
You can add a bright accent to both the interior and the diet of your household by placing flowerpots with sweet peppers on the windowsills. To do this, you should dig up bushes with unripe fruits (along with the root system) before the onset of frost, plant them in pots, treat them against pests and bring them into the house. As the vegetables ripen, you can pick them and enjoy their rich flavor.
Recipes
A fairly popular way to prepare for the winter is to dry peppers in oil. You can prepare it according to the standard procedure, only generously grease each slice of vegetable with olive or sunflower oil.
Dried vegetables:
To give pepper a unique taste, housewives use different seasonings and spices. You can sprinkle the vegetable pieces with salt, black or red pepper. Marjoram or dried basil are also used. Almost every seasoning will make the preparation of dried peppers unique. To make the pepper sweet and piquant, sprinkle it with a small amount of sugar. Chopped garlic is added to the pepper “boats” for spiciness.
Storing dry bell peppers
In order for the pepper to be well preserved throughout the winter, it must be stored in a linen bag - an old and time-tested method. This material allows air to pass through well, which provides the “dried fruit” with reliable ventilation.
You can store dry pepper in a jar, but it is advisable to make several holes in the lid.
If you don’t have a linen bag, you can store dried bell peppers in a plastic bag, but you don’t need to tie it tightly. It’s a good idea to make several holes in the walls of the bag.
Watch a video about drying sweet peppers from the Ezidri Master
Tweet
Storage of the finished product
You can store the pepper in the oil in which it was cooked, this way the rich taste will be preserved. Place pieces of dried pepper in a small sterilized jar in a dense layer and completely fill with sunflower or olive oil. The oil should be 2-3 centimeters above the stacked peppers to prevent air from entering. The jars are stored in the refrigerator and used as needed.
As a result of drying, you will get an indispensable ingredient for preparing various salads or pizza. Dried peppers are consumed both ready-made and used as a decoration for meat or fish dishes. It also makes a great snack. Properly prepared dried peppers will serve as a guarantee of tasty and healthy nutrition, which is important during periods of exacerbation of viral diseases.
Recipes with dried peppers
Do you want to surprise your guests with a simple but at the same time delicious salad? Then mix together basil leaves, fresh or sun-dried tomatoes, pieces of mozzarella and slices of sun-dried peppers. As a dressing, you can use a combination of soy sauce, salt and oil in which the pepper was stored.
Tired of classic pasta with creamy sauce? Simply sauté beef tenderloin slices with fresh onions, tomatoes and sun-dried peppers. Add salt and your favorite spices to taste and season the boiled spaghetti with this fry.
Sun-dried peppers
Sweet bell peppers have a huge supply of useful substances; the drying process allows them to be preserved almost in their original form. The pepper will get rid of excess moisture, but will still remain soft. Garlic, hot pepper and dry seasonings will create a fragrant crust on the pepper pulp. Dried peppers are stored covered with vegetable oil. Then this oil can be used in salads and sauces, it will acquire a very pleasant taste. Dried pepper “boats” are served with boiled potatoes, homemade cheese, and any meat and fish dishes.
Ingredients for making dried peppers for the winter:
- bell pepper – 1.5 kg
- garlic – 2 heads
- hot pepper – 1 pod
- mixture of dry Italian herbs - 1.5 tbsp.
- salt – 1.5 tsp.
- vegetable oil (sunflower or olive) – 200 ml
Recipe for making dried peppers at home:
To prepare for the winter, it is better to take red and green peppers to see how color can change the taste of the finished product. The red halves will be tender with a mild sweetish flavor, while the green halves will be sharper and denser. They should be served in pairs; the contrast of flavors creates a wonderful effect.
The peppers are washed and sorted. It is better to immediately discard limp and damaged fruits. You should choose varieties with thick, juicy pulp. They take longer to dry, but the taste will be impeccable.
Sweet peppers are cut into halves and the seeds are shaken out.
Garlic is peeled and washed. The cloves are cut into thin slices. Place 2-3 cloves of garlic in each half of the pepper.
Peppers are sprinkled with Italian herbs and salt. If you don’t have a ready-made mixture of dry spices, you can choose dry crushed seasonings at your discretion: dill, basil, oregano. Seasonings can be sprinkled boldly without fear of excess. And you need to salt very carefully so that only a few grains get into each half. Dried peppers should not be over-salted. The pulp of hot pepper is cut into miniature pieces, sprinkled with halves of sweet pepper.
Place the peppers in electric dryer trays and turn on the standard mode. The pepper will become dried in 10-12 hours. You can dry vegetables in the oven, but it should have a heating level of 100 degrees. If the scale starts at higher temperatures, the peppers will become baked. In the oven, the pepper will become dried in 4-5 hours, but its taste is significantly inferior to products cooked in an electric dryer.
Dried peppers can be served immediately. Spicy hot halves are a complete original snack.
Drying peppers in the oven of a gas stove. Methods
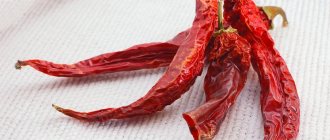
How to dry hot peppers?
Air drying
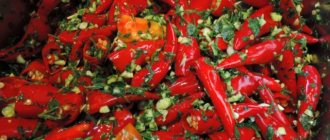
How to air dry hot peppers at home? This drying method is the most popular. Using the natural method, you can dry both whole and chopped capsicums. In the first case, the pods are strung on a thick thread using a needle.
To do this, you need to make a hole just below the stalk.
Next, the “sharp beads”, the elements of which should not touch each other, are hung in a dry room with good ventilation and dried until completely ready.
To air dry crushed peppers, use newsprint or fine sieves. Having scattered the cuttings on the surface of the paper, it is left for 8-10 days until completely dry, periodically shaking and stirring for uniform exposure.
It is advisable to change the layer of newspaper once every 2 days, as the paper absorbs moisture. This way you can achieve faster and better drying.
Interesting: in winter, you can dry hot peppers by hanging the pods over the radiator, or by placing a newspaper with slices on the windowsill (also above the radiator).
How to dry red hot peppers? You can learn how to prepare peppers for air drying by watching
Oven drying
How to dry hot peppers for the winter in the oven? Unlike air drying, hot peppers are often prepared using an oven if the product is then ground into powder.
For this method of drying, finely chopped vegetables are laid out on a baking sheet and placed in an oven preheated to 55C°...60C° for 3-5 hours.
As with the natural process, the cuts need to be stirred from time to time.
Important: during drying, the oven door must be slightly open, otherwise the pepper will not dry, but bake.
Drying in an electric dryer
How to dry red hot peppers at home in a dryer? Many housewives prefer to dry vegetables and fruits in electric dryers. A similar device can be used for red peppers. The prepared pods are laid out on the racks in one layer, the equipment is turned on at full power and dried for 10-12 hours until completely dry.
To ensure that the fruits do not stick to the grates, the process must be controlled, sometimes turning the pods over.
You can also prepare chopped chili in an electric dryer. In this case, the drying time is reduced to 4-6 hours.
Preparing dried peppers for the winter
Drying is one of the best ways to preserve perishable vegetables for the winter. These include bell pepper and hot pepper . The method is based on the principle of partial evaporation of moisture. The result is elastic slices that, when pressed, bend and do not crumble into dust.
In this matter, it is important to choose quality products and prepare them correctly. For drying, household appliances are used: microwave, oven, electric dryer.
The finished product is perfectly preserved in oil in the refrigerator or in glass containers without additives.
Bulgarian
To prepare delicious dried peppers, use these tips for selecting and preparing fruits:
- Buy vegetables with bright colors and thick flesh. They should not show signs of rot, stains or cracks.
- Wash the fruits in warm water and dry with a paper towel. Cut large ones into quarters, medium ones - in half. Remove the tails and seed pods. Peppers are sometimes peeled to enhance the flavor. But this is not a mandatory rule. Cook as you wish.
- To remove the skin, pour boiling water over the fruit and leave for three minutes. Then transfer to cold water. Using a knife, lift the peel and quickly remove it.
- Before starting the drying process, grease the peppers with vegetable oil, sprinkle with spices and chopped garlic. Add a little sea salt or sugar. This will enhance the taste of the product.
Spicy
The rules for preparing hot peppers are no different from preparing sweet fruits:
- Choose peppercorns with thick flesh and a smooth and elastic surface.
- Wash the fruits, dry them and cut them into halves. Cut off the stem and remove the seeds. Rinse the slices under running water and remove the internal membranes. If you want the heat to remain, leave some of the seeds.
- Place the peppers on a baking sheet, drizzle with oil as desired and sprinkle with spices and dry herbs.
The best ways to freeze sweet peppers
Increasingly, housewives are giving preference to frozen vegetables, which, unlike canned vegetables, retain all the vitamins and bright taste properties. Pepper is no exception. It can be frozen whole, prepared after cutting it into small cubes or strips.
For owners of large freezers, the method of preparing stuffed peppers is suitable, and fans of vegetable salads and sauces will appreciate freezing baked vegetables, which have a rich aroma and original taste.
Preparing raw materials for freezing
Preparing Peppers for Freezing
For preparations that will help diversify the menu until the next season, peppers of biological ripeness without damage or signs of rotting are selected. If the vegetables are chopped, you can use not the most beautiful specimens by simply cutting out the unaesthetic parts.
- vegetables are thoroughly washed under running water;
- the core is cut out with a sharp knife;
- veins and seeds are removed (if this is not done, the dish that includes the preparation may taste bitter);
- the peppers are washed again with running water and dried with a paper towel (the better the moisture is removed from the surface of the vegetables, the more crumbly the freezing will be).
For preparations, it is worth taking peppers of different colors - red, yellow, green. This is true for freezing whole and chopped vegetables. The vegetable dressing will become brighter, and the taste of the main dishes will be richer.
Whole frozen peppers
Lovers of stuffed peppers are often faced with the fact that they can enjoy the taste of their favorite dish only during the season. You can correct the situation by freezing the whole fruit, cleared of seeds and veins.
. There are several ways to do this:
Frozen products
- The peppers are placed one on top of the other, like glasses. The resulting columns are placed in the freezer. Before preparing the dish, they are stuffed without prior defrosting and cooked as usual.
- You can minimize the space occupied in the freezer by first plunging the peeled fruits into boiling water for 1 minute. This will soften the peppers and prevent them from cracking during the freezing process.
- Some housewives freeze peppers already filled with minced meat. The preparations are laid out on a flat surface, trying to ensure that the peppers do not come into contact with each other, and put into the freezer. After a day, they fill plastic bags with them. This method allows you to prepare a delicious dinner in a matter of minutes. The frozen semi-finished product is poured with sauce and cooked on the stove or in the oven for about 15-20 minutes.
Chopped frozen peppers
Bell peppers, frozen in pieces, will perfectly complement soups, main courses and salads. To prepare, cut the fruits into small cubes or strips and freeze in bags or plastic containers.
Ready to freeze
A few hours after placing the workpiece in the freezer, shake the container or bag so that the cubes or slices do not stick together.
Such peppers are not defrosted before heat treatment.
Shredded for freezing
Bell peppers frozen after grinding in a meat grinder or blender will enrich the taste of sauces and seasonings. You can freeze vitamin raw materials in small plastic cups or ice trays. Red peppers are best suited for this method of preparation.
Its taste, color and aroma go well with tomatoes, green basil, other vegetables and herbs. This allows you to freeze the sauce almost ready for use.
This preparation will be able to preserve all the vitamin and taste qualities until the new harvest.
Prepared baked vegetables
This preparation will delight you with new tastes and gastronomic emotions. Ripe and undamaged peppers (preferably thick-skinned) are selected for cooking.
. The fruits are thoroughly washed under running water without removing the stalk, dried with a napkin and placed on a baking sheet greased with vegetable oil.
Place the pepper in an oven preheated to 200 0C for 35-40 minutes.
The vegetables should be browned and covered with a brittle and almost black crust. Having taken them out of the oven, you must immediately place them in any thick-walled pan and cover the dish with a lid. After 15 minutes, peel the peppers by holding them by the stalk, after which all the insides can be easily removed.
It is advisable to save the juice that accumulates inside the baked vegetables by draining it into a suitable container.
. The prepared peppers are placed tightly in a container, filled with the resulting juice and stored in the freezer. This preparation is perfect for winter vegetable salads and will add new flavors to the soup dressing.
If you choose to store bell peppers by freezing, you should make sure that the freezer maintains the required temperature for this - from -18 0C to -32 0C. Only in this case will vegetables retain their nutritional and taste properties until the next harvest.
Drying vegetables for the winter
Dried bell peppers are summer-like and full of vitamins. There are several ways to prepare original seasoning for various dishes. For example, in an oven, electric dryer or outdoors.
Whatever drying method you choose, the peppers must be properly prepared by thoroughly washing, coreing and wiping dry. It is best to use fleshy, ripe and brightly colored fruits for drying.
Peppers dried in the oven
When preparing aromatic seasoning from vegetables that are bright and filled with vitamins and microelements necessary for health, you should adhere to the following scheme:
- Divide each pepper into four parts and cut into thin strips;
- preheat the oven to 400 C-500 C;
- line a baking sheet with parchment paper;
- place the pepper on the sheet, trying to leave a small distance between the strips;
- place the sheet in the oven and leave the cabinet door slightly open;
- the vegetable mass should be stirred periodically with a spatula;
- after 2 hours, turn off the oven without closing the door;
- the next day, you should resume the drying process (heat the oven, stir the pepper mass periodically for several hours).
You can check the readiness of the product for long-term storage by breaking a slice of the vegetable in your hand. If it bends and returns to its original position when pressed, then it is necessary to dry the product in the oven.
After drying
Plain water will help restore the dried preparation to the state of a fresh vegetable.
The proportions are as follows: take half a glass of water for a glass of dry pepper. By pouring liquid over the vegetable mixture for several hours, you will get delicious bell peppers that can be used for food, just like fresh ones.
Drying in an electric dryer
Peppers, previously washed under running water and cored, are cut either into cubes - 2x2 cm, or into thin rings 0.5 cm thick. It is advisable to blanch the vegetables in a saline solution (1%) for 2 minutes, cool in cold water and allow moisture drain. After which the raw materials are laid out on drying trays.
The main advantage of this method is the ability to forget about preparing the workpiece for a long 8-12 hours. During this time, the vegetables will acquire their characteristic crunchiness, without losing either their taste properties or their inherent delicate aroma. Some devices dry vegetables in 8 hours, others may take longer to achieve the effect necessary for long-term storage.
Vegetables dried using an electric dryer can be stored in pieces, or they can be chopped in a blender to a seasoning state. The finished product is heated in the oven and placed in glass jars, the lids of which are pieces of linen. Vegetable seasoning retains its taste for about 2 years and can be used to enrich soups, main courses and sauces.
The sun and air are helpers in preparing peppers for the winter
Some housewives prefer not to use ovens and electric dryers for drying vegetables, opting for natural drying processes. To do this, it is necessary to prepare a well-ventilated room that can reliably protect bell peppers from excess moisture and direct sunlight. This could be a covered veranda in a country house, a canopy on a personal plot, or even a balcony in an apartment building.
Preparatory process
Peppers cut into small strips are laid out in a thin layer on wire racks and covered with a layer of regular gauze. The workpiece is exposed to the air, and the temperature does not play a special role. It’s just that on sunny and fine days, vegetables will acquire the crispy consistency necessary for long-term storage in 3-4 days, and cloudy weather will force you to keep the trays in the air for about a week.
If it rains, the pepper must be brought indoors to avoid spoilage of the product. Periodically stir the vegetable pieces and check for readiness. Naturally dried vegetables retain maximum nutrients and have a bright aroma, which is indispensable when preparing first and main courses.
Oven-dried bell pepper
An original appetizer can be prepared from bell peppers dried in the oven. The preparation will decorate any holiday table and will be an excellent addition to the usual menu. To prepare a dish that is bright in every sense, you will need the following simple and affordable ingredients:
- meaty, ripe and aromatic Bulgarian
- pepper - 3 kg
- garlic - 15 cloves
- a mixture of your favorite spices (basil and coriander go best with pepper) - 7-8 tsp.
- garlic powder - 2 tsp.
- salt - 2 tsp.
- sugar - 4 tbsp
- vegetable oil
Peppers should be cleared of seeds and membranes, blanched in boiling water for 1-2 minutes and placed in a container filled with cold water. This will allow you to easily remove the skin from the vegetables. The peeling process is not necessary. If the presence of skin in the dish does not cause discomfort, this stage (blanching and subsequent peeling) can be omitted.
The baking sheet is covered with baking paper, on which the peppers cut into quarters are evenly placed. Vegetables are sprinkled with salt, sugar and seasoning and placed in an oven preheated to 100 C. The peppers will take about 2-3 hours to cook (depending on the capabilities of the oven and the meatiness of the peppers). You can check the degree of readiness by piercing the vegetables with a toothpick. If they are soft, then the drying process can be completed.
Appetizing even to look at
While the main product is being prepared, it is necessary to sterilize small jars. Hot pepper is placed in a container, interspersed with chopped garlic (about 4 cloves are needed for a half-liter jar). A completely filled jar is poured with hot, but not boiling, oil, rolled up, turned over and wrapped until it cools completely.
Such preservation can be stored at any temperature conditions, including in an ordinary pantry in a standard city apartment.
Advantages and disadvantages of the method
The main advantage of drying peppers is the ability to preserve most of the vitamins and minerals necessary to maintain immunity during the cold season. Compared to dried peppers, the taste of dried peppers is brighter and richer.
With regular use of the product, the condition of hair and nails improves. A large amount of fiber normalizes the functioning of the intestines, and consequently, other interconnected systems of the body.
Potassium and magnesium regulate the functioning of the heart and blood vessels, prevent the formation of blood clots, and promote blood thinning. Pepper has a beneficial effect on the condition of the mucous membranes and skin.
The calorie content of dried peppers without additives in the form of vegetable oil and spices is 118 kcal per 100 g.
There is no need to talk about the disadvantages of drying peppers. Here are some solid advantages:
- not too time consuming;
- can be stored for a long time in dry form and even longer in oil filling;
- the product does not lose its taste and is able to enrich dishes made from cereals, meat, flour, and other vegetables.
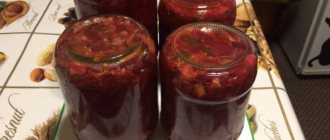
Dried peppers for the winter in oil
To prepare dried peppers in oil, use a simple recipe (the photo shows the finished result).
Ingredients:
- bell or hot pepper – 1 kg;
- extra virgin olive oil – 50 ml;
- balsamic vinegar to taste.
Preparation:
- Wash the peppers, dry them, remove the stem and core. Rinse with cold water and place cut side down in a bowl. This will ensure free flow of water.
- Line a baking sheet with parchment or grease with oil. Arrange the slices.
- Preheat the oven to 120°C, place the baking sheets and cook for 3-4 hours. Gradually reduce heat to 110°C.
- Remove the vegetables after the cooking time has passed and leave to cool.
- Heat the vegetable oil in a water bath or in the microwave. Add garlic if desired.
- Place the peppers in a jar, pour in warm oil, add a little balsamic vinegar and close the lid.
Reference . Vinegar extends the shelf life of the product.
Store in the refrigerator or cellar.
In seasonings and spices
Dried peppers in aromatic herbs and spices will delight you with a rich taste and pleasant aroma.
Ingredients:
- sweet or bitter pepper – 1 kg;
- rosemary, thyme, oregano;
- salt, black pepper - to taste;
- Extra Virgin olive oil – 80 ml;
- garlic – 3-4 cloves.
Preparation:
- Wash the vegetables, peel them, rinse with water. Cut into 2-4 pieces depending on size.
- Cook in the oven at 100°C or in an electric dryer at 75°C. Adjust the time as you wish and constantly monitor the slices so as not to dry out.
- Peel the garlic and cut into thin slices.
- Place chilled peppers in a glass container, add spices and garlic.
- Pour in olive oil and close the lid.
Store in the refrigerator on the top shelf.
Dried peppers: in an electric dryer
Cooking time:
30 minutes
Number of servings:
12
Energy value
- calorie content – 132.25 kcal;
- proteins – 132.25 g;
- fats – 11.98 g;
- carbohydrates - 4.78 g.
Ingredients
- sweet pepper – 4 kg;
- garlic – 4 cloves;
- Italian herbs – 2 tsp;
- hot pepper – 1 pc.;
- salt – 1 tsp;
- olive oil – 550 ml.
Step-by-step preparation
- Wash the peppers. Dry and clean. Remove the skins from the garlic. Chop each clove into thin slices.
- Cut the vegetable into slices. Place a hot chili pod on one tray of the electric dryer. Next, distribute the bell pepper slices.
- Place garlic on top of the vegetables. Sprinkle everything with salt and herbs.
- Set the dryer to 300 W for 7-7.5 hours.
- Take out the vegetables. Place hot peppers and garlic at the bottom of clean jars, and place bell pepper slices on top. Heat the oil and pour it into containers with vegetables. Store tightly covered in the refrigerator.
Try making dried peppers and you'll be surprised how much such a simple detail can enhance every dish. Not only vegetables will be used. Oil infused with herbs can be used to season salads or use it for marinades. Don’t be afraid to experiment and discover new ways of preparing it, because with a detailed recipe it’s very easy!
Did you like the recipe? Save it to your Pinterest! Hover over the image and click Save.
At the height of the pepper ripening season, every housewife is puzzled by how to preserve its taste, aroma and maximum beneficial properties until next summer. Dried peppers for the winter are one of the best ways to prepare them, along with freezing, canning and drying. In this article we will talk about all the features of this method of preserving peppers. After all, it is no secret for true gourmets that dried peppers add a special piquancy to dishes. And such a delicacy will definitely diversify the home menu.