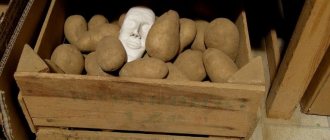
Potato box in the cellar. Features of storing potatoes on the balcony in winter
If there is no basement, storing potatoes on the balcony is allowed in specially equipped containers. They are sold in stores, but making such a box yourself is much cheaper. In order for the harvest from the garden to last all winter, you need to know the specifics of storing tubers:
- The shelf life of potatoes in winter is influenced by the correct choice of vegetable. All early varieties must be discarded immediately. Tubers cannot be stored for long periods of time either on the balcony or in the cellar.
- Do not put wet potatoes in the box. The moisture will warm the tubers, begin to germinate quickly, and rot will appear in some places.
- For storage, it is advisable not to take a batch of potatoes that contains a lot of rotten tubers. Even if you sort them carefully, the vegetable will not last long in winter. The presence of rot indicates that the crop has been affected by a disease or a violation of cultivation technology.
- Potatoes that can be stored for a long time are determined by their skin. It should be thick and not easy to scrape off with your fingernails. Additionally, the thick peel preserves the original taste of the pulp. Even if you accidentally leave an open window on the balcony in winter, such tubers will not get frostbite from a short-term drop in temperature.
Advice! The best varieties for storage are considered to be “Lasunak” and “Bronnitski”.
For long-term storage in winter, it is important to prepare the tubers well. Potatoes harvested from the garden or purchased are cleaned of soil residues as much as possible.
The next important stage of preparation is drying. It’s easier to do this in the garden. The potatoes are laid out in one layer under the sun and stirred periodically. A day of drying is enough. Prolonged exposure to the sun will result in the appearance of green on the skin. Such tubers will only be used for planting in the future. If the potatoes are too wet, they are left to dry for 2-3 days, but only in the shade and in a well-ventilated place. The balcony is also suitable for drying potatoes, but due to space limitations, it is poured in a thick layer. From time to time, gently stir the tubers so as not to damage the skin.
After drying, another sorting is carried out. All potatoes with mechanical damage and signs of disease are discarded. It is advisable not to put aside tubers that are too small for long-term storage. Over time, potatoes lose their elasticity and decrease in size. By the end of winter, the small tubers will shrivel and become impossible to clean.
Damaged potatoes selected during sorting are used for cooking. Good tubers are loaded into a box and sent for storage.
What varieties are suitable?
When choosing balcony storage for the winter, you should pay attention to the following varieties:
- Queen of Autumn. This is the easiest variety developed by Russian breeders. The weight of one fruit is 200 g, and the length reaches 25-30 cm. 120 days pass from the first shoots to maturity. The variety is excellent for fresh consumption and canning. The fruit is juicy and has a pleasant taste. Can be stored until June. At this time, their presentation and taste do not deteriorate.
- Flaccoro. This is a variety of Dutch selection. Market maturity occurs 110-1130 days after sowing. The color of carrots is bright orange. It is elongated, smooth with delicate flesh. The variety is characterized by high yield, the length of the root crop is 30 cm. Help. Its main advantage over other species is its excellent storability. Commercial quality is maintained until next summer.
- Vita Longa. This is a relatively new variety that is characterized by high yield. The duration of the growing season is 140 days. Recommended for winter storage, as it has excellent shelf life. Can be consumed fresh. The root crop weighs 200-300 g, length 30 cm.
- Carlena. A high-yielding variety, the fruits of which ripen 130 days after planting the seeds. Since root vegetables contain a high concentration of sugar, they should not be used by people with diabetes. Carlena is easy to care for, and if the right microclimate is maintained, the harvest will last until spring.
- Samson. This variety is one of the most unpretentious. The duration of the growing season is 110-115 days. Has improved taste. The carrot is 20 cm long and weighs 160-200 g. There is no core, but the pulp contains a high concentration of carotene, vitamins and microelements. The variety can grow in areas with any degree of fertility. You can store it until the next harvest.
- Vitamin. This variety was specially obtained for long-term storage. Ripens 110 days after planting. The length of the fruit is 17 cm. With high-quality care and regular watering, carrots are characterized by increased juiciness and excellent taste.
How to properly store potatoes in an apartment in winter?
How to make a vegetable garden on your balcony
It is risky to buy vegetables from resellers from other regions. Local species have been tested many times. Preparation for storage begins after harvesting or purchasing.
The algorithm is as follows:
- Dry fresh root vegetables for a week or two. You need a well-ventilated and shaded place under a canopy. The harvest is laid out in one layer. During this time, small cuts will heal, diseases will become more noticeable, and the peel will become thicker.
- Carry out a thorough examination of the fruit for non-healing damage, suspicious spots, and diseases. Only ideal, healthy specimens are selected.
- Assemble a heated thermal box or buy a ready-made thermal container and disinfect it.
- Seed potatoes should be kept separately. It will become much more resistant to rotting if it is greened with diffused light. You cannot eat such a vegetable, as toxic substances have formed in it.
- Inspect the storage periodically. If a suspicious smell or midges appear, you should look for a rotting tuber.
How to insulate a potato box
Types of grape presses, DIY instructions
In any place intended for storing vegetables, special conditions must be observed so that they do not spoil for a long time.
Temperature
The optimal temperature for storing potatoes is 4°C. Deviations of 1-2°C are acceptable. If it gets too warm (above 6°C), the tubers will begin to wither and dry out or the sleeping buds will wake up and the potatoes will begin to grow.
Air humidity
The air in the room where potatoes are stored should be dry, within 40-45%. A hygrometer is used to check room humidity. If humidity is higher than permissible values, the risk of fungal and bacterial infections increases.
Illumination
Any light is undesirable. When exposed to light from artificial sources, the tubers begin to turn green - such potatoes can no longer be eaten. The green color of the tubers is due to the accumulation of chlorophyll associated with solanine under the skin. This compound is toxic; the vegetable turns from edible to poisonous.
Air exchange
A well-thought-out ventilation system will ensure drying and proper cooling of the tubers and preserve the potatoes for 8-10 months.
Without access to air and its free circulation, temperature and humidity increase. This leads to premature aging of the vegetable, loss of taste, change in chemical composition and loss of nutritional properties.
For work you will need the following materials:
- timber with a section of 5×5 cm;
- plywood 15-20 mm thick;
- thermal insulation material 5 mm thick;
- 2-3 incandescent lamps or one 100 W;
- iron pipe;
- screws and iron corners.
How to make an insulated box:
- Determine the dimensions of the thermal container. It will consist of two boxes, one inside the other. The internal base should be 120-140 mm smaller than the external one.
- Cut out 4 future walls of the box and the bottom from plywood. Measure and saw off 4 bars that serve as frame posts. To use as a sheathing for the plywood, saw off 12 bars. Place them horizontally on the product, 2 on each surface, including the lid and floor.
- To protect wood from fungus, treat all workpieces with a special compound (“Pinotex”, “Snezh”). If the box will not be covered in the future with any finishing material, cover all the wood with waterproof varnish or oil paint.
- After the wood and plywood have dried, begin assembling the box. Mount the timber frame and fasten it with iron corners. Provide support for the sides by connecting the corners with additional bars.
- Cover the frame with plywood, which is secured with self-tapping screws.
- Drill small holes in each wall for ventilation.
- Line the inside of the box walls with penoplex. If the balcony is very cold, lay a layer of isolon with foil on top of the penoplex.
- Make an inner drawer using the same principle, changing the dimensions to smaller ones. You can do without a frame by simply covering the walls and floor with plywood.
- In the middle of the box, place an iron pipe on supports (a pipe from a drain will do) with a length slightly less than the length of the box.
- Place electrical equipment in the pipe - lamps with sockets on wires, which are hung on an additional wooden crossbar.
- Mount a temperature sensor on the front wall of the box, which will help control the temperature inside the box. You can design the electrical equipment in such a way that it works automatically. There are thermostats on sale that are equipped with a temperature sensor, which starts heating when the temperature inside the box drops.
Recommendations
To ensure that the thermobox reliably protects the potatoes, follow the recommendations:
- Any thermal box, even a factory-made one, will not save the harvest on an open balcony. A sharp wind, high humidity in autumn and winter, and temperature changes are dangerous not only for potatoes, but also for electrical appliances - they will simply fail. The balcony must be glazed (at least one glass) and slightly insulated (walls and floor).
- Connect the carrying lamp to your home network using an extension cord.
- In very severe frosts, additionally wrap the box with cotton blankets.
Is it possible in autumn and winter?
Carrots are sensitive to temperature and air humidity.
Therefore, when choosing a balcony for storing it, you need to create conditions in which it will not freeze, overheat and dry out. In autumn, root vegetables can be stored on an open balcony. In this case, you need to monitor the weather.
If the temperature at night begins to drop below zero, it is necessary to take additional measures aimed at insulating the crop. On the open balcony, fresh carrots can remain until frost.
On a glassed-in loggia, the crop can be left to overwinter, but only on the condition that the temperature there does not drop below -3 degrees.
What should a potato storage box be like, how to make it yourself
Is it possible to store potatoes on the balcony?
A box is the most common container for storing potatoes. Its main advantage is mobility. It is convenient to use small boxes that can hold up to 12 kg. They are easy to carry, and there is quick access to the tubers to periodically sort through them. The material is plastic, wood or cardboard. The main thing is that it is convenient to monitor the safety of the tubers and there is excellent air ventilation.
Design requirements for the cellar and apartment
The general rules for maintaining the microclimate for storing potatoes are the same for both the cellar and the apartment.
The requirements for a homemade box are:
- materials must be safe;
- to maintain an optimal microclimate, ventilation holes are made;
- the box should not allow daylight to pass through.
The only difference between the designs will be its size. As a rule, large structures are prepared for the cellar - bins, but in an apartment this is impossible.
What materials to make it from?
Available and inexpensive materials for making a box are wood or plastic. Any wooden material will do: lining, plywood, chipboard, regular board. First, a frame is created, and then covered with wooden beams.
The advantage of making containers with your own hands is that you can precisely adjust its dimensions to the parameters of your storage space. If you settled on the plastic option, then today hardware stores have a lot of options for polymer containers. Among them there will certainly be one that is suitable in size.
Preparation
First, determine the place where the box will stand:
- the box should not stand in the aisle and interfere with movement;
- The box should not be installed where there may be strong drafts, it will be cold and the tubers will freeze.
Next, calculate the size of the box. The parameters will depend on:
- quantity of potatoes;
- area allocated for storage;
- design forms;
- type of door opening.
To complete the work you will need:
- material;
- nails or screws;
- corners;
- thermal insulation;
- tools.
Read also: Vietnamese pig breed reviews
It is not necessary to buy new materials - boards left over after repair will also work.
Design Features
All potato storage boxes have a common structure:
- to ensure complete ventilation, the walls are made with holes;
- legs are attached to the bottom for better ventilation;
- all internal surfaces are made of wood to avoid the absorption of toxic substances by tubers;
- all surfaces are made smooth so as not to damage the tubers;
- Be sure to make a lid - for darkening.
Step-by-step production
After determining the location and dimensions, a drawing is made in which all the details are displayed. Then they begin production.
Manufacturing stages:
- The bars for the frame are prepared and sawn.
- The frame is assembled using metal corners. Corners allow you to achieve perfectly even corners and add additional rigidity to the structure.
- Cover the back wall of the frame with boards, leaving 1 cm gaps between them.
- Turn the product over and sheathe the front wall up to half the height from the bottom, maintaining the distance between the boards. The upper part of the wall will be collapsible. For this purpose, guides are made from aluminum corners. The corners are screwed to vertical bars in such a way that there is a distance between the corner and the bar that is slightly larger than the thickness of the board.
- Finish covering the remaining walls and bottom of the box, not forgetting the distance between the boards.
- They make legs. To do this, screw three smaller bars to the bottom.
- Insert removable boards on the front of the drawer. Since they should not be fixed, the distance between them is controlled using screws, screwing them into the side walls of the board.
- They make a lid. To do this, assemble a frame, its corners are fixed with corners.
- Attach the frame to the drawer using a long furniture loop.
- Cover the lid with boards.
This box is suitable for storing potatoes in the basement or hallway.
If a balcony is chosen as a storage location, the box is made insulated:
- Build two boxes in such a way that one fits into the other and there is a space between the walls of at least 5 cm.
- Any thermal insulation material is placed in this space.
- The lid is also made double and insulated.
At sub-zero temperatures in winter, heating is inserted inside the box. You will need a piece of perforated pipe. It is fixed vertically in the center of the container, and a light bulb with a socket or a hair dryer is inserted inside.
How to treat boxes
Storage boxes are pre-treated with the following disinfecting solutions:
- copper sulfate;
- bleach;
- strong solution of potassium permanganate;
- then dried outside.
Assembling a vegetable box with your own hands
Let's figure out how to make a universal version yourself. This is a chest with a lid on top. We will need bars to assemble the frame, sheet material for covering them: plywood, chipboard, etc. You can take suitable boards. We work in the following sequence:
- We measure the free space on the loggia. We determine the dimensions of the future structure. It is important that it is as spacious as possible and at the same time convenient to use. If necessary, we build a design drawing.
- We install the frame. Let's start from the floor. We lay and secure four bars. This will be the foundation. We install racks on it. Then we arrange the upper part of the frame. We assemble the base from the bars for the future lid.
- We cover the bottom. If subsequent insulation is not expected, you can fill the boards with small gaps. The result will be a kind of ventilation system that will protect supplies from excess moisture. Otherwise, we collect a solid bottom. In this case, before covering the floor, it is advisable to put a sheet of insulation, for example, polystyrene foam.
- We cover the walls of the structure with boards or attach plates cut from sheet material to them. If necessary, install a partition or several to divide the chest into compartments.
- We cover the lid frame. You can attach it to hinges or leave it removable.
This is how you make your own box for storing potatoes and other vegetables on the balcony. The product can be painted, varnished, etc. If you place a foam seat on the lid, you will get a comfortable sofa.
Instagram superartmebli
The lid of the vegetable drawer can be removable or, as in the photo, attached using hinges
How to make a potato storage box in the basement. Rules for storing potatoes in the cellar in winter
It is important not only to grow potatoes correctly, but also to preserve them. In this article we will tell you how to store potatoes in the cellar and how to preserve a high-quality harvest before the onset of warm weather.
Rules for storing potatoes in the cellar in winter
Preparing the premises
The best place to store this vegetable is underground storage (cellar, basement). But even in such a room, not everyone can save potatoes. This vegetable contains a large amount of liquid and starch, so it spoils quickly. In view of these features, storing potatoes in a cellar requires certain conditions.
To eliminate the risk of temperature changes in such a room, it is necessary to ensure high-quality insulation against overheating and freezing. It is better to do this before harvesting. For a free-standing cellar, the risk of overheating or freezing is eliminated. Under snow cover, the ground will, on the contrary, cool the underground room.
To ensure good insulation from temperature changes, a number of measures must be taken:
If possible, a cellar can be made above the surface (roof) of the cellar. This is a special covered structure that will provide excellent protection for the upper part of the room from external factors. Thus, the temperature in the storage will differ little from the external temperature. After this you need to insulate the door. It must be airtight, i.e., close tightly. It can be lined with foam or any other insulating material. What is the optimal temperature for storing tubers in storage? According to experienced gardeners, the ideal temperature for potatoes is within 2-3 degrees Celsius. At higher temperatures, potatoes germinate. At temperatures around zero, potato starch becomes sugary. These potatoes become sweet. At sub-zero temperatures, potatoes freeze and disappear. If the storage is deep enough, it can be equipped with another hatch. Thus, a vacuum space is formed between the two hatches, protecting the room from freezing. You can cover the cellar with foam plastic. Additional heating of the cellar can be provided using special lamps. Place them in the corners of the room and turn them on in case the temperature drops. Lamps that will be used for this purpose must be painted over with dark paint. For convenience, some gardeners use lamps with sensors that respond to temperature changes. For storage facilities located under the house, you can use special split systems. They will provide the necessary cooling of the room. True, such equipment is not cheap, and not every owner can afford it. The optimal alternative to a split system may be a more economical option - a compressor from an old refrigerator. An unheated garage will require additional insulation. In such a room, potatoes are stored in boxes or boxes. You can’t do without insulating materials here
The boxes are wrapped in several layers of old blankets or clothes to protect them from freezing. Good ventilation is another important condition for proper storage of potatoes in the cellar for the winter. In a well-ventilated area, you can prevent potato rotting and premature germination. It is also necessary to ensure a certain level of humidity - within 60-70%
You can keep it at this level using special moisture-absorbing substances. For example, you can place containers with powdered lime around the perimeter of the storage facility. Before storing vegetables, the storage must be dried, cleared of debris and treated with disinfectants (from mold, mildew and other parasites).
Conditions for proper storage of various products
To prevent vitamin reserves from deteriorating over the long winter, you need to try to provide them with optimal conditions. There is no universal solution here, they will all be different:
- Potato. It does not deteriorate at temperatures from +1 to +5 C. High humidity is unacceptable, it provokes the development of rot. Tubers are placed in boxes, trays or even nets in a layer no higher than 100 cm. An important point: darkening is necessary, otherwise the potatoes will begin to sprout.
- Root vegetables (carrots, beets, etc.). The optimal temperature for them will be from 0 to +2 C. Their skin dries out very quickly, so it is best to put the food in storage and sprinkle it with wet sand or sawdust.
- Red or white cabbage. It is well preserved from +2 to -1 C if you place it on shelves with the stalks up. Broccoli or cauliflower is not stored this way. They only need to be frozen, after cutting them into inflorescences.
- Garlic or onion. Dry completely and hang or lay in bulk. In the first version, the heads are woven into a kind of braids or folded into a net. The best temperature is from -2 to 0 C.
Instagram drevlev
A box made of natural wood is well suited for storing vegetables.
- Country cottage area
How to properly store your first harvest: 14 important points
Common mistakes
Even experienced gardeners are not immune to making mistakes.
Among the most common are the following:
- Temperature below 0°C. Mistakenly believing that frost promotes long-term storage, owners do not control the lower temperature limit. As a result, the vegetables freeze and most of them become unusable.
- Accommodation on an open balcony. As in the previous paragraph, the problem lies in the overcooling of the tubers. It is better to avoid unglazed rooms.
- Washing the tubers. Washed potatoes will not remain fresh for long. Such processing is necessary immediately before eating.
- Storing spoiled fruits. Dispose of damaged and rotting specimens at the preparation stage. It is advisable to check vegetables throughout the entire period for rot, drying out or other damage - storing such fruits with other vegetables is highly not recommended.
Storing potatoes on the balcony is not at all difficult if you choose the right container and maintain the necessary conditions. With properly organized storage, vegetables will retain their freshness and pleasant taste for a long time.
Content
Conditions for proper storage
How to store vegetables on the balcony
What should a storage box look like?
Assembling the box with your own hands
We insulate the storage structure
Useful tips
In a private house there is always a suitable place where you can place the harvest collected from the garden beds. In a high-rise apartment, everything is much more complicated. There is catastrophically little free space. But even if this can be managed, difficulties remain in providing suitable conditions. The optimal solution to this problem is a box for storing vegetables on the balcony. Let's figure out how to arrange it correctly.
Instagram balkonmir
There is a place for a vegetable box even on the smallest balcony
Thermal box for storing potatoes. Cellar for storing vegetables on the balcony
The master performed the work called “Thermal Cabinet”. The cellar is designed for storing fruits, vegetables, garden crops - potatoes, beets - everything that is grown in garden plots.
See the end of the article
The need arose because there is a garden plot, children come, it is also a place for leisure and at the same time a small amount of beets, potatoes were planted last year, two bags were born, but there was somewhere to store them, refrigerators are not intended, and I decided to make a cellar for balcony
Today is the last day of the price collapse! Electronics for DIYers in
I looked at the designs offered by industry or private manufacturers. But they didn’t like the fact that the potatoes needed to be poured into a box, and they lay in a crowd; I wanted it to be more accessible and located in boxes. I proceeded from this when I made my model.
The heating cabinet was supposed to be installed on the balcony; you couldn’t think of any other place. The dimensions of the thermal container were obtained from the dimensions of the boxes, plastic. They are available in grocery stores in different sizes and depths. I liked the drawers, which are 30 cm wide, 50 cm long, and 20 cm high – optimal.
I designed my closet with three stacks of drawers. There is a standard thermostat outside; I didn’t bother making a homemade one. The minimum maintenance temperature is +5 degrees - what science recommends for storing vegetables; +5 - +6 degrees this temperature is maintained. I set the thermostat to minimum. Now the temperature on the balcony is +6, if the temperature drops to minus temperature, then the automation will begin to turn on the heating of this thermal container, and the air will circulate through the volume using fans.
In the finished models, the master was not satisfied with the fact that the heater is located at the bottom, but it doesn’t matter. The trouble is that warm air rises, and, as is known from physics, it accumulates at the top. And the result is uneven heating of the contents of this container. Therefore, I decided to add a fan to create forced circulation. When using a fan, air circulation and uniform heating of the contents of the thermal container are achieved.
How does a heating cabinet work?
The lid opens on two door hinges. Inside, everything is upholstered with thick sheet insulation, six-layer plywood is used to ensure rigidity in the corners, the master used metal angles so that the cabinet does not change its projections. There are three racks with containers inside. The center stack houses a device that heats and ventilates the storage space according to the following principle: when the condition for the heater to turn on occurs, the electronics apply voltage to the heater and fan, everything turns on, and warm air begins to rise. Having reached the lid, it goes down, and thus there are two circulation circuits. The master shows the device of the thermal heater and fan of the cellar.
Mini storage for vegetables
Ready-made cellars are available in two types: hard and soft. They come in different sizes and models, and are designed for use on an unheated balcony or loggia. Since different models have technical differences, it is better to find out details of operating conditions from the product instructions.
Hard cellar
A cellar with a rigid body is a plastic, metal, painted or chrome-plated container, from the appearance of which you cannot guess that vegetables are stored inside. Cellars with a capacity of 100, 200 or more liters are produced, and you can choose a product for a small or large balcony, for a family of 1, 2 or more people.
Thermal cabinet
The cellars are equipped with built-in thermostats that maintain a constant temperature in the heating cabinet, and most models provide forced ventilation. The ventilation system eliminates the formation of condensation inside the container, which means that vegetables do not spoil due to excessive humidity and stagnant air. Products can be stored in hard cellars both in winter and summer.
The cellars operate from a 220 V electrical network, power consumption is economical and safe. During a temporary power outage, most devices maintain the temperature inside the storage unit for some time.
Flexible cellar
Flexible cellars are similar in appearance to a spacious bag. Their main advantage is mobility: at the end of the season, the storage can be easily rolled up and put on a shelf. The cellar is made from waterproof fabric and soft insulation, mainly padding polyester. Thin heating electrodes are built into the fabric, which, when heated, increase the temperature inside the vegetable storage device.
The flexible cellar is powered from the mains and, according to manufacturers, can be used on an unheated balcony at temperatures down to -40C. Some models have a screen outside that informs about the temperature inside the storage. When it drops below the programmed limit, the heating turns on automatically, and when the upper temperature limit is reached, the heating system turns off.
The disadvantage of flexible containers is that, unlike their rigid counterparts, they are not intended for storing vegetables in the summer.
Earthen or devil's apple
Potatoes belong to the vegetable crops of the nightshade family, that is, they are a relative of the well-known tomato. But unlike it, potato fruits are inedible and poisonous due to the corned beef they contain.
Potatoes are a plant of the nightshade family.
Brought to Russia by Peter the Great, the “earth apple” was used for a long time only for decorative purposes and was not eaten. Attempts to instill a culture of potato consumption even led to a potato riot - due to poisoning of the plant's fruits, the peasants categorically refused to grow it, calling it a damn apple.
Potato fruits are poisonous
What we call potatoes or potatoes in everyday life are the tubers of the roots of the plant. Potatoes are classified as vegetables, although it would be more correct to call them a root vegetable.
The vegetable has great nutritional value due to its protein and carbohydrate content. Potatoes help alkalize the body, reduce cholesterol, and normalize metabolism. But due to the large amount of carbohydrates in the form of starch, it can cause weight gain.
Potatoes are rightly called the second bread
Traditionally, in modern Russia, potatoes are considered the second bread. It is nourishing, tasty, and you can prepare many dishes from it. Potatoes are boiled, fried, baked, stewed, put in soup, made into pies, cutlets, pancakes - you can’t list everything. Rarely does a family go without this vegetable for at least a day
That’s why it’s so important to preserve the harvest until spring.
Potato laying
All supplies must be dry before stacking and free from rotten or pest-damaged potatoes. You need to pour it out carefully so as not to break the sides of the tubers. To simplify the bookmark, you need to remove the boards that are installed on the corners of the front of the box, and install them back as they are filled. It is necessary to ensure that the closed lid does not press down the top potatoes.
Drawings and diagrams
Before you can cheaply and beautifully make a wardrobe on the balcony with your own hands, you must make drawings. The further success of the started business depends on the correct implementation of this stage.
In order not to make mistakes when making a cabinet, you definitely need a drawing.
Before drawing a diagram, be sure to take measurements of the room. Here's what you need to measure:
- distance from floor to ceiling (if you plan to make a full-length cabinet);
- wall width;
- depth of the proposed structure.
Before making a drawing, you need to measure all the parameters that will be useful for building the cabinet.
Next, you need to mark the locations of future partitions, indicate on the walls the location of shelves and places where doors are attached.
It is necessary to apply dimensions to the drawing in compliance with proportions. Thus, you will see the future structure with your own eyes on the diagram.
The drawing must indicate the dimensions of all cabinet parts.
Be sure to consider the option of making a cabinet under the windowsill. There is no need to outline the assembly along the entire length - leave room for approaching the window. When using this option, it is advisable to make the top cover of the cabinet an extension of the window sill.
A convenient option is a cabinet under the windowsill.
When making a wardrobe with your own hands, it’s great to save space. The doors will be conveniently retracted to the side without taking up additional space when open. This installation method is advantageous to use in small rooms.
After drawing the main dimensions on the drawing, proceed to the marks of partitions, shelves, and doors. Allow extra space for doors in open position
This is especially important when installing a corner option
In the corner version, it is important to consider the space for opening the doors. A correctly drawn diagram will allow you to cut wooden board blanks to size without difficulty or delay, which will minimize material consumption and speed up the manufacturing process.
A correctly drawn diagram will allow you to easily and without delay cut blanks from a wooden board to size, which will minimize material consumption and speed up the manufacturing process.
Expanding the bodice
Any clothing is unthinkable without seams. Depending on the type of material, seam allowances can reach from 0.5 to 2 centimeters. We leave the allowances minimal, rip out all the vertical seams - the middle one along the back and front, the side seams, and the raised seams.
In this way, you can get up to 5 centimeters of fabric. The more complex the cut of the dress, the more loose material there will be due to the seam.
If you do not follow the direction, then in this case the seam most often lies poorly. And this happens due to the fact that the fabric does not stretch along the lobar thread, but does stretch along the transverse thread. In addition, the transverse and longitudinal directions of the threads of matter often differ in color.
The slightest deviation in the direction of the threads leads to considerable “trouble”: the darts are deformed, which means the part will fit poorly, stretch or wrinkle.
In the picture you see a variety of bodices assembled from several parts.
Yoke
Suppose the bodice of a dress or blouse is short, in this case the most suitable option is a yoke; it can be placed both in front on the shelf and at the back along the back.
Required:
- Fabric that is as similar as possible to the material of the dress or in a contrasting color.
- Scissors.
- Edge for processing if you want to emphasize the line of the yoke.
Progress:
- We trace our item on paper to get a pattern.
- We note the detail of the future yoke.
- We outline folds and tucks, if necessary.
- We increase the length of the yoke by the amount necessary for the dress.
- We try on the paper version, it can be swept away.
- We cut out the yoke.
- Remove the top part of the shelf or back.
- We sew the yoke.
- Ironing.
We suggest you familiarize yourself with How to polish an acrylic bathtub
Corsage belt
If you decide to lengthen the fitted bodice, then it is not necessary to make a yoke. It is best to treat the bottom of the bodice with a stitched corsage belt assembled from pieces.
The work is carried out similarly to the previous one, but in this case we work with the lower part of the bodice.
Inserts
When the bodice is tight, it is most convenient to make inserts in its middle or in its side parts (mod. 6,7).
The pattern shows the locations of darts and gathers, the direction of the grain thread and the configuration of the cut of the parts that make up the bodice.
If there is no identical fabric, give contrasting details! To make the item look harmonious, we make inserts not only on the sides, but also on the sleeves, shoulders or the lower part of the hem.
Progress:
- We outline where we will make additions.
- Cut out the dress fabric.
- We lay out the resulting parts on the fabric of the inserts.
- We shallow it, making allowances taking into account how many centimeters we need to expand the thing.
For example, you need 4 cm, one needs 2 cm. Along each edge of the insert - 1 cm:
- Cut out, don't forget the seam allowances.
- We sew in all the inserts.
- We steam the seams.
- Let's try it on.
The correct selection of fabric in this case is half the success:
- Try to choose fabric of the same thickness and density. Even if it is lace, the approximate thickness is still taken into account.
- Fabrics should require the same care.
- If you really like the top of the dress, but it is very narrow, make a blouse out of it, and use the skirt fabric for inserts.
Lacing
Required:
- Tailor's scissors and chalk.
- Threads.
- Lace.
- Blocks (rings).
Progress:
- We outline the cuts, their depth and width.
- We outline the location of the blocks.
- We cut taking into account the allowances.
- We process the edges of the cutout with a hem seam with a closed cut.
- We break through the blocks.
- We thread the lace.
- Let's try it on.
We suggest you read How to get rid of the unpleasant smell of leather products on your own
If open areas of the body in the sections do not suit you, then duplicate them with a contrasting insert.
When the dress becomes tight, do not rush to change yourself, just change the dress slightly!
Potato box in the cellar. How to store potatoes in the cellar
In order for potatoes to be stored in the cellar for a long time, it must be clean (it is advisable to not only tidy up the storehouse every summer, but also fumigate it with sulfur bombs or whitewash the floors and walls with slaked lime)
In addition, it is important that by the time the harvest is loaded into the cellar, it should not be higher than 7–8°C (after all, many cellars warm up almost to room temperature in the summer). It is important to create the necessary microclimate in the cellar
Premises requirements: how to preserve crops in winter
The temperature in the storage is the most important condition: when it approaches 0°C, the breakdown of starch into simple carbohydrates sharply accelerates, and when it rises above 5...6°C, root growth processes are launched. As for air humidity, excess (above 90%) leads to the development of mold, and low (less than 70%) causes the tubers to dry out.
Unfortunately, in large cities, public cellars are often more like utility blocks, and the temperature and humidity conditions in them are far from ideal. So, in our cellar the necessary conditions are created no earlier than December, so only what has not had time to deteriorate before winter is stored in it.
To create and regulate conditions, you must be able to ventilate the room. It is advisable to fill the floor of the cellar with clean sand. To increase humidity, you can periodically spray the walls and ceiling with water; to reduce it, use containers with quicklime. The light in the cellar is turned on only for a short time when it is necessary to perform any work.
Tuber preparation
First of all, the potato harvest must be harvested on time: overripe tubers are stored even worse than unripe ones. No matter how dirty the potatoes are when dug up, washing them before storing them for long-term storage is unacceptable. After all, it is very difficult to dry it after washing, and insufficiently dried tubers will last no more than a month.
Tubers must be properly dried
The dug up tubers must be left in the sun for one and a half to two hours, then they are scattered in a thin layer under a canopy for the so-called treatment. If you maintain a temperature of 12–18 ° C, then, provided there is access to air, in 1–2 weeks random wounds will heal, the skin will harden, and if there are diseased potatoes, they will show themselves. The harvest is then sorted and stored. The smallest and largest ones are placed closer and used in the first months: medium-sized specimens are best stored. If you have to place still warm potatoes in the cellar, you need to be prepared for moisture to appear on them. In this case, it is advisable to dust the tubers with wood ash or chalk. Some gardeners treat tubers with Fitosporin.
Methods for placing tubers
You can place potatoes in bulk (in bulk) in the cellar, but there must be a tray with ventilation holes underneath. It is most convenient to use small wooden boxes for 2–4 buckets. If potatoes were purchased in polymer nets, after preparation and sorting they can be returned to them, and the nets placed in the cellar not close to each other. However, 10–12 cm should be left between the boxes, and also not leaning any container against the walls. Any reusable container should be disinfected before use.
We mount the box and install the heater
Having decided on the size and material, you need to build a frame on the balcony. The connection of wooden blocks is carried out using furniture corners. After this, they are treated with an antiseptic substance. Once the frame is ready, it is sheathed on the outside with plywood. To maintain the temperature in the balcony vegetable storage automatically, you can install a thermostat. To prevent the bottom from freezing, you should place the box on small legs. The recommended height from the balcony floor to the bottom of the structure is 10 cm.
The size of the vegetable storage box is selected depending on the available space on the balcony.
The insulation is first glued to the walls and then laid on the bottom. All detected joints and leaks must be sealed with polyurethane foam.
The inside of the box is lined with plywood in the same way as the outside.
The procedure for installing a heating system from light bulbs:
- Two holes are drilled in the lid of the box for the wires, and ceramic sockets are mounted to the sides. They are recommended to be used to prevent the material from melting over long-term use. If you decide to place the lamps in a tin pipe inside the box, you need to secure this pipe by first drilling several ventilation holes in the bottom or in its lower part. This is done so that cold air from the bottom of the box can enter the pipe. The warm one, in turn, will come out of the upper end of the pipe.
- The functions of the fan will be performed by a small computer cooler or a similar mechanism. The fan in this storage room on the balcony is secured with screws.
- The temperature sensor should be placed in the coldest area - at the bottom of the box. Although the location is cold enough to significantly reduce the likelihood of a fire, the wires should be laid in corrugated tubing.
- The lamps are painted with dark varnish to prevent the potatoes from turning green.
Diagram of a balcony cellar. Click to enlarge.