Pumpkin is a popular vegetable that occupies a worthy place in the list of popular vegetables. Pumpkin is not only tasty, but also a healthy vegetable, which can be used raw or boiled, and it is also very good to drink pumpkin oil, which will help stabilize and normalize the functionality of the gastrointestinal tract and the body as a whole. That is why you should stock up on pumpkin seeds yourself, saving money on buying ready-made planting material. How to grow a pumpkin, what is suitable for collecting seeds? What is the collection and storage technology? Let's figure it out.
Planting and growing mother pumpkins for further seed collection
Obviously, caring for the plant should begin with proper planting, because the suitability of the fruit for collecting seeds depends on how you plant and care for the plants correctly. The landing site is an important point that is recommended to be adhered to. Experts say that seeds planted to grow mother fruits should be kept separate from the main pumpkin plantings. Of course, if such manipulation is possible, feel free to take advantage of this opportunity, otherwise you should proceed with artificial pollination.
Storing pumpkin seeds and sunflower seeds
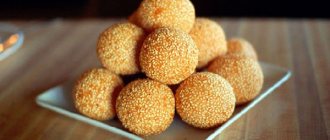
The seeds of plants such as sesame, sunflower, and pumpkin have excellent taste and contain a whole range of vitamins, fats and minerals necessary for the proper functioning of the body. In this case, certain rules for their storage must be observed. It should be borne in mind that this product is not treated with preservatives, and therefore will not remain fresh for a long time. We’ll talk further about how to store seeds correctly.
How to pollinate a pumpkin yourself?
The quality and quantity of fruits depends on pollination, so to be sure that the plant will receive the necessary and appropriate pollination, it is better to carry out the procedure yourself, manually. The pollination technology is not complicated - pollen should be transferred from the stamen to another pistil. This procedure is recommended to be carried out with a brush and immediately after the flowers have fully opened. The following is the procedure for removing your own stamens. The flower itself is protected from outside pollination with a paper cap. Of course, only the strong inflorescences that appeared first should be pollinated, because they are considered the strongest. Further, caring for plants is no different from ordinary growing.
Preparing seeds for germination
In the “seed” plot, all pumpkins will ripen well on the plant.
They take the very first seeds if they are attractive in color, shape, and size.
Seed fruits are removed last so that the seeds fill and are full-bodied.
Pumpkin cut for seeds lasts for about a month in a warm room, but you can’t wait too long, because for the seeds this is fraught with their germination inside the fruit.
To extract the seeds, the pumpkin itself must be cut. Do not cut through the center of the fruit to avoid damaging the seeds. Remove the seeds and immediately rinse them in cool water.
Separate the best seeds - large, full, without defects or mechanical damage - and dry them. All own seeds are dried warmly, at a temperature of 40-45 ° C.
Warming up is also an important process; during this process, viruses die and seeds ripen. Keep selected seeds in a warm, dry room.
Soaking pumpkin seeds is not difficult at all. First, select large, plump seeds. Fold a medical bandage or gauze in several layers. Moisten it with warm water. Place one half of it in a square plastic container. Place pumpkin seeds on it. In this case, I need to take a little more than I need. Cover the seeds with the other half of the cloth. Do not cover the container with a lid - the seeds must breathe.
Leave this seed container in a warm place to help the seeds germinate faster. If the air temperature fluctuates, you can make a “greenhouse” - just cover the container with film. But open it periodically to allow air to flow to the seeds.
In the process of germinating pumpkin seeds for planting, the gauze or cloth should not dry out, so always moisten both the upper half and, of course, the lower half with water. Seed germination depends on their quality and air temperature. Sometimes it takes two days for the seeds to swell and hatch, sometimes more.
When processing pumpkin canopies, they are pre-soaked in a solution of potassium permanganate so that the plants do not get sick. Do not wait for the sprouts to grow much - then it can be difficult to remove them from the fabric. Plant either in cups, if you want to get seedlings, or directly into the ground.
At the end of February - beginning of March, put the seeds in a matchbox and place it in close proximity to the radiator for at least 30-40 days so that they warm up thoroughly. Before planting in open ground, harden the seeds in the refrigerator for 2-3 days to ensure their resistance to changes in air temperature, drought and many different diseases.
Beginners when growing pumpkin seedlings may encounter problems that can negate all their efforts. What dangers can small plants face?
Pull
The most common problem that can occur with seedlings when growing them on a windowsill is stretching. At the very beginning of development, when the shoots have just broken through the ground and, as if breaking free, are actively growing, a slight stretching of the shoots occurs, which is easy to eliminate.
Stretched pumpkin sprouts are a common phenomenon.
Seedlings can stretch out for other reasons, for example, when they have little light, but enough moisture and nutrition. In search of sunlight, the shoots spend all the accumulated nutrients on vertical development and become weak and thin, like blades of grass. These may not take root in the ground, so the lighting should be intense. And if there is not enough natural light, artificial supplementary lighting must be provided.
Blackleg
It is especially important to follow the watering schedule also because its excess entails consequences much more serious than usual pulling - we are talking about black leg. If an elongated shoot can be carefully rolled into a ring and buried with earth so that it takes on lateral roots and returns to normal, then the problem with the black leg cannot be corrected so quickly.
The black leg can ruin all the work of a gardener at the very beginning of his journey
When infected, the root collar of a plant becomes brown, the plant tissue rots and the seedlings die; it is almost impossible to stop this process. But not only excess moisture in the soil provokes this trouble; often the culprit of the disease is infected soil. This can only be avoided by first disinfecting the soil. Most often it is frozen on the balcony or calcined in the oven.
Having placed the soil mixture on a baking sheet, set the oven temperature to 200 degrees and calcine the soil for two to three hours.
If it is enough to ignite the soil for two hours, then you need to freeze it for about two months, which means you will have to take care of this in advance. The soil thaws after freezing at room temperature for about a week, then on the day of planting it is spilled with a hot solution of potassium permanganate of a light crimson color.
To transfer seedlings to the site, the average daily temperature should not fall below 10 degrees. The immediate procedure for planting pumpkin seedlings is carried out at a temperature of 13-15 degrees.
The weather should not be sunny, evening time is optimal.
The lunar calendar is used to determine specific pumpkin planting dates. It indicates the most favorable days in accordance with the lunar phases.
Planting pumpkin seeds for seedlings usually occurs in late March-early April. Planting of grown seedlings in the ground - between the second half of May and the first days of June.
During the new moon and full moon, planting work is not carried out. It is better to sow on the waxing moon.
Transferring grown seedlings from their usual conditions to the site will be less painful for them with proper preparation of the soil and the seedlings themselves, which should be done in advance.
You should also not forget about careful care of plants. Timely watering and fertilizing will help increase pumpkin productivity, and the harvest obtained as a result of hard work is important not only to harvest correctly, but also to preserve.
Seedlings that have reached a length of about 20 cm and have at least two true leaves are considered ready for planting.
Land preparation begins in the fall. The area is cleared of crop residues, weeded, and dug up.
Organic fertilizers are applied - manure or peat manure compost (about 50 kg per 10 m²), humus. They also enrich the soil with phosphorus in the autumn. Superphosphate on soils of average fertility is used in a dosage of 200 g per 10 m².
In the spring, as soon as the soil has thawed and warmed up sufficiently, the area is dug up again.
Acidic soils are fertilized with lime, ash or chalk. Dense, clayey - compost or humus, adding river sand and peat. You can use green manure - plants that are planted before planting the main crop to improve the soil structure and enrich it with nitrogen. They prevent the growth of weeds.
If the soil is dense and moist, the beds should rise above the ground by at least 25 cm; if it’s loose, you don’t have to make beds at all.
Crop rotation is also important. It is not advisable to plant a pumpkin in an area where related crops previously grew. It is better to use soil after legumes, nightshades, onions, cabbage, carrots or beets.
Choose a place for the pumpkin on the site that is well lit by the sun and protected from cold winds.
Holes for seedlings are located at a distance of at least 1 m from each other. Leave 1-1.5 m between the beds. The width of the hole is 40-50 cm.
Humus or compost and wood ash are placed at the bottom of the holes. Potassium and phosphorus fertilizers and ammonium nitrate are added if they were not added when digging the site. Water generously with warm water (at least 2 liters).
A week before planting, they begin to prepare the seedlings - they take them outside, gradually increasing the time spent outdoors from 2-3 hours to the whole day.
The seedlings are transferred to the prepared holes by transshipment - they are removed from the planting container along with a lump of earth to avoid injury to the roots. The seedling is placed in the hole at a slight angle, soil is gradually added and compacted.
It is advisable to sprinkle the top of the hole with peat or humus to prevent moisture evaporation.
Until the seedlings take root in the new place, they are covered at night with cut-off plastic bottles, cardboard cones or greenhouse structures with arcs and polyethylene.
A similar system is used for planting pumpkins in open ground with seeds. The area and holes are prepared in the same way; seeds - the same as for seedlings. Place several seeds in each hole at different depths (5-8 cm).
Cover the plantings with glass, polyethylene or covering material.
When the seedlings sprout, the strongest one is selected, and the above-ground part of the rest is torn off without pulling out the roots.
Aftercare
After transplanting a pumpkin, proper care in the open ground is important.
Water the plants almost every day until they begin to produce new leaves. Before the fruits appear, watering is slightly reduced, and then resumed. When the pumpkin is ripe, stop watering.
The soil is regularly loosened. This provides oxygen access to the root system and prevents the appearance of weeds. Loosen the soil near the plants with care so as not to damage the roots.
7-10 days after planting the seedlings or three weeks after sowing the seeds, organic and mineral fertilizers are added to the soil, alternating them with each other.
You can start by fertilizing with manure. It is diluted with water in a ratio of 1:10. Bird droppings diluted 1:20 are also used.
If these fertilizers are used in dry form, they are first immersed in hot water for several hours to swell, after which water is added in the amount necessary to maintain the proportions.
Next time, mineral fertilizers are applied: potassium sulfate in a dosage of 2 teaspoons per bucket of water or superphosphate - 2 tablespoons per bucket of water.
On air
- Landing. Seeds are sown in open soil after it has warmed up to 12–13 degrees; they should be buried 70–80 mm into the soil. Pumpkin seedlings are sown in April or the first days of May, and the plants are transplanted into open soil in the last days of May or the first days of June.
- Priming. Any is suitable, but pumpkin grows better in nutritious soil, which should be dug up in advance and all the necessary mineral fertilizers and organic matter added to it.
- Watering. When the seedlings are planted in the ground, they should be watered once a day until they take root. Then watering should not be very frequent until the size of the ovaries is equal to a fist. If it rains systematically in the summer, then you don’t have to water the pumpkin at all. After the fruits begin to gain mass, it is necessary to gradually increase the amount of watering to 10 liters per 1 adult bush.
- Fertilizer. 7 days after planting the seedlings in open soil, they are fed with a solution of mullein or chicken droppings. After this, the bushes are fed with organic matter once every 4 weeks, and there should be 3 or 4 such feedings.
- Reproduction. Generative (seed) method without seedlings or through seedlings.
- Harmful insects. Melon aphids, springtails (or white springtails), wireworms, slugs.
- Diseases. White rot, anthracnose, ascochyta blight, powdery mildew and black mold.
On air
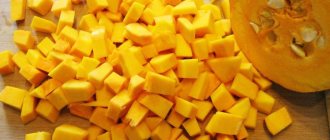
- Select the ripest, largest and sweetest pumpkin, which is cut in a convenient way (divided into two halves or the upper part of the fruit is removed).
- The seeds, along with the amniotic pulp, are removed from the core using a spoon, and then thoroughly cleaned and washed with warm or cool water in a colander.
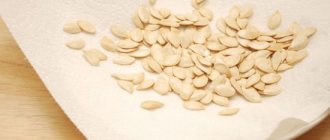
- To pre-dry the seeds, place them in one layer on a paper towel or thin cloth with good absorbency. At this stage, a final inspection is carried out, removing any remaining debris, as well as diseased and damaged specimens.
- For final drying, it is recommended to place the seeds on baking paper, stirring them occasionally to avoid mold.
- It is best to dry the seeds under natural conditions, that is, at room temperature and low humidity. This process takes about a month. The most impatient can use a low-heat oven (3-4 hours) or a dehydrator (1-2 hours). However, such drying methods significantly reduce the quality of the seeds, since the likelihood of them overheating is too high.
- If you are preparing seeds for food purposes, it would be better to immediately fry them in the oven or on a hot frying pan.
When to harvest fruits for seed collection?
Seed collection should occur exclusively from ripe fruits. That is why it is recommended to wait until the pumpkin is technically ripe. It is noteworthy that pumpkin is a fruit that can successfully ripen at home after harvesting. Remember, you should not allow the pumpkin mash to remain on the plot during freezing, as this can completely destroy the harvest.
How to determine the ripeness of a pumpkin? The stalk of each pumpkin should be dry and woody. The color of the fruit must be rich and fully correspond to the declared color. These criteria will indicate whether the fruit is ripe or not. Many people mistakenly believe that overripe fruits have first-class seeds - this is a myth. When overripe, seeds begin to germinate directly inside the fruit; accordingly, the growing season is disrupted, and these seeds cannot be used for sowing.
We grow our own seeds
- First, when you grow your own seeds, you will always know what you are planting. Varieties tested by time and personally by you. After all, we collect seeds only from the best plants and the first fruits. And in store-bought bags of fifteen seeds, only 7-8 look like real ones. And the contents of these bags do not always match the variety.
- Secondly, I am increasingly hearing about some kind of crisis next year. Of course, we have seen them more than once. And those who lived in the nineties generally don’t care about all the crises. And yet, if we have our own seeds and everything in the garden grows, then we will provide for ourselves in the fall. And we’ll make preparations for the winter.
- Thirdly, the most important and important advantage of their seeds is that they preserve and accumulate information about their owners. I have already said that plants sense our mood and understand our thoughts and intentions. I will say more - they can transmit this information through seeds to next generations.
If you hold the seeds in your mouth for a while before planting, they can learn more about you. The saliva will be absorbed into the seed, and it will know more about the state of your body than you do. And he will be able to grow fruits that are useful to you.
This method is described in great detail in Vladimir Megre’s book “Anastasia” in the chapter called “The Seed is a Doctor.” It is not necessary to sow the entire garden this way. Grow a few seeds of different plants for yourself, try it! And collect your personal seeds from them!
Of course, seeds can only be collected from varietal plants. Nothing will come of hybrids (F1). Everyone knows that these seeds do not retain the properties of their parents.
I'm done with the theoretical part. I hope I have convinced you to grow your own seeds.
How to grow and collect your own seeds?
First, I want to talk about the general rules for planting any plants from seeds .
- Seeds of cross-pollinated plants should not be planted close to each other. It is recommended to plant different varieties of carrots, turnips, radishes, cabbage no closer than 500 - 1000 meters. The further the better. Of course, summer residents do not have such opportunities on their site.
- You can protect your plantings with a cape of gauze or thin chintz so that pollen from other plants does not get in and the bees cannot transfer it. You have come across, for example, beets with light stripes inside and completely tasteless. This means that the beet seeds were pollinated from the fodder beet.
- This does not threaten tomatoes, since they have pollen in the flower and pollinate themselves. But the rest can. Of course, it won’t turn out to be a recap - that’s for sure.
- If you want to preserve the main characteristics of a variety, plant related crops away from each other.
Your own tomato seeds
Tomatoes are usually taken from the first or second bunch, the largest and most beautiful ones. Let them sit until about September, until they are ripe and overripe. Then they are kneaded and washed in water to remove the pulp. We dry the clean seeds and put them away for storage.
I make a small paper bag on which I write the name of the variety and the year of collection. Tomatoes from fresh seeds germinate very well and can be stored for up to five years.
Your own cucumber seeds
Overgrowths that were simply overlooked and not collected in time are often left for seeds. These are not always the best specimens. It is better to specifically leave a cucumber for seeds with all the characteristics of the variety, even and beautiful. Until the end of August, let the cucumber ripen on the vine. It will become large with a thick brown crust.
When the lashes dry, we collect the seeds and leave them to ripen in a warm room. They will stay like this for about another month. When the cucumber is overripe, becomes soft and the pulp begins to smell of fermentation, it’s time to take out the seeds. We take them out, rinse them from the pulp and dry them.
The process of seed ripening in cucumbers and tomatoes can be accelerated. We knead the well-ripened fruits and leave this mass to stand in a warm place for several days and ferment. Then, as usual, we rinse off the pulp and dry it.
Don’t forget to separate the different varieties and label the bags.
It is better not to sow fresh cucumber seeds; there will be a lot of barren flowers. The best harvest is obtained from seeds after 3 years of storage, and they remain viable for up to 6-7 years.
Your own carrot, beet, turnip and radish seeds
I will combine them together because the principle of obtaining seeds from root crops is the same.
In the first year, we grow a crop from which we select the best, in our opinion, 2-3 carrots to save for planting. We immediately cut off the tops up to the shoulders; try not to injure the root crops themselves when harvesting. It is better to store in a cellar at a temperature of 0+3°C. For better preservation, you can dip our “roots” in a clay mash and dry them to form a crust.
It is better to prepare a small area for planting in the fall in order to plant them early in the spring. Add humus and a little ash to the ground. At the end of April you can already plant, I’m talking about the Urals.
Look at the weather, the plantings are not afraid of slight frosts until they take root, until they begin to grow and it gets warmer. It is not necessary to plant all the remaining root crops. One of each variety will be enough. They will produce a lot of seeds. All of these plantings will have flower stalks that grow more than a meter tall. Tie them to a support to prevent them from breaking due to wind or rain.
Mature seeds of carrots and beets become light brown in color and are easily separated from the peduncles. Start collecting them and drying them at home in the shade as they ripen. Since the bush blooms unevenly, the remaining seeds need to be allowed to mature. To do this, in dry weather in September, we cut off the entire bush with seeds and hang it upside down in a dark, ventilated room. Lay a cloth on the floor so that the mature seeds fall on it.
This is how carrot and beet seeds are ripened. And radishes, turnips, daikon can be tied into brooms and laid to dry. Well-dried seeds can be stored in an unheated room without losing their quality. But usually the seeds are stored at home in a cool, dark place.
Your own radish seeds
They ripen in the year of sowing. Often radishes begin to bloom on their own when planted densely or in hot weather. But we are not interested in such seeds. You need to choose a large, beautiful radish, pull it out of the ground and forget it in the shade for a couple of hours. Then we plant it again and water it well. She will quickly begin to grow flower stalks and by autumn good seeds will ripen in them. They can be collected directly in pods-boxes, dried and stored like that. And before planting, rinse.
Your own cabbage seeds
The most important thing here is to preserve the head of cabbage with roots until spring. To do this, you can dig up cabbage with a lump of earth and plant it in a bucket. And just put it in the cellar. Just make sure that the soil doesn’t dry out at all, and water occasionally as needed.
Often cabbage begins to sprout in the cellar by spring. In the spring, we are not late with planting our cabbage, as with other plantings. The flower stalks of cabbage are the same as those of radishes or radishes. By autumn, the seeds will ripen in the pod-pods.
Zucchini and pumpkins
I think everything is known with them. In winter, when cooking, simply select and dry mature, plump seeds.
Your own onion seeds
Onions produce seeds in the third year.
- In the first year we sow nigella (onion seeds), from which onion sets grow.
- In the second year, it grows into a full-fledged onion for food.
- And in the third year, if we plant the best bulbs, they will produce flower stalks and by autumn the seeds will ripen in them.
Plant the bulbs in early spring. In summer, a small fence is made near the flowering onions so that the flower stalks do not break or fall. By autumn, not all seeds may ripen. In dry, warm weather in September, they are cut, tied in bunches and hung to ripen, like carrots.
But since the onion flower stalks are shorter, you can put a calico bag directly on them so that the mature seeds spill out and are collected immediately. You just need to put the bag on well-dried seed shoots and let them ripen in a ventilated room. Ripe onion seeds are black in color and easily fall out of the peduncles.
I’ll say a few words about greenery
Dill, lettuce, mustard, cilantro, caraway - they all bloom in the year of sowing and the seeds can be collected as they ripen. And for example, I don’t collect or sow dill every year. It grows on its own.
Parsley takes two years to grow from seed. The first year after sowing we eat and dry the greens, then this green bed disappears under the snow. And in the second year, the overwintered bushes bloom and form seeds by autumn. I collect them as they ripen and don’t have time to do everything, so in the spring the parsley sprouts all over again. But to change the location, I sow a new small bed of parsley. So it grows from snow to snow for me.
All seeds must be dried thoroughly on a stove or near a radiator before storage. Of course, under no circumstances should you fry it.
Place all your seeds in separate bags and sign the name and year of collection so as not to get confused later.
If you wish, you can grow all the seeds yourself from any variety you like.
belochka77.ru
Pumpkin seed collection technology
Collecting seeds is a simple process - you need to select a ripe fruit and get the seeds. This procedure can be carried out in any way convenient for you, but experts recommend making the cut from the side so as not to injure the seeds. The technology is simple - we remove the pulp along with the seeds from the fruit. Separate the seeds, wash and dry. When the seeds have dried, it becomes clear which grains have a damaged surface, hollowness and a suspiciously different color - such seeds should be thrown away, leaving only those that in your opinion are ideal. There will be very few better seeds, but they will be of excellent quality.
Strangers among us?
Pumpkin is our traditional crop, so we expected to understand the varieties offered without any problems. However, upon closer examination, an interesting thing emerged.
"AiF. At the dacha”: 8 out of 17 varieties turned out to be not zoned (according to the State Register of 2012). These are nutmeg pumpkins Beauty, Nut butter, Chudo-Yudo, varieties without specifying the species Honey dessert, Potimaron Red Sun, F1 Children's delicacy, Mamushka, Golden pear. Another variety, Izyaschnaya, is zoned in the Central Black Earth and Lower Volga regions. Does it make sense to grow these pumpkins, for example, in the Moscow region?
| Important | |
| Only every third of the purchased bags of pumpkin seeds did not cause any complaints. 47% — Varieties are not zoned 12% — Pictures do not correspond to descriptions 12% — Technical errors in names 29% — No problems identified | |
M.D.: From this list, only one variety can be approved without reservation: potimaron (French name for Japanese pumpkin) Red Sun , a representative of the so-called large-fruited pumpkin. It produces good fruits that will grow in our conditions if cultivated through seedlings. A representative of the same species, the Golden Pear , is early ripening and can also grow here. However, it does not keep for a long time and the pulp is rather dry.
Mamushka variety represents a different species (i.e. muscat) and theoretically can be successful here. Nut butter and Honey dessert are late varieties of butternut squash, such as Butternut. This is an excellent option for its historical homeland, but in our climate it does not ripen well and is not always as productive as it is described. The variety Miracle - Yudo is successful in the middle zone, but the fruits must be ripened for 2-3 months after harvesting. Don’t count on the advertised red flesh of the nutmeg pumpkin – it doesn’t have time to fully ripen in our country. But it may well turn orange. It is better to grow nutmeg pumpkins and any foreign varieties only through seedlings (seedlings are 35–40 days old).
The early ripening and productive variety Children's Delicacy belongs to the third type - hard-barked pumpkin. The name is apparently related to the size of the fruit, convenient for use in baby food, but the adjective “delicacy” is quite flattering: there are tastier pumpkins.
As for the Izyaschnaya , it is so-called large-fruited, and like any varieties recommended for the Central Chernozem Zone, it can be grown in the Non-Chernozem Zone (preferably through seedlings). Its flesh is very dense - sometimes it is difficult to cut, and during long-term storage it becomes completely dry.
Article on the topic
How to properly store the harvest. Tips for gardeners
How to store pumpkin seeds?
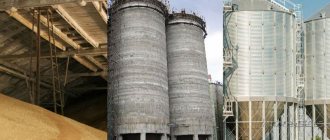
To begin with, it is worth learning and remembering that high humidity is the number one enemy for future planting material, despite the presence of a dense shell. Excess moisture at any stage can cause seed death. Conclusion, seeds should be stored after complete and very high-quality drying, nothing else. Storage conditions should be as dry as possible. Sudden changes in temperature or a very hot place can not only destroy the seeds, but also completely prevent germination. You should not experiment - heat, sharp cold or an extremely humid room are taboo for pumpkin seeds.
The ideal storage conditions for pumpkin seeds are a room where the air temperature can range from 18 to 25 degrees, and the humidity does not exceed 70%, preferably this figure should be lower.
How to store seeds? The best containers are paper bags, envelopes or fabric bags. It is strictly forbidden to store in polyethylene.
If you unquestioningly follow all stages of fruit growing, collection and storage technology, the seeds will become an excellent planting material and will retain their characteristics for 5 years or more.
How to dry pumpkin seeds at home
There are several ways to dry pumpkin seeds.
- The natural way is to spread them out in a thin layer on a baking sheet and place it in the sun or under a canopy for several days, and stir the seeds several times during the drying process. In the evening, the baking sheet will need to be brought into the house so that due to fog or dew they do not become damp. Once the top transparent film easily peels away from the seeds and the inside of the seed is dry and hard, the natural drying process can be considered complete.
- How to dry pumpkin seeds in a frying pan. When frying seeds in a frying pan, you need to regulate the temperature and stir constantly to avoid burning. During this drying process, the seeds not only lose moisture, which allows them to prolong their storage process, but also acquire a pleasant, unique aroma, a specific nutty flavor and a golden crust.
- Pumpkin seeds can also be dried in the microwave. If you choose this method, the drying time will depend on the number of seeds placed in the microwave oven and the power of the device. Therefore, the seeds will have to be regularly checked for readiness every fifteen or twenty minutes.
- The temperature in the oven is set from sixty to one hundred degrees, depending on the size of the seeds. Drying time is twenty or thirty minutes. During this time, the seeds need to be mixed several times to avoid the presence of wet seeds inside the batch.
- In a special electric dryer. The device is programmed at eighty degrees, the drying time is up to one hour, with the baking tray with seeds placed on the middle level, and just like when drying in the oven, the seeds need to be stirred.
- In an air fryer. When drying in this way, the temperature is set no higher than sixty degrees, the time is thirty minutes.
READ ALSO: How to store whole and cut pumpkin for a long time
Visually, well-dried seeds should be golden in color. The clear top film should peel off easily. The inside of the seed should be pale green, completely dry and have a pleasant nutty flavor.
Some useful tips
To preserve a variety you once liked on your plot, you should prepare your own seeds for the next season. Moreover, this is not at all difficult to do if you know three or four small tricks.
- Remember that pumpkin is a cross-pollinated crop. Therefore, to obtain seeds with stable varietal characteristics, plants must be grown at a considerable distance from other related vegetables (cucumbers, zucchini, squash and others). The interval should be at least 500 meters. If such spatial isolation is not possible, pollinate by hand and then cap the flower.
- For propagation, choose only full-fledged, not hybrid varieties. Plants grown from seeds marked F1 on the packaging will never produce high-quality planting material. Pumpkins grown from it are very likely to no longer correspond to the declared varietal characteristics.
- For ease of care, try to plant seed plants separately from other representatives of the variety, as they require special agricultural technology - less frequent watering and fertilizing. This will shorten the growing season and achieve fruit ripening directly on the plant, without additional ripening. Seeds ripened directly on the bush are better adapted to the local microclimate and soils and are more resistant to diseases.
- When preparing seeds, always choose the ripest and healthiest pumpkin from the strongest plant. In addition, the fruit in its shape, size, color and taste characteristics must fully correspond to the varietal characteristics.
Read also: Stewed cabbage with cutlets